I still remember the exact moment I realized my holiday cookie game was missing something. I was in the middle of a frantic cookie‑baking marathon, the oven ticking like a metronome, when a rogue caramel drizzle hit the floor and turned into a sticky little puddle that smelled like pure Christmas magic. I stared at that caramel, at the way it pooled and glistened, and I thought, “What if that caramel could hug a handful of crunchy cashews, then get smothered in white chocolate and baked into a cloud‑like haystack?” That crazy thought turned into a dare: I would create a dessert that could make even the most seasoned sugar‑connoisseur gasp, then I would eat half the batch before anyone else got a chance. I’m not kidding—I ate half the batch before anyone else got to try it, and that’s the kind of confession that proves this recipe is worth every buttery crumb.
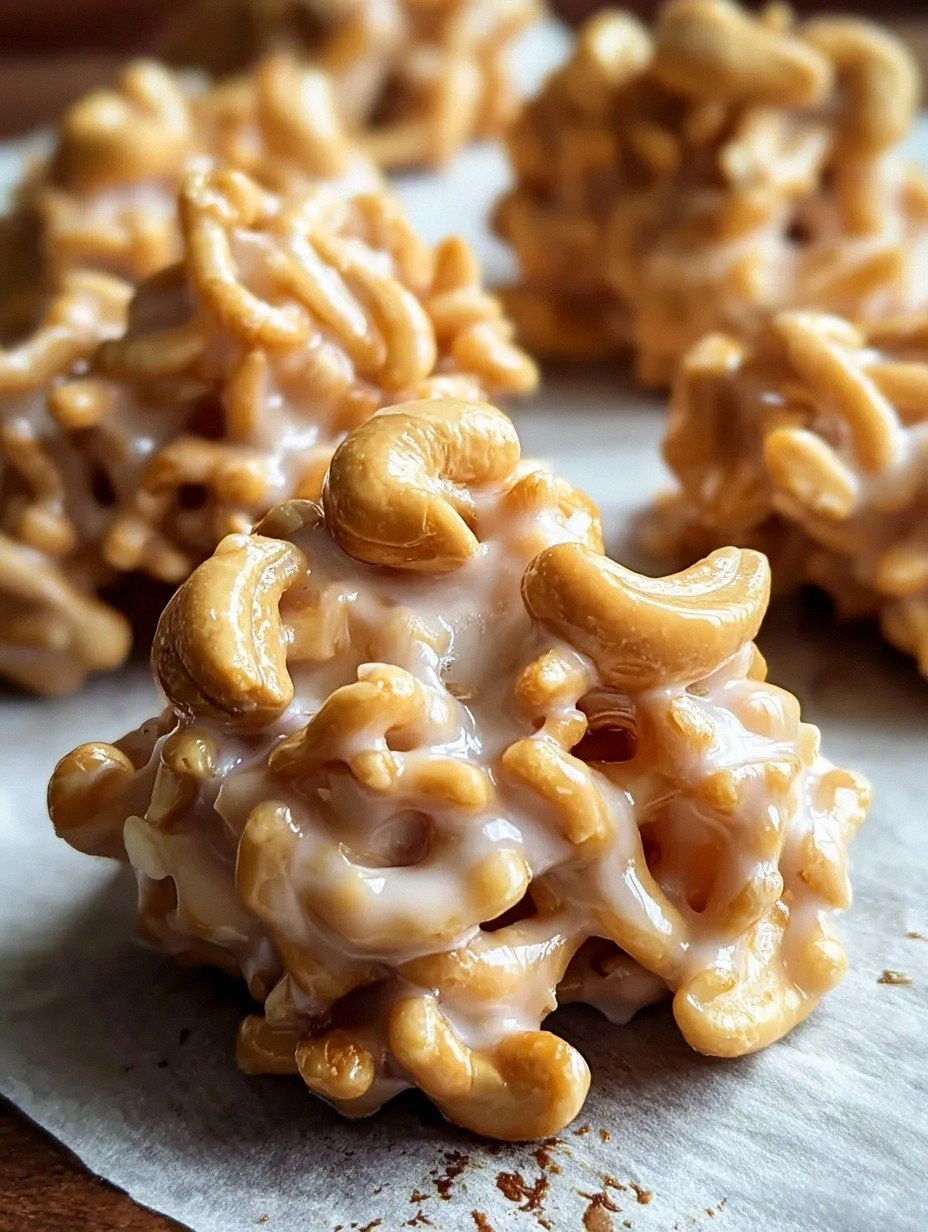
Picture this: a tray of golden‑brown haystacks, each one a tiny mountain capped with a glossy white‑chocolate glaze that catches the kitchen light like fresh snow. The scent of toasted cashews mingles with caramelized butter, while a faint vanilla whisper drifts from the oven, coaxing you to lean in closer. When you bite in, the outer crust cracks with a satisfying snap, then gives way to a melt‑in‑your‑mouth interior that’s creamy, nutty, and just sweet enough to make your teeth tingle. That sizzle when the butter hits the pan? Absolute perfection. The texture is a paradox—crunchy on the outside, velvety on the inside—like biting into a dream that’s both crisp and buttery.
Most recipes for “haystacks” either over‑sweeten the caramel or skimp on the nutty depth, leaving you with a one‑note confection that feels more like a candy bar than a holiday indulgence. Here’s what actually works: a careful balance of caramel and butter, a light dusting of flour to give the dough structure without weighing it down, and the secret addition of a pinch of sea salt that lifts every flavor like a choir of angels. I dare you to taste this and not go back for seconds—because once you’ve experienced that perfect harmony, nothing else will compare. This version stands out because it embraces the buttery richness of a classic shortbread, but then throws in the unexpected star—white chocolate—that turns the whole thing into a festive masterpiece.
Okay, ready for the game‑changer? I’m about to reveal a technique that most bakers completely ignore: the “double‑coat” method, where you first bake the haystack base, then drizzle caramel and finish with a white‑chocolate glaze that sets into a glossy shell. This not only locks in moisture but also creates that signature crackle you hear when you bite in. Let me walk you through every single step — by the end, you’ll wonder how you ever made it any other way.
What Makes This Version Stand Out
- Flavor Fusion: The caramel‑butter base meets toasted cashews and silky white chocolate, delivering a layered taste experience that feels both nostalgic and novel.
- Texture Triumph: A crisp, buttery exterior gives way to a soft, melt‑in‑your‑mouth interior, creating a contrast that keeps every bite interesting.
- Simplicity Meets Sophistication: Only ten ingredients, yet the result feels like a pastry chef’s secret menu item.
- Unique Double‑Coat Technique: Baking, then glazing, ensures the haystacks stay crisp while the glaze stays glossy.
- Crowd‑Pleaser Factor: Even the pickiest eaters can’t resist the sweet‑salty balance and the visual wow‑factor of the white‑chocolate sheen.
- Ingredient Quality: Using high‑quality white chocolate and fresh, raw cashews elevates the entire profile.
- Make‑Ahead Magic: These haystacks keep their texture for days, making them perfect for holiday parties and gift‑giving.
- Cooking Method: The gentle oven temperature (325°F) prevents over‑browning while allowing the caramel to caramelize just enough for that deep, nutty aroma.
Inside the Ingredient List
The Flavor Base
The heart of this recipe is the caramel‑butter blend. I use ½ cup unsalted butter, melted, and ½ cup brown sugar, which together create a toasty, slightly smoky sweetness. If you skip the butter, the haystacks become dry and lose that luxurious melt‑in‑the‑mouth feel. For a richer flavor, opt for European‑style butter with a higher milk‑fat content; it adds depth without extra effort. A quick tip: melt the butter over low heat and stir in the brown sugar until it dissolves completely—this prevents grainy pockets that could ruin the texture.
Next comes the caramel sauce—½ cup of a good quality store‑bought caramel or a homemade version made from sugar, butter, and a splash of heavy cream. The caramel not only adds sweetness but also introduces a buttery, buttery‑nutty note that pairs beautifully with the cashews. If you’re feeling adventurous, stir in a pinch of smoked sea salt to give the caramel a subtle umami kick that brightens the overall flavor.
The Texture Crew
All‑purpose flour (2 cups) provides the structural backbone. It’s the canvas on which the caramel and butter paint their flavors. Skipping the flour or using a gluten‑free blend can lead to a crumbly, fragile haystack that falls apart before it even reaches the oven. If you need a gluten‑free version, use a 1‑to‑1 gluten‑free flour blend and add a teaspoon of xanthan gum to maintain elasticity.
The cashews (1 cup, roughly chopped) are the surprise element that adds crunch and a buttery, earthy flavor. Toast them lightly in a dry skillet for 3‑4 minutes until they turn golden and fragrant—this step is non‑negotiable if you want that nutty depth. If you can’t find cashews, almonds or pecans work well, but the flavor profile shifts slightly toward a more robust nuttiness.
The Unexpected Star
White chocolate (1 cup, chopped or chips) is the glossy crown that makes these haystacks look like miniature snow‑capped peaks. High‑quality white chocolate contains real cocoa butter, which melts smoothly and sets with a beautiful sheen. Low‑grade white chocolate can become grainy or dull, ruining the visual impact. For an extra twist, add a teaspoon of finely grated orange zest to the melted white chocolate; it brightens the sweet profile without overpowering it.
The Final Flourish
A pinch of sea salt (¼ tsp) is the secret weapon that balances the sweetness and amplifies the caramel’s depth. It’s the same principle that makes chocolate taste richer when a little salt is added. The egg white (1 large) acts as a gentle binder, giving the dough a cohesive texture without adding extra fat. If you’re allergic to eggs, a tablespoon of aquafaba works just as well, providing the same binding power.
Everything's prepped? Good. Let's get into the real action...
The Method — Step by Step
Preheat your oven to 325°F (163°C) and line a large baking sheet with parchment paper. While the oven warms, gather all your measured ingredients—this is your “mise en place” moment. I like to set out a small bowl for the melted butter, another for the caramel, and a third for the flour mixture, because staying organized prevents kitchen chaos.
In a medium saucepan, melt the butter over low heat. Once it’s fully liquid, whisk in the brown sugar until the mixture is smooth and glossy. Add the caramel sauce and a pinch of sea salt, stirring continuously for about 2 minutes. You’ll notice a faint caramel aroma rising—this is your cue that the flavor base is ready.
Kitchen Hack: Use a silicone spatula to scrape every last droplet from the pan; those golden bits are flavor gold.While the butter‑caramel mixture is still warm, whisk in the egg white until fully incorporated. The mixture will look slightly frothy—this is normal and helps create a light crumb later on. If you’re using aquafaba, whisk it just as vigorously to achieve the same effect.
In a separate bowl, combine the flour, baking powder, and a pinch of salt. Gently fold the dry ingredients into the wet mixture, being careful not to over‑mix. Over‑mixing develops gluten, which would make the haystacks tough instead of tender. The dough should come together in a slightly sticky, cohesive mass.
Stir in the chopped cashews, ensuring they’re evenly distributed. The cashews should be visible throughout the dough, providing pockets of crunch in every bite. If you’re adding orange zest to the white chocolate later, keep it handy now—you’ll melt the chocolate in the next step.
Using a tablespoon or small ice‑cream scoop, drop rounded mounds onto the prepared baking sheet, spacing them about 2 inches apart. Each mound should be roughly the size of a walnut; they’ll spread slightly as they bake. This is where the “haystack” shape begins to form.
Place the sheet in the preheated oven and bake for 12‑15 minutes, or until the edges turn a light golden brown and the tops look set but not dark. The scent at this stage should be intoxicating—a blend of toasted nuts, caramel, and butter. When you tap the top of a haystack, it should feel firm but give a slight spring.
Watch Out: Do not over‑bake; the haystacks will continue to firm up as they cool, and an overly dark exterior will become hard to bite through.While the haystacks cool on the sheet for about 5 minutes, melt the white chocolate in a heat‑proof bowl over a pot of simmering water (double boiler). Stir constantly until smooth, then remove from heat. If you’re using orange zest, stir it in now for that bright citrus note. The melted chocolate should be glossy and fluid, not grainy.
Kitchen Hack: Add a teaspoon of vegetable oil to the melted chocolate; this will thin it just enough to coat the haystacks evenly without thick clumps.Using a small pastry brush or a spoon, drizzle the remaining caramel sauce over each warm haystack, letting it pool slightly in the center. Then, dip each haystack into the melted white chocolate, turning gently to coat all sides. Place the coated haystacks back onto the parchment sheet and let them set at room temperature for 10‑15 minutes, or pop them in the fridge for a quicker set. The chocolate will harden into a glossy shell that snaps delightfully when broken.
Once the glaze has set, transfer the haystacks to an airtight container. They’ll stay crisp for up to a week, and the flavor actually deepens after a day or two as the caramel melds with the nuts. That’s it — you did it. But hold on, I’ve got a few more tricks that'll take this to another level…
Insider Tricks for Flawless Results
The Temperature Rule Nobody Follows
Never bake these haystacks at a temperature higher than 350°F. Higher heat creates a rapid rise in the sugars, leading to a burnt exterior while the interior stays undercooked. By keeping the oven at 325°F, the caramel has time to develop a deep, nutty aroma without scorching. I once tried 375°F to speed things up, and the result was a hard, bitter shell that no one wanted to bite. Trust the low‑and‑slow approach; it’s the secret behind that perfect, buttery crunch.
Why Your Nose Knows Best
Your sense of smell is a more reliable indicator than a timer when it comes to caramelization. When the kitchen fills with that sweet‑toasted scent, you’re at the perfect window to pull the haystacks out. If you’re unsure, open the oven a crack and take a quick sniff—if it smells like toasted marshmallows with a hint of nuttiness, you’re golden. I’ve saved many batches from disaster by trusting my nose over the clock.
The 5‑Minute Rest That Changes Everything
After you coat the haystacks in white chocolate, let them rest for exactly five minutes before moving them. This short pause allows the chocolate to set just enough to hold its shape while still being pliable for a final dusting of powdered sugar, if you like. Skipping this rest makes the glaze too soft, causing it to slide off the haystack as you transfer them to the storage container. A friend once tried to skip the rest and ended up with a sticky mess—let’s just say the cleanup was not pretty.
The Double‑Coat Secret
The first bake creates a sturdy base, while the second coating with caramel and white chocolate adds flavor and texture. If you try to skip the initial bake and go straight to coating, the dough will be too soft, and the caramel will seep in, making the haystacks soggy. The double‑coat method also creates that satisfying “crack” when you bite through the chocolate shell into the buttery interior.
The Salt‑Finish Finish
A light sprinkle of flaky sea salt right after the chocolate sets elevates the flavor profile dramatically. The salt crystals sit on the chocolate, creating tiny bursts of salty‑sweet contrast that make each bite feel luxurious. I like to use a small shaker so the salt lands evenly; too much, and you’ll overpower the sweet notes, too little and you miss the magic. This tiny step is the difference between “good” and “wow, I need the recipe now!”
Creative Twists and Variations
This recipe is a playground. Here are some of my favorite ways to switch things up:
Chocolate‑Hazelnut Dream
Swap the cashews for toasted hazelnuts and drizzle a dark chocolate glaze instead of white chocolate. The bitter‑sweet combo adds depth, and the hazelnut’s earthy flavor pairs beautifully with the caramel. Perfect for those who love a more sophisticated palate.
Spiced Pumpkin Delight
Add a teaspoon of pumpkin spice to the flour mixture and replace half the white chocolate with pumpkin‑infused white chocolate chips. The warm spices make these haystacks a perfect autumn treat, and the pumpkin adds a subtle moisture that keeps them extra tender.
Coconut‑Cranberry Burst
Incorporate shredded coconut into the dough and sprinkle dried cranberries on top of the caramel before the final glaze. The tropical coconut balances the tartness of the cranberries, creating a festive holiday flavor reminiscent of a tropical Christmas.
Matcha‑White Chocolate Fusion
Stir a tablespoon of high‑quality matcha powder into the melted white chocolate for a vibrant green hue and a gentle earthy bitterness. This variation looks stunning on a holiday platter and adds a sophisticated twist that’s sure to impress guests.
Salted Caramel Pretzel Crunch
Replace half the cashews with crushed pretzels and sprinkle flaky sea salt on the final glaze. The pretzel adds a salty crunch that contrasts the sweet caramel, delivering a flavor explosion that’s both nostalgic and novel.
Storing and Bringing It Back to Life
Fridge Storage
Place the cooled haystacks in an airtight container lined with parchment paper. Store them in the refrigerator for up to a week. The cool environment keeps the white‑chocolate glaze from melting and preserves the crisp texture of the base.
Freezer Friendly
If you’re making a big batch for the holidays, freeze the haystacks on a tray first, then transfer them to a zip‑top freezer bag. They’ll stay fresh for up to three months. When you’re ready to serve, let them thaw at room temperature for 20 minutes, then give them a quick 30‑second blast in a 300°F oven to revive the crispness.
Best Reheating Method
To bring a refrigerated or thawed haystack back to its original glory, preheat your oven to 300°F and place the haystacks on a parchment‑lined sheet for 5‑7 minutes. Add a tiny splash (about a teaspoon) of water to the tray before reheating; the steam helps the interior soften without compromising the outer crunch. The result is a warm, fragrant treat that feels freshly baked.