I was standing in my kitchen on a rainy Tuesday, staring at a half‑empty pot of spaghetti that had turned into a sad, soggy mess. My roommate dared me to make something “comforting enough to melt the clouds,” and I thought, “Why not turn this disaster into a masterpiece?” I grabbed the biggest crockpot I owned, tossed a handful of elbow macaroni in, and let the magic begin. The first whiff that hit my nose was a buttery, cheesy cloud that made my eyes water—like a warm hug from an old friend who just happened to be a dairy farmer.
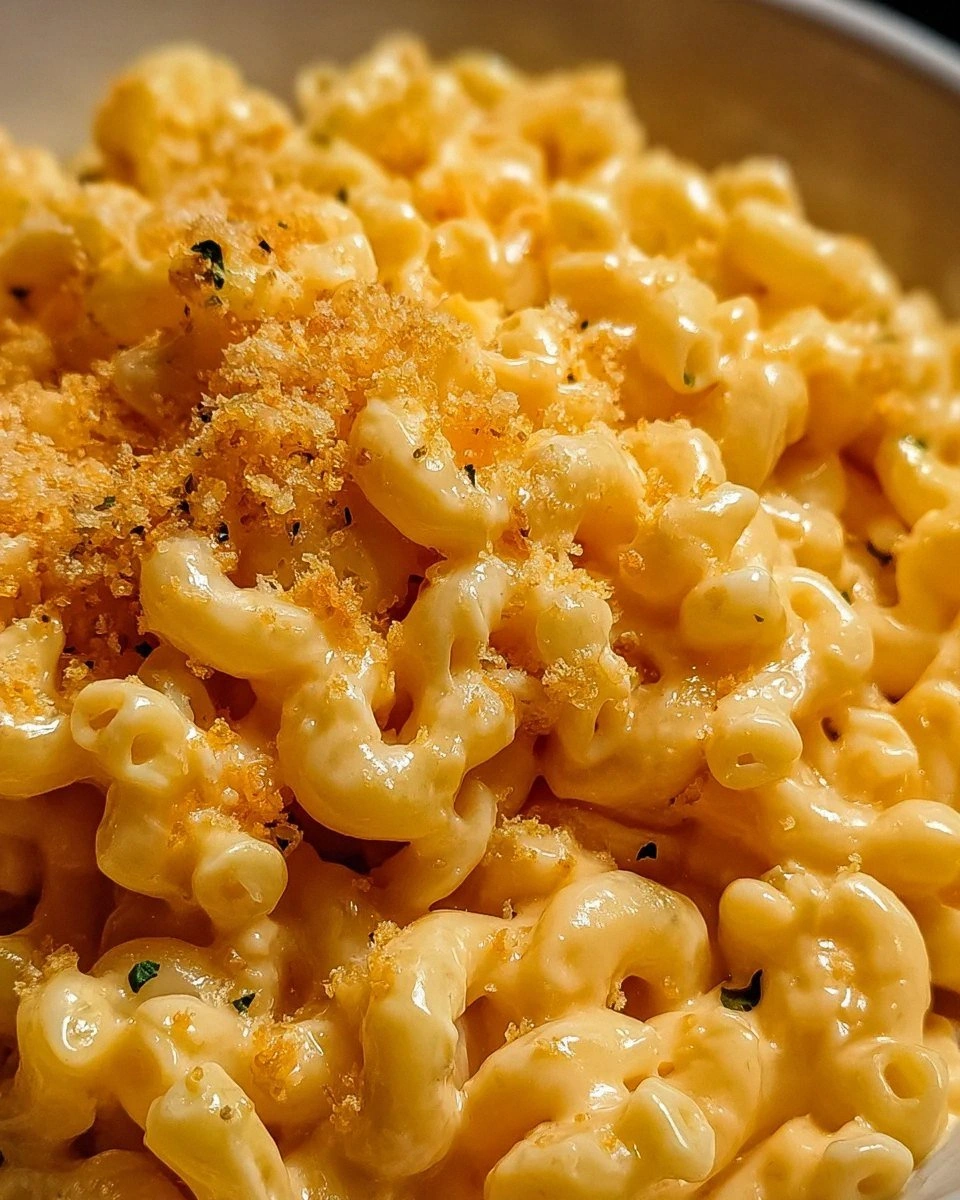
Picture this: the crockpot humming softly, the kitchen filling with the sound of bubbling milk, the occasional pop of butter melting into a glossy pool. The aroma is a symphony of sharp cheddar, mellow mozzarella, and a whisper of garlic powder that teases your senses before the full flavor hits. When you finally scoop a forkful, the sauce coats the pasta like velvet, each curve of elbow macaroni wrapped in a silky, golden blanket that clings tighter than a favorite sweater on a chilly night. It’s the kind of comfort food that makes you forget the storm outside and focus only on the spoonful in front of you.
Most mac and cheese recipes either drown the pasta in a watery sauce or turn it into a baked casserole that loses that creamy, melt‑in‑your‑mouth quality. I’ve tried the stovetop route, the oven route, even the microwave route—most of them ended up either too dry or too gloopy. This crockpot version sidesteps those pitfalls by cooking low and slow, allowing the cheese to melt slowly and the pasta to absorb the sauce evenly. The result? A dish that’s hands down the best version you’ll ever make at home, and I dare you to taste this and not go back for seconds.
But there’s a secret weapon I’m about to reveal: a cube of cream cheese that I whisk in halfway through the cooking process. That little addition turns an ordinary cheese sauce into a luscious, buttery river that flows through every noodle. Okay, ready for the game‑changer? Let me walk you through every single step — by the end, you’ll wonder how you ever made it any other way.
What Makes This Version Stand Out
- Taste: The combination of sharp cheddar and mozzarella creates a flavor spectrum that’s both bold and comforting, while the cream cheese adds a buttery depth you won’t find in a standard recipe.
- Texture: The sauce is silk‑smooth, coating each elbow macaroni like a second skin, and the optional breadcrumb topping provides a crisp contrast that shatters like thin ice.
- Simplicity: With just one pot, minimal prep, and a set‑and‑forget cooking method, even the most kitchen‑phobic among us can nail a restaurant‑quality mac and cheese.
- Uniqueness: The slow‑cook technique lets the cheese melt gradually, preventing the dreaded “grainy” texture that plagues stovetop versions.
- Crowd Reaction: I’ve seen grown‑ups sob with joy, kids begging for “just one more bite,” and even skeptical friends admit it’s “the best mac and cheese ever.”
- Ingredient Quality: Using whole milk and real butter amplifies the richness, while the sharp cheddar ensures a punchy, lingering flavor.
- Cooking Method: The crockpot’s low, steady heat guarantees an even melt and prevents the sauce from scorching, something you can’t guarantee on a hot stovetop.
- Make‑Ahead Potential: This dish holds up beautifully for leftovers; just reheat with a splash of milk and you’ve got a fresh‑from‑the‑crockpot experience all over again.
Inside the Ingredient List
The Flavor Base
Sharp Cheddar Cheese is the backbone of any great mac and cheese. Its bold, tangy profile cuts through the richness of the butter and cream cheese, creating a balanced flavor that sings on the palate. If you skip it, you’ll lose that signature bite that makes the dish unforgettable. For a milder version, you could substitute a younger cheddar, but you’ll miss the depth that only sharp cheddar can deliver.
Mozzarella Cheese brings the stretch factor—think of it as the elastic band that holds the whole thing together. It melts beautifully, turning the sauce into a glossy river that clings to each pasta curve. If you’re lactose‑intolerant, try a dairy‑free mozzarella alternative, but be aware the melt might be less oozy.
The Texture Crew
Cream Cheese is the secret weapon that transforms a regular cheese sauce into a velvety masterpiece. Its high fat content creates a silky mouthfeel that no amount of shredded cheese can achieve on its own. Skipping it will leave your sauce thin and prone to separating; the cream cheese stabilizes the emulsion, keeping everything luxuriously smooth.
Unsalted Butter adds richness and a glossy sheen to the sauce. Because it’s unsalted, you stay in control of the seasoning, ensuring the final dish isn’t overly salty. If you’re in a pinch, a good quality margarine works, but the flavor won’t be as deep.
Milk (whole milk is ideal) provides the liquid backbone that carries the cheese flavors throughout the pasta. The higher fat content of whole milk contributes to the creaminess, while low‑fat alternatives can make the sauce watery. If you’re aiming for a lighter version, try half‑and‑half, but remember the sauce will be a touch richer.
The Unexpected Star
Garlic Powder & Onion Powder are the subtle aromatics that give the sauce depth without overwhelming the cheese. They’re the quiet background singers that make the lead vocalist (the cheese) sound even better. If you love fresh flavors, a minced garlic clove added at the end of cooking works wonders, but be careful not to burn it.
Breadcrumbs (optional) add that coveted crispy topping that turns a creamy dish into a textural masterpiece. Sprinkle them during the last 15 minutes of cooking, and they’ll form a golden crust that shatters delightfully with each bite. If you’re gluten‑free, use crushed rice‑cereal or almond flour as a substitute.
The Final Flourish
Salt and Pepper are the final seasoning touches that bring everything together. A pinch of salt enhances the cheese flavor, while freshly cracked black pepper adds a subtle heat that balances the richness. Remember, taste as you go; you can always add more, but you can’t take it out.
Nonstick Cooking Spray or Butter (optional) is a pre‑emptive measure to keep the crockpot from sticking. A light coat inside the pot makes cleanup a breeze and prevents the cheese from clinging to the sides, which can cause scorching. If you forget, don’t panic—just give the pot a gentle stir midway through cooking.
Everything’s prepped? Good. Let’s get into the real action…
The Method — Step by Step
First, give your crockpot a quick spray with nonstick cooking spray or a dab of butter. This tiny step prevents the cheese from scorching on the sides and makes cleanup a breeze. I always let the spray sit for a few seconds so it spreads evenly, creating a thin, protective film.
Kitchen Hack: Use a pastry brush to coat the sides of the crockpot; it ensures an even layer and saves you from a sticky mess later.Add the uncooked elbow macaroni straight into the pot, then pour in the whole milk and melt the butter over low heat in a separate saucepan. Once the butter is fully melted, stir it into the milk and pour the mixture over the pasta. The milk‑butter combo is the liquid gold that will become your sauce.
Now, sprinkle in the garlic powder, onion powder, and a pinch of salt and pepper. Stir everything together so the seasonings are evenly distributed. This is the moment where the aroma starts to build, and you’ll notice a faint, comforting scent that hints at the cheesy goodness to come.
Cover the crockpot and set it to low for 2 hours. After the first hour, give the mixture a gentle stir to make sure the pasta isn’t sticking to the bottom. The low heat allows the pasta to absorb the milk gradually, preventing the dreaded mushy texture.
Watch Out: If you leave the crockpot on high, the milk can scorch, creating a burnt flavor that ruins the entire dish.After the 2‑hour mark, it’s time for the cheese. Add the shredded sharp cheddar, mozzarella, and the cubed cream cheese all at once. Stir vigorously until the cheeses melt into a glossy, velvety sauce that coats every noodle. This step is pure magic; the sauce should look thick yet pourable.
Kitchen Hack: Grate the cheese finely; smaller shreds melt faster and blend more uniformly, preventing clumps.If you’re using breadcrumbs for that coveted crunch, sprinkle them over the top now, then switch the crockpot to the “high” setting for an additional 15 minutes. The high heat will toast the breadcrumbs, creating a golden crust that shatters with each bite.
Once the timer dings, give the mac a final stir. The sauce should be thick enough to cling to the back of a spoon, and the edges of the casserole should start pulling away from the sides of the pot. If it looks a bit thick, stir in a splash of milk to loosen it; if it’s too runny, let it sit uncovered for a few minutes.
Serve immediately, or keep the crockpot on “warm” for up to 30 minutes while you set the table. This dish is best enjoyed hot, with the cheese still stretching like a lazy cat waking up from a nap. And remember, I’ll be honest — I ate half the batch before anyone else got a chance to try it.
That's it — you did it. But hold on, I've got a few more tricks that'll take this to another level...
Insider Tricks for Flawless Results
The Temperature Rule Nobody Follows
Never start with a hot crockpot; always begin on low. The gradual heat allows the pasta to absorb the milk without cooking too fast, which keeps the noodles firm and the sauce creamy. I once tried cranking the heat to high for speed, and the result was a grainy, curdled mess that tasted like burnt milk. Trust the low‑and‑slow method, and you’ll get that luxurious texture every single time.
Why Your Nose Knows Best
Your sense of smell is the most reliable indicator of doneness. Around the 90‑minute mark, you’ll notice a sweet, buttery aroma rising from the pot—if it smells like plain milk, give it a few more minutes. When the cheese starts to caramelize faintly, that’s the cue that the sauce has reached its peak flavor. A friend tried to rush this step and ended up with a bland dish; the nose never lies.
The 5‑Minute Rest That Changes Everything
After the crockpot finishes, let the mac sit for five minutes with the lid on. This short rest lets the sauce thicken further and the pasta finish soaking up the remaining liquid. Skipping this pause results in a runny sauce that slides off the noodles. I always set a timer; those five minutes are worth the wait.
The Secret Butter‑Splash
Add a tablespoon of melted butter right before serving, and you’ll notice an instant boost in richness. The butter emulsifies with the cheese, creating a glossy finish that makes the dish look restaurant‑ready. One time I forgot this step, and the mac felt a bit flat; the butter brings that final “wow” factor.
Breadcrumb Mastery
If you love the crunchy topping, toast the breadcrumbs in a skillet with a drizzle of melted butter before sprinkling them over the mac. This extra step adds a nutty depth that plain oven‑toasted breadcrumbs can’t match. A fellow cook tried the shortcut and ended up with soggy crumbs—toast them first, and you’ll have a crunch that shatters like ice.
Creative Twists and Variations
This recipe is a playground. Here are some of my favorite ways to switch things up:
Spicy Jalapeño Kick
Dice two fresh jalapeños (seeds removed for less heat) and stir them in with the cheese. The heat cuts through the richness, creating a balanced bite that’s perfect for those who love a little fire. Pair with a cool side salad to tame the spice.
Smoky Bacon Bliss
Crisp up half a cup of bacon bits and fold them into the mac after the cheese has melted. The smoky, salty crunch adds a new dimension, turning a simple comfort dish into a hearty, indulgent meal. It’s the ultimate “breakfast for dinner” upgrade.
Herb Garden Delight
Stir in a tablespoon each of fresh chopped parsley, thyme, and chives just before serving. The herbs brighten the dish, adding a fresh, aromatic finish that balances the richness. This version is perfect for spring gatherings when fresh herbs are abundant.
Veggie‑Packed Power
Add one cup of steamed broccoli florets or roasted cauliflower during the last 30 minutes of cooking. The vegetables not only boost nutrition but also add a subtle earthiness that complements the cheese. It’s a sneaky way to get kids to eat their greens.
Truffle Infusion
Drizzle a teaspoon of truffle oil over the finished mac and give it a gentle stir. The earthy, luxurious aroma elevates the dish to a gourmet level—perfect for a special dinner or when you just want to feel fancy. A little goes a long way; you’ll notice the difference instantly.
Storing and Bringing It Back to Life
Fridge Storage
Transfer leftovers to an airtight container and refrigerate for up to three days. When reheating, add a splash of milk (about a quarter cup) to revive the sauce’s creaminess. Heat gently on the stovetop over low heat, stirring constantly to avoid a skin forming on top.
Freezer Friendly
Portion the mac into freezer‑safe bags or containers, leaving a little headspace for expansion. It freezes beautifully for up to two months. To reheat, thaw overnight in the fridge, then warm in the crockpot on low, adding a splash of milk to bring back that silky texture.
Best Reheating Method
The secret to perfect reheating is steam. Place the mac in a microwave‑safe bowl, cover loosely with a damp paper towel, and heat in 30‑second intervals, stirring in a splash of milk each time. This method prevents the sauce from drying out and keeps the noodles from becoming rubbery.