Love this? Pin it for later! 📌
Remember the first time you handed your child a corn dog at the state fair? That golden, crispy exterior giving way to the juicy hot dog inside—pure magic in their tiny hands. But here's the thing: we can't always dash to the fairgrounds when the craving strikes, and the frozen supermarket varieties often leave much to be desired. That's why I'm sharing my game-changing recipe for homemade mini corn dogs that you can batch-cook, freeze, and reheat whenever hunger pangs hit.
As a mom of three ravenous boys and a food blogger who's tested countless recipes, I've perfected this freezer-friendly version that's become our household's saving grace. Whether it's an after-school snack emergency, a playdate surprise, or those nights when dinner needs to be fun and fast, these mini corn dogs deliver big-time satisfaction without the processed aftertaste of store-bought versions.
The beauty lies in their size—mini means they cook faster, freeze better, and are perfectly portioned for little hands. Plus, when you make them yourself, you control everything: the quality of hot dogs, the sweetness of the cornbread coating, and most importantly, you can pronounce every single ingredient. Trust me, once you stock your freezer with these golden nuggets of joy, you'll never reach for the boxed variety again.
Why This Recipe Works
- Freezer-Friendly Formula: The cornbread coating is engineered to freeze and reheat without becoming soggy, maintaining that coveted crispy exterior.
- Kid-Approved Size: Mini portions mean faster cooking time and perfect for little appetites—plus they're fun to eat!
- Hidden Veggie Boost: Finely grated carrots or zucchini can be seamlessly incorporated into the batter for extra nutrition.
- Customizable Coating: Adjust sweetness, add cheese, or include herbs to create your family's signature flavor profile.
- Batch Cooking Champion: Double or triple the recipe easily—your future self will thank you during busy weeknights.
- Air Fryer Adaptable: Reheat straight from frozen in minutes for a quick, healthier alternative to deep-frying.
- Allergy-Friendly Options: Simple substitutions make this gluten-free or dairy-free without compromising taste or texture.
- Portion Control Made Easy: Pre-portioned servings help manage snacking and reduce food waste.
Ingredients You'll Need
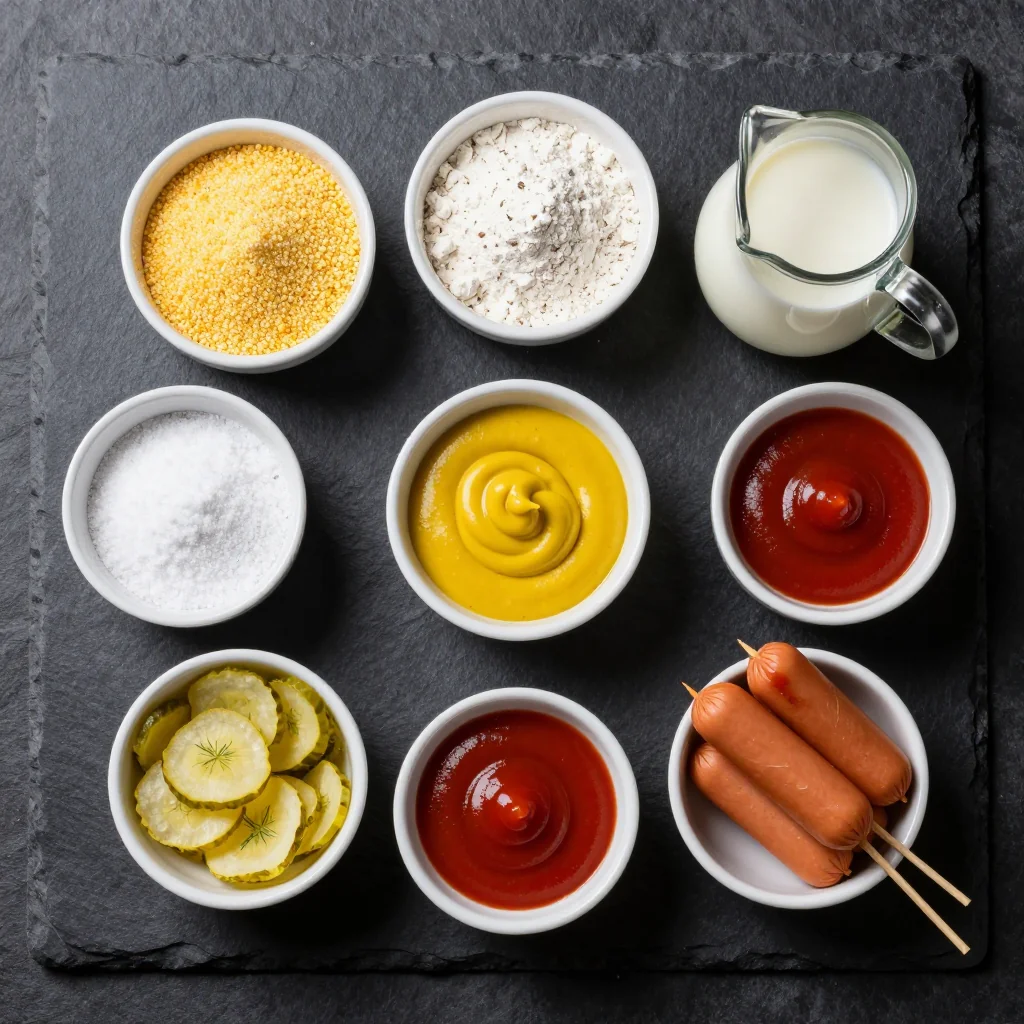
Let's talk ingredients—because quality matters when you're feeding your family. I've tested this recipe with everything from premium organic hot dogs to budget-friendly options, and I'm sharing my honest findings so you can make the best choice for your household.
Hot Dogs: The star of the show deserves thoughtful selection. I prefer all-beef hot dogs for their robust flavor that stands up well to the sweet cornbread coating. If you're feeding younger toddlers, chicken or turkey dogs work beautifully and are often lower in sodium. Cut them into 2-inch pieces—this size is perfect for little hands to hold and ensures the cornbread-to-hot-dog ratio stays balanced. Pro tip: Cut them slightly shorter than you think you should; they'll seem tiny, but once coated, they'll be perfectly portioned.
Cornmeal: This isn't the time for that ancient bag at the back of your pantry. Fresh, quality cornmeal makes all the difference in achieving that authentic fair-style flavor. I use medium-grind yellow cornmeal for the best texture—fine enough to create a smooth batter but coarse enough to provide satisfying crunch. Stone-ground varieties offer superior flavor, but regular grocery store cornmeal works perfectly fine. If you're gluten-free, ensure your cornmeal is certified gluten-free, as cross-contamination is common in processing facilities.
Flour: All-purpose flour gives structure to our batter, preventing it from sliding off the hot dogs during frying. For my gluten-free friends, a 1:1 gluten-free flour blend works wonderfully—I recommend King Arthur or Bob's Red Mill brands for consistent results. Whole wheat pastry flour can be substituted for half the all-purpose flour if you're looking to boost nutrition without compromising texture.
Leavening Agents: Both baking powder and baking soda create the light, airy texture that makes these corn dogs irresistible. Make sure yours are fresh—baking powder loses potency after 6-12 months, and old leavening agents result in dense, heavy coating. I replace mine every January as part of my pantry refresh routine.
Eggs: Large eggs bind everything together and add richness. Room temperature eggs incorporate more easily into the batter, so pull them out 30 minutes before mixing. For egg allergies, I've successfully used Bob's Red Mill egg replacer—follow package instructions for equivalent of 2 eggs.
Buttermilk: The tangy flavor and acid content tenderize the cornbread while helping it brown beautifully. No buttermilk? No problem—add 1 tablespoon of lemon juice or white vinegar to regular milk and let it sit for 5 minutes. Dairy-free? Unsweetened almond or oat milk with the same acid addition works perfectly.
Honey: Just a touch of honey enhances the corn flavor without making the batter overly sweet. Maple syrup or brown sugar work as substitutes, but honey provides the most authentic fair-style taste. For babies under one year, substitute with maple syrup.
How to Make Kid-Friendly Mini Corn Dogs from Your Own Freezer Stock
Prep Your Hot Dogs
Pat hot dogs completely dry with paper towels—this is crucial for batter adhesion. Cut into 2-inch pieces (you'll get about 3 pieces per hot dog). Insert wooden skewers or lollipop sticks about ¾ of the way through each piece. Arrange on a parchment-lined baking sheet and freeze for 30 minutes. This freezing step prevents the hot dogs from warming the batter too quickly, ensuring it stays put during frying.
Mix the Dry Ingredients
In a large bowl, whisk together 1 cup cornmeal, ¾ cup all-purpose flour, 2 tablespoons sugar, 1 tablespoon baking powder, ½ teaspoon baking soda, and 1 teaspoon salt. This thorough mixing ensures even distribution of leavening agents, preventing bitter pockets in your finished corn dogs. Create a well in the center for easy wet ingredient incorporation.
Combine Wet Ingredients
In a separate bowl, whisk together 2 large eggs (room temperature), 1¼ cups buttermilk, 2 tablespoons honey, and 2 tablespoons melted butter. The butter should be cooled slightly—if it's too hot, it'll cook the eggs. Room temperature ingredients blend more smoothly, creating a cohesive batter that adheres perfectly to your hot dogs.
Create the Batter
Pour wet ingredients into dry ingredients and stir until just combined. The batter should be thick enough to coat a spoon but fluid enough to drip slowly. Overmixing develops gluten, resulting in tough coating. It's perfectly fine if a few small lumps remain—they'll hydrate during the resting period. Let batter rest for 10 minutes; this allows cornmeal to hydrate and leavening agents to activate, creating lighter corn dogs.
Heat the Oil
Fill a heavy-bottomed pot with 2-3 inches of vegetable oil. Heat to 350°F (175°C) using a candy thermometer for accuracy. Maintaining proper temperature is crucial—too low and corn dogs absorb excess oil becoming greasy; too high and the exterior burns before the interior cooks through. I prefer peanut oil for its high smoke point and neutral flavor, but vegetable or canola oil work well too.
Coat the Hot Dogs
Working with one frozen hot dog piece at a time, dip it into the batter, turning to coat completely. Let excess batter drip off for 2-3 seconds—the coating should be substantial but not so thick that it slides off during frying. If batter becomes too thick during the process, thin with a tablespoon of buttermilk. Keep remaining hot dogs in the freezer between batches to maintain optimal temperature.
Fry to Golden Perfection
Carefully lower coated hot dogs into the hot oil, 2-3 at a time depending on pot size. Don't crowd the pan—it drops oil temperature and creates soggy corn dogs. Fry for 2-3 minutes until golden brown, turning once for even cooking. They're done when they're a deep golden color and float to the surface. Remove with tongs and drain on a wire rack set over paper towels. The rack prevents steam from making the bottoms soggy.
Flash Freeze for Later
Let corn dogs cool completely—about 15 minutes. Arrange in a single layer on parchment-lined baking sheets and freeze until solid, about 2 hours. This flash-freezing step prevents them from sticking together when stored. Once frozen solid, transfer to freezer bags, removing as much air as possible. Label with date and contents—they'll keep for up to 3 months, though mine never last that long!
Expert Tips
Oil Temperature Mastery
Invest in a quality candy thermometer and clip it to your pot. Oil temperature fluctuates dramatically when adding cold food. Adjust heat as needed between batches, and always let oil return to 350°F before adding more corn dogs. Consistent temperature equals consistent results.
Batter Consistency Check
Perfect batter should coat your finger but still drip slowly. Too thick? Add buttermilk a tablespoon at a time. Too thin? Whisk in cornmeal a teaspoon at a time. Batter thickness directly affects how well it adheres during frying—getting this right is half the battle.
Keep Them Cold
Work in small batches, keeping remaining hot dogs in the freezer. Cold hot dogs help batter set quickly when it hits the hot oil, preventing sliding. If kitchen is warm, place the batter bowl over an ice pack to keep it chilled between batches.
Don't Overcrowd
Fry maximum 3-4 mini corn dogs at once. Overcrowding drops oil temperature dramatically, leading to greasy, pale corn dogs that absorb too much oil. Be patient—your reward is perfectly crispy, golden results every time.
Stick Selection
Wooden skewers work, but lollipop sticks or even sturdy pretzel sticks are better for kids. Soak wooden sticks in water for 30 minutes before using to prevent burning. For toddlers, skip sticks entirely and serve as corn dog "nuggets" for safer snacking.
Make-Ahead Magic
Mix dry ingredients the night before and store covered at room temperature. In the morning, whisk wet ingredients and combine. This 5-minute prep makes fresh corn dogs totally doable for weekend brunch or surprise playdates.
Variations to Try
Cheese-Stuffed Delight
Cut a small slit in each hot dog piece and insert a cheese stick cube before coating. Cheddar, pepper jack, or mozzarella all work beautifully. The cheese melts during frying, creating an irresistible gooey center that kids go crazy for.
Tex-Mex Twist
Add 1 teaspoon chili powder, ½ teaspoon cumin, and ¼ cup chopped cilantro to the batter. Use pepper jack cheese inside and serve with salsa-ranch dipping sauce. This variation is particularly popular with older kids and adults.
Honey Butter Bliss
Increase honey to 3 tablespoons and add 1 teaspoon vanilla extract to the batter. Serve with whipped honey butter for dipping. This sweeter version tastes like state-fair perfection and makes an indulgent weekend breakfast treat.
Baked Not Fried
Spray corn dogs generously with cooking spray and bake at 400°F for 12-15 minutes, turning once. While not quite as crispy as fried, this version significantly reduces oil content. Spray again halfway through for extra browning.
Breakfast Sausage Swap
Replace hot dogs with breakfast sausage links for morning corn dogs. Add 1 tablespoon maple syrup to the batter and serve with warm syrup for dipping. These are incredible for brunch gatherings and freeze just as well as the original.
Veggie Power Boost
Finely grate ½ cup zucchini or carrots and squeeze out excess moisture. Fold into the batter with 2 tablespoons additional flour. Kids won't detect the vegetables, but you'll know they're getting extra nutrition in every bite.
Storage Tips
Freezer Storage
Properly stored, these mini corn dogs maintain optimal quality for up to 3 months. After flash-freezing on baking sheets, transfer to heavy-duty freezer bags, removing as much air as possible. I use a straw to suck out excess air—it's oddly satisfying and significantly extends freezer life. Label bags with contents and date, because frozen mystery foods are the bane of every parent's existence.
For best results, wrap each corn dog individually in plastic wrap before placing in freezer bags. This extra step prevents freezer burn and allows you to grab single servings without defrosting the entire batch—perfect for those random Tuesday afternoon snack emergencies.
Reheating Instructions
Oven: Preheat to 375°F. Place frozen corn dogs on a wire rack set over a baking sheet. Bake 12-15 minutes until heated through and crispy. The wire rack allows hot air to circulate, preventing soggy bottoms.
Air Fryer: 360°F for 6-8 minutes, shaking halfway through. This method produces incredibly crispy results with minimal oil. Don't overcrowd the basket—work in single layers for best results.
Microwave: While not recommended for optimal texture, desperate times call for desperate measures. Microwave on high for 45-60 seconds, then crisp in a toaster oven for 2-3 minutes. Never microwave longer than 1 minute or the hot dog explodes through the coating.
Make-Ahead Batter
The batter can be mixed up to 2 days ahead and stored covered in the refrigerator. Bring to room temperature and whisk briefly before using—it may need a splash of buttermilk to loosen. However, for optimal lift and texture, I recommend mixing fresh batter when possible. The 5-minute effort is worth the superior results.
For ultimate convenience, measure and combine all dry ingredients in mason jars. Label and store for up to 3 months. When ready to use, dump into a bowl, add wet ingredients, and you're minutes away from fresh corn dogs. These make excellent gifts for new parents or busy families—include a tag with mixing instructions for a thoughtful, practical present.
Frequently Asked Questions
Absolutely! Cocktail sausages are perfectly sized and eliminate cutting. Pat them very dry before coating, as they often have more moisture than regular hot dogs. You'll need about 24-30 cocktail sausages for this recipe. They're particularly great for parties since they're already bite-sized.
Several factors cause batter slippage: hot dogs aren't cold enough, oil temperature is too low, or batter is too thin. Ensure hot dogs are frozen solid before coating. Check oil temperature with a thermometer—below 340°F, the batter won't set quickly enough. If batter seems thin, whisk in cornmeal a teaspoon at a time until it coats the spoon thickly.
Soak wooden skewers in water for 30 minutes before using. Alternatively, wrap the exposed ends with small pieces of aluminum foil during frying. Lollipop sticks or even sturdy pretzel sticks are great burn-proof options. For toddlers, skip sticks entirely and serve as corn dog "nuggets" for safer snacking.
Yes, though they won't be quite as crispy. Preheat oven to 400°F. Spray coated corn dogs generously with cooking spray and place on a wire rack set over a baking sheet. Bake 12-15 minutes, turning once and spraying again. For extra browning, broil for the final 1-2 minutes, watching carefully to prevent burning.
Beyond classic ketchup and mustard, kids adore honey-mustard (equal parts honey and yellow mustard), ranch dressing, or barbecue sauce. For a sweet twist, try warmed grape jelly mixed with yellow mustard—sounds weird but tastes like state-fair magic. Cheese sauce is always a hit, and older kids enjoy sriracha-mayo for a spicy kick.
Cooked corn dogs keep for 3-4 days refrigerated in airtight containers. However, they lose their crispness in the fridge. For best results, refrigerate un-cooked coated hot dogs and fry fresh when needed, or freeze cooked ones immediately. Refrigerated leftovers reheat best in an air fryer or oven to restore some crispness.

Kid-Friendly Mini Corn Dogs from Your Own Freezer Stock
Ingredients
Instructions
- Prep hot dogs: Pat hot dogs completely dry and cut into 2-inch pieces. Insert sticks ¾ through each piece. Freeze for 30 minutes.
- Mix dry ingredients: In a large bowl, whisk together cornmeal, flour, sugar, baking powder, baking soda, and salt.
- Combine wet ingredients: In a separate bowl, whisk eggs, buttermilk, honey, and melted butter until smooth.
- Create batter: Pour wet ingredients into dry ingredients. Stir until just combined. Let rest 10 minutes.
- Heat oil: Heat 2-3 inches of oil in a heavy pot to 350°F using a candy thermometer.
- Coat and fry: Dip frozen hot dogs into batter, coating completely. Fry 2-3 at a time for 2-3 minutes until golden brown.
- Drain and cool: Remove with tongs and drain on wire rack. Cool completely before flash-freezing.
- Flash freeze: Arrange cooled corn dogs on baking sheets and freeze until solid, about 2 hours.
- Store: Transfer frozen corn dogs to freezer bags, removing excess air. Freeze up to 3 months.
- Reheat: Bake from frozen at 375°F for 12-15 minutes or air fry at 360°F for 6-8 minutes.
Recipe Notes
Keep hot dogs frozen until ready to coat—this prevents batter from sliding off during frying. Work in small batches to maintain oil temperature. For gluten-free, substitute all-purpose flour with 1:1 gluten-free flour blend.