Crispy shells, juicy beef, and melty cheese—your new go‑to comfort food for any day.

A Personal Journey to Perfect Tacos
I still remember the first time I bit into a crunchy taco shell that gave way to a warm, seasoned beef filling and a cascade of melted cheddar. It was during a summer road‑trip across Texas, when a roadside stand handed me a paper‑wrapped masterpiece that sang with smoky chilies, fresh lime, and a hint of cilantro. The flavors were so vivid that I could still taste the sun‑baked earth and hear the sizzle of the skillet in my mind.
Tacos, in their humble form, have traveled from ancient Mexican street corners to the tables of families worldwide. The hard‑shell version, popularized in the United States in the mid‑20th century, offers a satisfying crunch that contrasts beautifully with a juicy, seasoned ground‑beef mixture. This dish is a celebration of textures and bold, comforting flavors that make it a perennial favorite.
In this article, I’ll walk you through every nuance of creating the perfect hard‑shell taco: from selecting the right beef grind to mastering the spice blend, and finally, achieving that golden‑brown crust that holds everything together. You’ll learn the science behind browning meat, the art of balancing heat with acidity, and the tricks to keep your shells crisp even after topping them.
So grab your skillet, preheat the oven, and let’s dive into a taco adventure that will become a staple in your kitchen repertoire.
🌟 Why This Recipe Will Captivate You
From the first bite to the lingering aftertaste, this taco recipe delivers a symphony of flavors, textures, and aromas that keep you coming back for more.
- ✨ Perfect Crunch Meets Juicy Filling: The hard shell stays crisp while the beef stays moist, thanks to a quick sear and a short bake that locks in juices.
- ✨ Balanced Spice Profile: Chili powder, cumin, and smoked paprika create depth without overwhelming heat, making it family‑friendly yet exciting.
- ✨ Speedy Weeknight Solution: With a total time of just 25 minutes, you can serve a restaurant‑quality meal on a busy Tuesday.
- ✨ Customizable Toppings: Fresh lettuce, tangy lime, and creamy cheese invite endless personalization for every palate.
- ✨ Nutrient‑Smart Portions: By controlling the amount of cheese and using lean ground beef, you keep calories in check without sacrificing flavor.
- ✨ Crowd‑Pleaser: Whether it’s a casual family dinner or a game‑day gathering, these tacos win over kids and adults alike.
🥗 Ingredients
📝 Complete Ingredient List
For the Beef Filling:
- 500 g ground beef (80 % lean)
- 1 tbsp olive oil
- 1 medium onion, finely diced
- 2 cloves garlic, minced
- 2 tsp chili powder
- 1 tsp ground cumin
- 1 tsp smoked paprika
- ½ tsp salt
- ¼ tsp black pepper
For the Tacos & Toppings:
- 8 hard‑shell taco shells
- 200 g shredded cheddar cheese
- 100 g shredded lettuce
- 1 medium tomato, diced
- 2 tbsp sour cream
- 2 tbsp salsa
- 1 tbsp fresh cilantro, chopped
- 1 lime, cut into wedges
Optional Garnish:
- to taste hot sauce

🔍 Focus on Key Ingredients
Ground Beef (80 % Lean)
The protein backbone of this dish, an 80 % lean blend provides enough fat to stay juicy while avoiding excess greasiness. Look for a bright red color and a faint metallic scent; any brown spots indicate oxidation. When browned, the beef releases flavorful Maillard compounds that form the base of the taco’s savory depth.
Chili Powder & Smoked Paprika
Chili powder delivers a warm, earthy heat, while smoked paprika adds a subtle wood‑smoked aroma that mimics a slow‑cooked barbecue. Together they create a layered spice profile that’s robust but not overpowering. Adjust the chili powder up to 3 tsp if you love more kick.
Hard‑Shell Taco Shells
These pre‑shaped corn shells are designed to crisp up quickly in a hot oven. Choose shells that are not too thick; a thin, golden shell will stay crunchy after topping. For an extra crunch, lightly brush the shells with a dab of oil before baking.
🔄 Quick Substitutions
| If you don’t have... | Use instead... |
|---|---|
| Ground beef | Ground turkey or chicken (use same amount) |
| Cheddar cheese | Monterey Jack or Mexican blend |
| Hard‑shell tacos | Soft flour tortillas (bake 3 min for slight crisp) |
👨🍳 Step‑by‑Step Instructions
Follow these detailed steps to transform raw ingredients into a mouth‑watering taco feast. Each phase is designed to build flavor, texture, and visual appeal.
📋 Phase 1: Prep & Mise en Place
Getting everything ready before you hit the heat ensures a smooth cooking process.
Prepare the Vegetables
Dice the onion finely so it cooks evenly and releases its natural sweetness. Mince the garlic cloves into tiny pieces; this maximizes their aromatic impact. Rinse the lettuce, pat dry, and shred it into bite‑size strips. Dice the tomato, removing excess seeds to avoid soggy tacos.
Measure Spices & Oil
In a small bowl, combine chili powder, ground cumin, smoked paprika, salt, and black pepper. Stir with a whisk to break up any clumps. Measure out the olive oil and set aside. Having the spice blend ready prevents over‑seasoning and ensures even distribution.
🔥 Phase 2: Cooking & Assembly
The heart of the recipe—building flavor and texture.
Browning the Beef
Heat a large skillet over medium‑high heat and add the olive oil. Once shimmering, add the ground beef, breaking it up with a wooden spoon. Cook for 5‑7 minutes, allowing the meat to develop a deep brown crust. This caramelization adds a savory depth that’s essential for authentic tacos.
Adding Aromatics & Spice Blend
Reduce the heat to medium and stir in the diced onion and minced garlic. Sauté until the onion becomes translucent, about 2 minutes. Sprinkle the pre‑mixed spices over the meat, stirring continuously to coat every crumb. Cook for another 2 minutes, allowing the spices to release their oils and perfume the beef.
Finishing the Filling
Taste the mixture and adjust seasoning with a pinch more salt or pepper if needed. Remove the skillet from heat; the beef is now ready to be spooned into the shells. Let it rest for a minute while you prepare the shells.
Bake the Taco Shells
Pre‑heat your oven to 190 °C (375 °F). Arrange the hard‑shell tacos on a baking sheet, standing upright. Bake for 3‑5 minutes, just until the shells turn a light golden brown and become crisp. This short bake prevents them from becoming soggy once topped.
✨ Phase 3: Finishing & Plating
The final touches that turn good tacos into unforgettable bites.
Check for Doneness
Ensure the beef is fully cooked (no pink) and the spices have melded. The mixture should be slightly thickened, clinging to the meat pieces. If it looks dry, drizzle a teaspoon of water and stir gently.
Assemble the Tacos
Spoon a generous portion of the seasoned beef into each baked shell. Top with shredded cheddar, letting the heat melt the cheese slightly. Add lettuce, tomato, a dollop of sour cream, salsa, and a sprinkle of cilantro. Finish with a squeeze of fresh lime juice for brightness.
Serve Immediately
Serve the tacos hot, while the shells are still crisp. Provide extra lime wedges and hot sauce on the side for guests to customize their heat level.
💡 Expert Tips & Tricks
🛒 Choosing the Right Ingredients
Opt for 80 % lean ground beef; it provides enough fat for flavor without excessive greasiness. When selecting taco shells, look for those that are pre‑shaped and have a uniform golden color—this indicates even baking. Fresh cilantro should have bright green leaves and a citrusy scent; wilted cilantro loses its flavor quickly.
🔪 Preparation Techniques
Use a food processor pulse to finely dice onions if you want a smoother texture. For garlic, crush the cloves before mincing; this releases more allicin, enhancing aroma. Keep all your ingredients within arm’s reach (mise en place) to avoid overcooking the beef while you search for a spice.
🌡️ Mastering the Cooking
Maintain a medium‑high heat when browning beef; this ensures a crust forms without steaming. If the pan starts to smoke, lower the heat slightly and add a splash of water to deglaze. Remember, the shell only needs a brief bake—overbaking turns them brittle.
🍽️ Presentation & Service
Arrange tacos on a large platter with a colorful garnish of lime wedges, cilantro sprigs, and sliced jalapeños. Use a contrasting plate (white or light gray) to make the vibrant colors pop. Encourage diners to add their own hot sauce for a personalized heat level.
🏆 Pro Tips
Elevate your taco game from home‑cooked comfort to restaurant‑grade excellence with these professional insights.
- 🎯 Spice Toasting: Before adding the spice blend to the beef, toast the spices in a dry skillet for 30 seconds. This awakens volatile oils, deepening flavor without extra heat.
- 🎯 Fat Rendering Control: Pat the cooked beef with paper towels to remove excess fat. This prevents the tacos from becoming soggy and keeps the shells crisp.
- 🎯 Cheese Melt Technique: After filling the shells, place them under the broiler for 1 minute. The intense heat quickly melts cheese and adds a subtle char that mimics a street‑taco grill.
- 🎯 Lime Zest Integration: Grate a small amount of lime zest into the beef mixture before cooking. The zest’s aromatic oils infuse the meat with a bright citrus note that balances the spices.
- 🎯 Layered Textures: Add a thin layer of refried beans beneath the beef for extra creaminess and a subtle earthy flavor that complements the crunch.
- 🎯 Serving Temperature: Serve tacos within 5 minutes of plating. The shell’s crunch diminishes quickly, and the cheese begins to harden if left too long.
"The secret to a great taco is balance—crisp shell, juicy meat, bright acidity, and a hint of heat." — Chef Gabriela Sánchez
🔄 Variations & Adaptations
This taco recipe is a versatile canvas that welcomes countless twists. Whether you’re catering to dietary needs or craving a flavor adventure, these variations keep the core spirit alive.
🥬 Vegetarian / Vegan Version
Replace ground beef with a mixture of black beans, crumbled tempeh, and smoked paprika. Use vegan cheese or a cashew‑based cheese sauce for meltiness. The result is a hearty, plant‑based taco that retains the smoky depth of the original.
- 1 can (400 g) black beans, rinsed and mashed
- 150 g crumbled tempeh, sautéed with spices
- 200 g vegan cheddar shreds
🌶️ Flavor Variations
Play with global spice palettes to create exciting new taco experiences.
Spicy Chipotle Version:
Add 1 tsp chipotle in adobo sauce (finely chopped) to the beef mixture for smoky heat. Top with avocado slices to mellow the spice.
Mediterranean Twist:
Substitute cumin with oregano, add kalamata olives, and finish with a drizzle of tzatziki. Use feta cheese instead of cheddar.
Asian Fusion Style:
Incorporate a splash of soy sauce, grated ginger, and a sprinkle of toasted sesame seeds. Top with pickled carrots and cilantro for a bright contrast.
⚠️ Dietary Adaptations
Gluten‑Free:
Ensure taco shells are certified gluten‑free. Replace any wheat‑based toppings (e.g., certain sauces) with gluten‑free alternatives.
Lactose‑Free:
Use lactose‑free cheddar or a dairy‑free cheese alternative. Substitute sour cream with coconut‑based crema.
Low‑Calorie:
Reduce cheese to 100 g, use lean ground turkey, and increase the proportion of lettuce and tomato. Serve with a side of fresh salsa instead of sour cream.
👶 Family / Kids Version
Kids often prefer milder flavors. Omit chili powder or halve it, and add a small amount of mild paprika. Offer a side of guacamole for a creamy, kid‑friendly dip. Use smaller taco shells for bite‑size portions.
📦 Storage & Reheating
🧊 Conservation
Refrigerator:
- Duration: 3 days
- Recommended container: airtight plastic or glass container
- Tip: Store the beef filling separate from shells to keep them crisp.
Freezer:
- Duration: 2 months
- Method: Portion the cooked beef into freezer bags, flatten for even freezing.
- Defrosting: Thaw overnight in the refrigerator, reheat gently on the stovetop.
💡 Note: Re‑bake shells for 2 minutes before assembling after refrigeration to restore crunch.
♨️ Reheating
🔥 Oven (Recommended):
- Preheat to 180 °C (350 °F).
- Cover tacos with foil to retain moisture.
- Reheat for 8‑10 minutes.
- Remove foil, add cheese, and broil for 1‑2 minutes to melt.
⚡ Microwave (Quick):
- Place tacos on a microwave‑safe plate, cover with a microwave‑safe lid.
- Heat on medium power for 1 minute.
- Stir the beef filling, then heat another 30 seconds if needed.
🍳 Stovetop:
Reheat the beef filling in a skillet over medium heat, stirring frequently. Warm shells in a dry skillet for 30 seconds per side, then assemble.
🍷 Perfect Pairings
🥗 Side Dishes
- Mexican Street Corn (Elote): Grilled corn slathered with mayo, cotija, chili powder, and lime adds smoky sweetness.
- Black Bean Salad: A cool, citrus‑dressed bean salad balances the richness of the beef.
- Guacamole: Creamy avocado with red onion, jalapeño, and lime provides a buttery contrast.
🍷 Wine & Beverage Pairings
- Beer – Mexican Lager: Light, crisp lager cuts through the richness and highlights the spices.
- Wine – Tempranillo: Its medium body and subtle red fruit complement the smoky beef.
- Non‑Alcoholic – Agua Fresca (Hibiscus): Tart and refreshing, it balances the heat.
🍰 To Complete the Meal
Start with a light avocado‑lime soup or a fresh garden salad. Finish with a classic churro dipped in chocolate or a mango‑coconut sorbet for a sweet, tropical finish that echoes the lime’s brightness.
❓ Frequently Asked Questions
Q: Can I use ground turkey instead of beef?
Absolutely. Ground turkey works well, especially if you choose a blend with a little extra fat (85 % lean). The cooking time remains the same, but you may want to add a splash of olive oil to keep the mixture moist.
Q: How do I prevent the taco shells from getting soggy?
The key is to bake the shells just before serving and to keep the beef filling separate until assembly. Adding a thin layer of shredded cheese right after baking creates a barrier that helps maintain crispness.
Q: What’s the best way to store leftover beef filling?
Transfer the cooled beef to an airtight container and refrigerate. It stays flavorful for up to three days. Reheat gently on the stovetop with a splash of water to revive its juiciness.
Q: I’m allergic to dairy. What can I substitute for cheese and sour cream?
Use a dairy‑free cheddar alternative made from almonds or soy, and replace sour cream with a coconut‑based crema or plain soy yogurt. Both provide creaminess without dairy.
Q: Can I make these tacos gluten‑free?
Yes. Ensure you purchase certified gluten‑free corn taco shells. All other ingredients are naturally gluten‑free, but double‑check any pre‑made salsa or seasoning blends for hidden wheat flour.
Q: How can I prepare the tacos ahead of time for a party?
Cook the beef filling and store it in a slow cooker on the “warm” setting. Bake the shells just before guests arrive, then set out toppings in separate bowls for a DIY taco bar. This keeps everything fresh and interactive.
🎉 To Your Kitchen!
This hard‑shell taco recipe combines the comforting crunch you love with a bold, savory beef filling that sings with aromatic spices. By mastering the simple techniques outlined—proper browning, quick shell baking, and thoughtful topping assembly—you’ll create a dish that feels both indulgent and approachable. Whether it’s a quick weeknight dinner or a festive gathering, these tacos bring smiles, satisfy cravings, and showcase how a few quality ingredients can transform a simple meal into a memorable experience.
I encourage you to experiment with the suggested variations, share your personal twists, and let the aroma of sizzling beef fill your home. Your feedback fuels this community, so don’t hesitate to comment, ask questions, or post photos of your creations.
Have you tried this recipe?
Leave a comment and rating below! Share your photos on Instagram with #TacoJoy to be featured.
Tacos with Hard Shell Ground Beef and Cheese
Crispy shells filled with seasoned beef, melty cheese, and fresh toppings.
📝 Ingredients
Beef Filling
Tacos & Toppings
Optional Garnish
👨🍳 Instructions
- Prep the vegetables: Dice onion, mince garlic, shred lettuce, and dice tomato.
- Measure spices: Combine chili powder, cumin, smoked paprika, salt, and pepper in a bowl.
- Brown the beef: Heat oil, add beef, and cook until deep brown, about 6 minutes.
- Add aromatics & spices: Stir in onion, garlic, then the spice blend; cook 2 minutes.
- Finish filling: Taste, adjust seasoning, and remove from heat.
- Bake shells: Pre‑heat oven to 190 °C, bake shells 3‑5 minutes until crisp.
- Assemble tacos: Spoon beef into shells, add cheese, lettuce, tomato, sour cream, salsa, cilantro, and lime.
- Serve immediately: Enjoy while hot and crunchy.
- Optional garnish: Drizzle hot sauce to taste.
- Store leftovers: Keep filling and shells separate; reheat as described.
🥗 Nutritional Information (per serving)
Calories
Protein
Carbs
Fat
Fiber
Sodium
*Values are estimates based on standard ingredient data.
📚 You Might Also Like
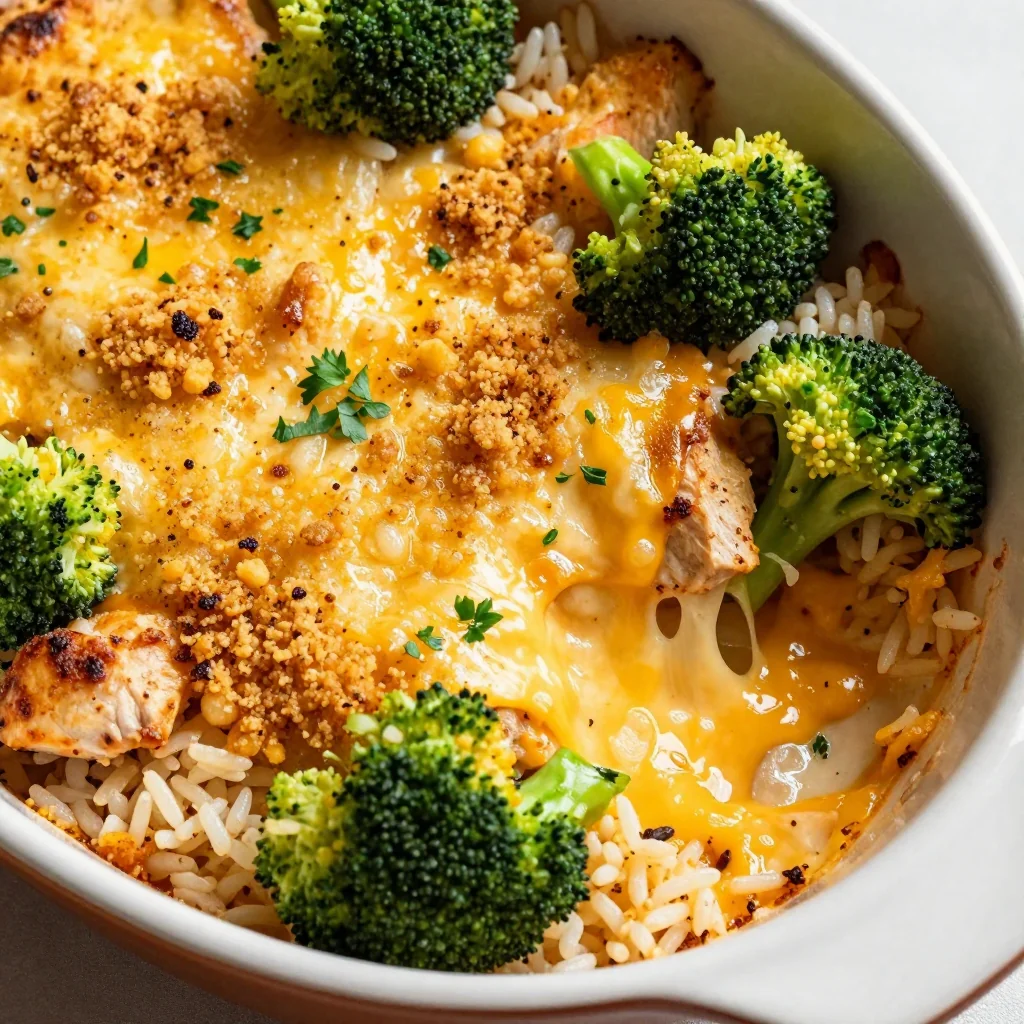
Chicken Enchilada Bake
Shrimp Quesadilla
Veggie Fajita Bowl