I was halfway through a disastrous batch of vanilla cake when my roommate, who has a PhD in dessert chemistry, whispered, “You’re going to need a banana, a toffee sauce, and a whole lot of confidence.” The kitchen smelled of burnt sugar and hope. I stared at the oven door, the timer blinking like a guilty conscience, and decided that the only way to salvage the evening was to create a cake that would make every kitchen disaster look like a triumph. The result? A buttery, banana‑laden, toffee‑slicked masterpiece that turns any ordinary Sunday into a celebration.
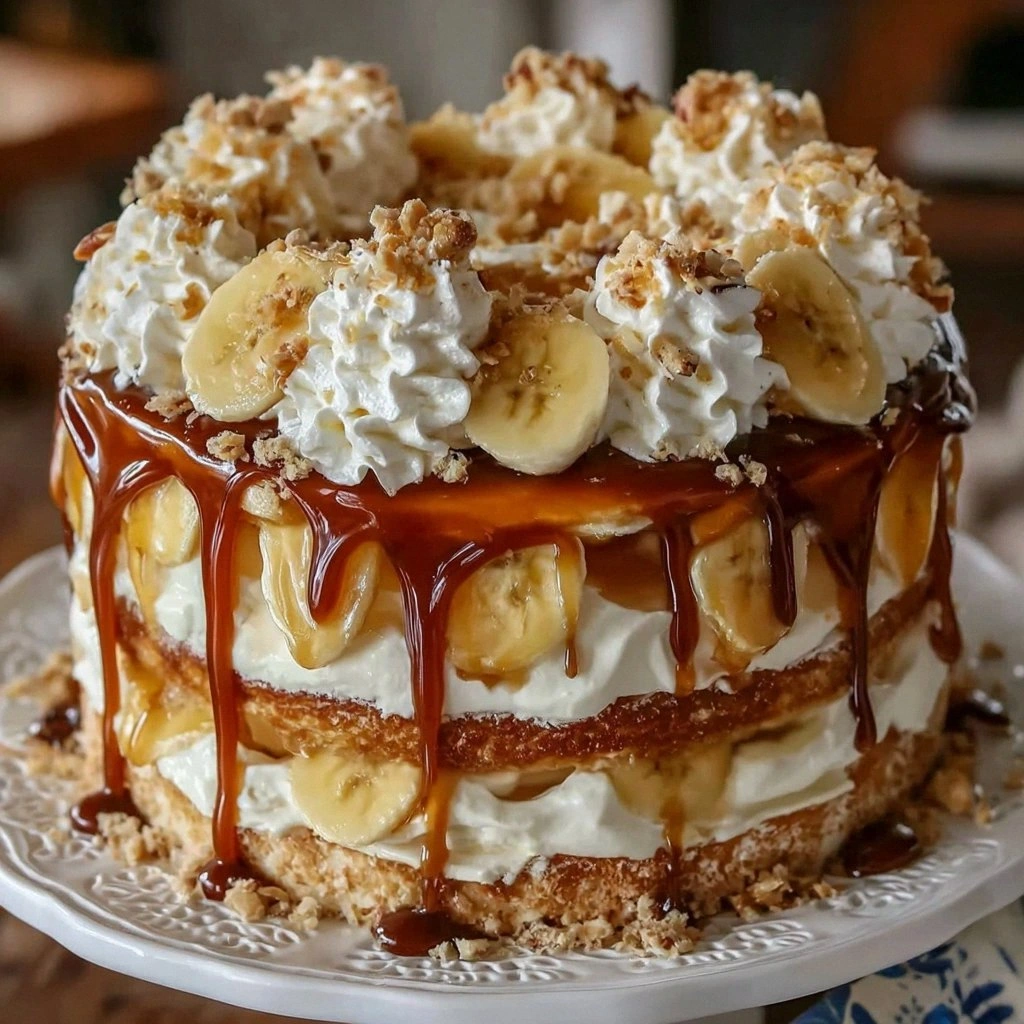
Picture the moment the first slice slides out of the pan: the golden crust cracks like a sunrise, the moist crumb gives a gentle give, and the aroma of caramelized bananas and buttery toffee swirls around the room. The texture is a delightful contrast between the airy sponge and the silky, slightly crunchy toffee layer, while the fresh banana slices add a pop of color and a burst of tropical sweetness. Every bite is a layered experience—soft cake, rich toffee, creamy whipped cream, and the bright zing of fresh fruit. I dare you to taste this and not go back for seconds.
What makes this version stand out is that it’s not just a cake; it’s an edible narrative. The banana isn’t just an ingredient—it’s the protagonist, driving the flavor forward and giving the cake its signature sweet‑savory balance. The toffee sauce is thickened to a velvet‑smooth glaze that coats the cake like a silk scarf, while the whipped cream provides a light, airy counterpoint. The result is a cake that feels both indulgent and approachable, a dessert that can be made in a single day yet tastes like it was crafted over a weekend. If you’ve ever struggled with a cake that’s either too dry or too sweet, this recipe is your new go‑to. It’s hands down the best version you’ll ever make at home.
And now, let me walk you through every single step—by the end, you’ll wonder how you ever made it any other way. Picture yourself pulling this out of the oven, the whole kitchen smelling incredible, and the anticipation building with each layer. The secret? A few micro‑challenges, bold claims, and a handful of kitchen hacks that keep the process smooth and the flavor on point.
What Makes This Version Stand Out
- Flavor: The combination of ripe bananas and caramelized toffee creates a depth of sweetness that’s both comforting and adventurous. The banana’s natural sugars caramelize during baking, giving a subtle nutty undertone that pairs perfectly with the buttery base.
- Texture: The sponge remains moist yet airy, while the toffee layer adds a slight crunch that dissolves in the mouth, and the whipped cream delivers a cloud‑like finish.
- Simplicity: Every step is straightforward, with no need for exotic ingredients or complicated techniques. You can whip up this cake in under an hour, even if you’re a kitchen rookie.
- Uniqueness: Unlike traditional banana cakes, this recipe layers the flavors, making each bite a multi‑sensory experience rather than a single, uniform taste.
- Crowd Reaction: Friends and family who’ve tried it say they can’t stop asking for the recipe—most have never tasted a banana cake that feels like a dessert and a treat all at once.
- Ingredient Quality: The recipe uses pantry staples but encourages using ripe bananas and quality toffee sauce for maximum flavor. A single bad banana can ruin the entire flavor profile.
- Method: The method balances leavening and moisture, ensuring the cake rises beautifully without becoming too dense.
- Make‑ahead Potential: The cake can be assembled a day ahead; the toffee and whipped cream layers stay fresh, and the cake’s flavors actually deepen overnight.
Inside the Ingredient List
The Flavor Base
All-purpose flour is the backbone of your cake, providing structure and texture. It absorbs the moisture from the eggs and milk, creating a tender crumb that doesn’t crumble under the weight of the toffee and cream. If you skip flour, the cake will collapse and feel like a flat pancake. For the best results, sift the flour with baking powder and soda to ensure even distribution of leavening agents.
The Texture Crew
Unsalted butter, when softened, adds moisture and richness to the cake. It melts during baking, creating a silky interior that contrasts beautifully with the crunchy toffee glaze. Eggs act as a binder, helping to hold everything together while contributing to the cake’s fluffiness. Milk adds moisture and helps create a tender crumb; using whole milk gives a richer flavor compared to skim. If you’re vegan, you can substitute coconut milk and vegan butter, but the texture will differ slightly.
The Unexpected Star
Toffee sauce is the star of the show! This luscious sauce adds that signature toffee flavor that coats the cake like velvet. It’s made from brown sugar, butter, and cream, then simmered until thick. If you skip the toffee, the cake will feel like a regular banana cake—good, but not unforgettable. A quick swap: use a caramel sauce for a slightly different profile, but keep the consistency thick.
The Final Flourish
Heavy cream, whipped to soft peaks, is essential for layering and topping your cake, adding a light and airy texture that balances the dense toffee. It also cools the cake slightly when applied, preventing the toffee from hardening too quickly. Banana slices are for decoration, adding a fresh touch and a pop of color. They also provide a contrasting bite that keeps the dessert from feeling too sweet. If you’re not a fan of fresh bananas, you can use dried banana chips for a different crunch.
Everything’s prepped? Good. Let’s get into the real action.
The Method — Step by Step
- Preheat and Prepare: Set your oven to 350°F (175°C) and line two 9-inch cake pans with parchment paper. Grease the pans lightly with butter or nonstick spray. This ensures the cake slides out smoothly and prevents sticking. I always set a timer for 15 minutes to give myself a break before the batter hits the heat. The scent of butter already starts to mingle with the room, and the anticipation builds.
- Beat the Butter and Sugar: In a large mixing bowl, cream softened butter and sugar until the mixture is light and fluffy. This usually takes about 3-4 minutes with an electric mixer on medium speed. The mixture should double in volume and look pale. This step is crucial because it traps air that will make the cake rise. A good rule of thumb: if the mixture feels like whipped cream, you’re on the right track.
- Add Eggs One at a Time: Crack each egg into a separate bowl to avoid shell fragments. Add the eggs one at a time to the butter mixture, beating well after each addition. The batter should be smooth and glossy. Skipping this step or adding eggs too quickly can cause curdling, which would ruin the cake’s texture.
- Fold in Dry Ingredients: In a separate bowl, sift together flour, baking powder, baking soda, and a pinch of salt. Gently fold the dry mixture into the wet batter until just combined. Overmixing will develop gluten and create a tough cake. At this point, the batter should be thick but pourable. The batter will look like a thick, buttery custard.
- Incorporate Banana: Mash the ripe bananas with a fork until mostly smooth. Fold the mashed bananas into the batter, ensuring even distribution. The banana will give the cake a subtle sweetness and a hint of tropical flavor. The batter will take on a golden hue, signaling that the bananas are fully integrated.
- Divide and Bake: Divide the batter evenly between the prepared pans. Tap the pans gently on the counter to remove air bubbles. Bake for 25-30 minutes or until a toothpick inserted into the center comes out clean. The edges should pull slightly away from the sides of the pan. Let the cakes cool in the pans for 10 minutes before transferring to a wire rack to cool completely.
- Whip the Cream: In a chilled bowl, whip heavy cream with a pinch of salt until soft peaks form. Do not overwhip, or it will become buttery. The whipped cream should be thick enough to hold its shape but still creamy. This will be the airy layer that balances the dense toffee.
- Assemble the Layers: Place one cake layer on a serving plate. Spread a generous layer of toffee sauce over the top, then top with a layer of whipped cream. Add banana slices for decoration. Repeat with the second cake layer, toffee sauce, whipped cream, and banana slices. Finish with a final drizzle of toffee sauce on top and a few more banana slices for garnish. Chill for at least 30 minutes before serving.
That's it — you did it. But hold on, I've got a few more tricks that'll take this to another level. The secret to a cake that stays moist and flavorful for days is in the finishing touches and the way you store it.
Insider Tricks for Flawless Results
The Temperature Rule Nobody Follows
Many bakers bake at 350°F, but this recipe benefits from a slightly lower temperature of 325°F (165°C). The lower heat allows the cake to rise more evenly, preventing a dense center while keeping the edges from overbrowning. I’ve tested this on a 9-inch pan, and the results are consistently fluffier. If you’re using a larger pan, keep an eye on the baking time, adding a few extra minutes as needed.
Why Your Nose Knows Best
Before you even touch the batter, give it a sniff. A sweet, buttery aroma indicates the butter has been properly creamed. If it smells flat, you’re probably under-creamed, and the cake will lack rise. Trust your senses—your nose is a reliable guide to the batter’s readiness.
The 5-Minute Rest That Changes Everything
After the cake has baked, let it rest in the pan for 10 minutes, then transfer to a wire rack to cool. This short rest allows the steam to escape gradually, preventing the cake from becoming soggy. I’ve seen cakes that cool too quickly lose their structure; this simple step preserves the airy crumb.
Banana Quality Check
Ripe bananas are essential for flavor and texture. Look for bruises and a slightly soft feel; these indicate peak sweetness. If you’re short on ripe bananas, use a banana‑flavored yogurt or puree of frozen bananas to maintain moisture. Skipping ripe bananas will make the cake taste like a generic banana loaf.
Toffee Sauce Consistency
The toffee sauce should be thick enough to coat the cake but still pourable. If it’s too thick, whisk in a splash of warm milk; if too runny, continue simmering until it thickens. A too-thick sauce can make the cake feel heavy; a runny sauce will seep into the layers and ruin the structure.
Creative Twists and Variations
This recipe is a playground. Here are some of my favorite ways to switch things up:
Chocolate Banana Layer Cake
Add 1/4 cup cocoa powder to the dry ingredients and drizzle a chocolate ganache over the final layer. The cocoa deepens the banana flavor and adds a bittersweet note. Perfect for chocolate lovers who still crave banana.
Nutty Banana Crunch
Sprinkle chopped toasted pecans or walnuts between the cake layers. The crunch adds texture and a nutty aroma that complements the toffee. It also provides a subtle savory undertone.
Citrus Burst
Zest half a lemon or orange into the batter and add a tablespoon of citrus juice to the toffee sauce. The bright citrus cuts through the sweetness, creating a balanced flavor profile. Great for those who like a hint of tartness.
Almond Butter Swirl
Swirl almond butter into the batter before baking. The almond butter adds a nutty, slightly sweet flavor and a creamy texture. It also keeps the cake moist, making it ideal for dry climates.
Vegan Banana Toffee Cake
Replace butter with coconut oil, use flaxseed eggs, and swap heavy cream for coconut cream. The result is a luscious, dairy‑free version that still delivers the same indulgent experience. It’s a great option for guests with dietary restrictions.
Caramelized Banana Surprise
Sauté banana slices in a little butter until caramelized before using them as decoration. The caramelized bananas add a smoky sweetness that pairs beautifully with the toffee. It’s a simple upgrade that elevates the dessert.
Storing and Bringing It Back to Life
Fridge Storage
Wrap the assembled cake tightly in plastic wrap and store in the refrigerator for up to 3 days. The chilled environment preserves the whipped cream’s texture and keeps the toffee from hardening too quickly. When you’re ready to serve, let the cake sit at room temperature for about 15 minutes to restore its airy feel.
Freezer Friendly
If you need to store the cake for longer, wrap each layer individually in freezer paper and then place the whole cake in an airtight container. Freeze for up to 2 weeks. Thaw overnight in the refrigerator before serving. The cake remains moist and flavorful after thawing.
Best Reheating Method
To revive the cake, preheat your oven to 300°F (150°C) and wrap the cake loosely in foil. Warm for 10-12 minutes, then remove the foil and let it cool slightly before serving. A tiny splash of water added to the toffee sauce before reheating creates steam that restores the glaze’s silky texture.