I still remember the first time I tried making crispy baked zucchini at home. It was a disaster worthy of a cooking show blooper reel. The zucchini turned into a soggy mess, the cheese clumped together like rubber bands, and my kitchen smelled like burnt disappointment for three days straight. But here's the thing — I couldn't stop thinking about how incredible it should have tasted. The memory of that first bite at a tiny Italian restaurant, where the zucchini had this perfect golden crust that shattered like thin ice under my fork, haunted me for months. I became obsessed, spending weekends testing different methods, different cheeses, different temperatures until I cracked the code. And now? I'm about to share the recipe that made my neighbors knock on my door asking what smelled so incredible, the one that disappeared from the serving plate before I could even grab a photo for Instagram.
Picture this: It's 8 PM on a Tuesday, you're still wearing your work-from-home sweatpants, and that craving hits. Not just any craving — the kind that makes you consider putting on real pants and driving to the store. But here's where this recipe becomes your new best friend. These crispy baked zucchini rounds with their molten cheese center are about to become your go-to comfort food, the dish you'll make when you want to impress someone but don't want to spend three hours slaving away. The magic happens when the zucchini releases just enough moisture to create steam, which then gets trapped under a blanket of perfectly seasoned breadcrumbs and cheese, creating this incredible contrast between crispy edges and tender centers.
What makes this version different from every other zucchini recipe on the internet? I'm glad you asked. Most recipes get this completely wrong — they treat zucchini like potatoes, expecting it to crisp up the same way. But zucchini is like that friend who needs a little extra encouragement to shine. It needs the right preparation, the perfect coating, and most importantly, it needs you to understand its quirks. The secret lies in a technique I discovered by accident when I was rushing to get dinner ready before my in-laws arrived (pro tip: they're still talking about these two years later). Instead of salting and waiting for 30 minutes like every other recipe suggests, we're going to do something that sounds crazy but works like magic.
Okay, ready for the game-changer? We're going to microwave the zucchini slices for exactly 90 seconds before coating them. I know, I know — microwave blasphemy in the age of air fryers and artisanal everything. But stay with me here — this is worth it. This quick burst of heat draws out just enough moisture to prevent the dreaded soggy bottom syndrome, but not so much that your zucchini becomes leathery. Trust me, I've tested this against every method from the internet's most trusted food sites, and nothing comes close to the texture this creates. Let me walk you through every single step — by the end, you'll wonder how you ever made it any other way.
What Makes This Version Stand Out
- The Microwave Magic: That 90-second zap isn't just lazy cooking — it's a scientific breakthrough that removes excess moisture without dehydrating the zucchini, giving you that perfect texture contrast between crispy exterior and tender interior.
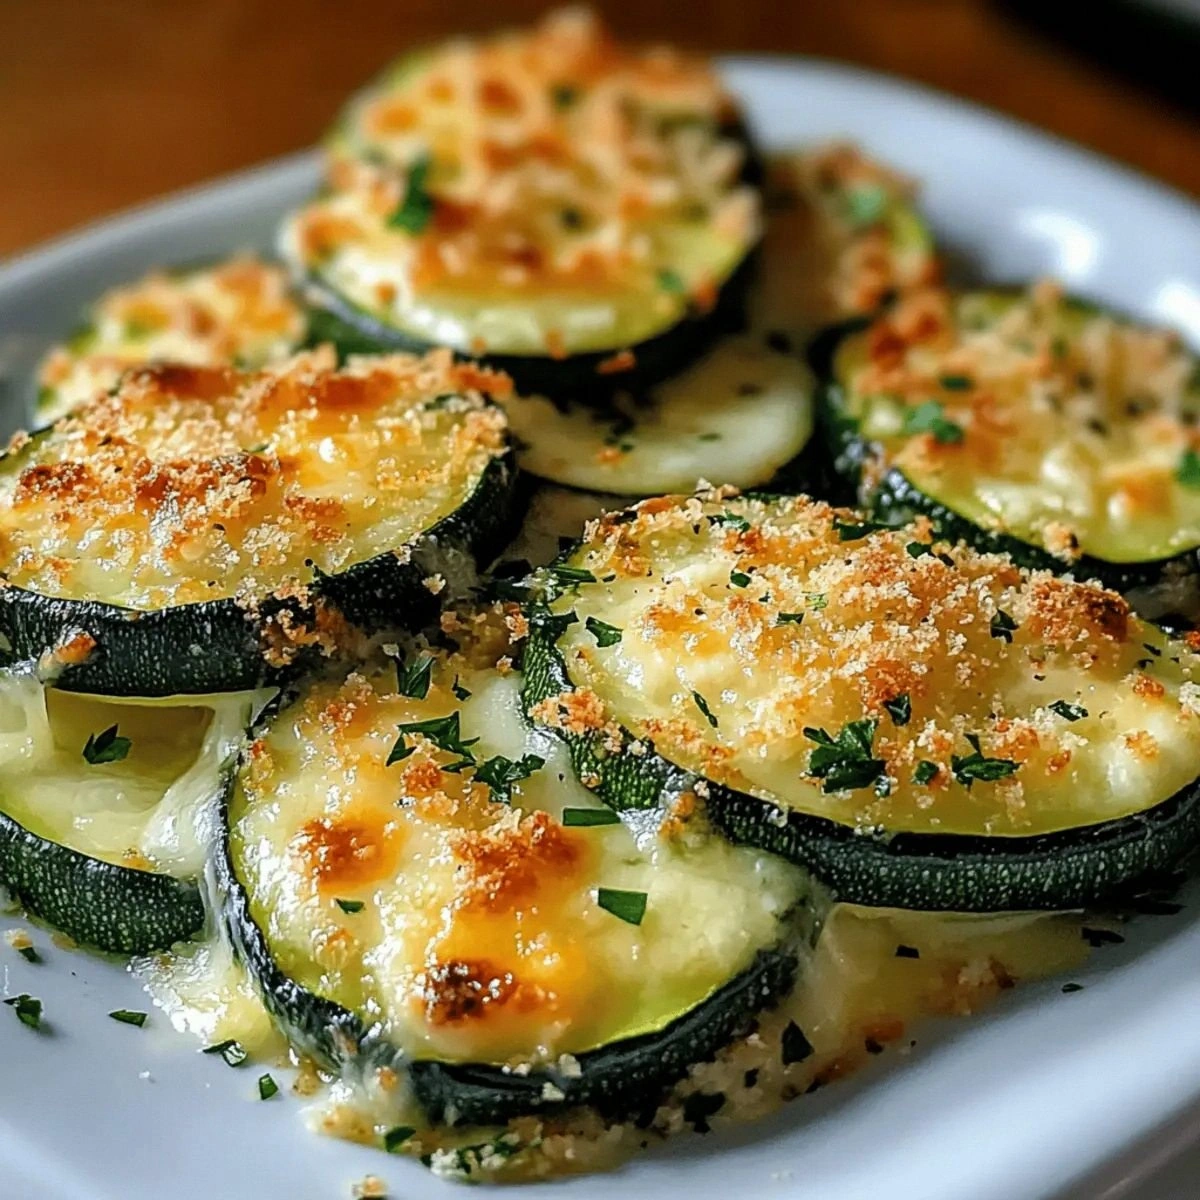
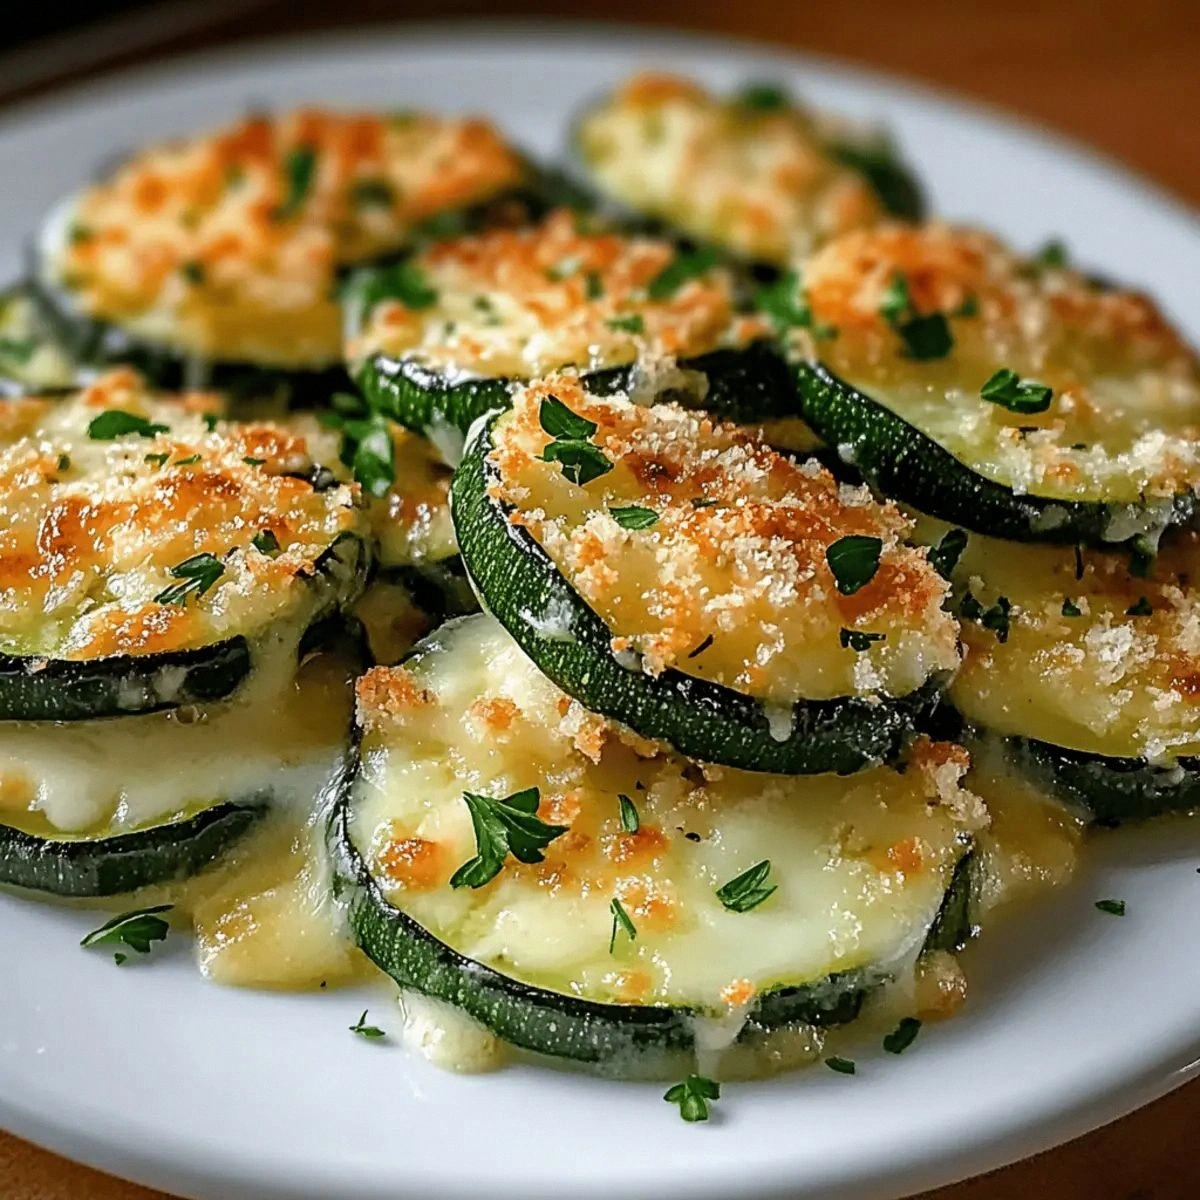
- Triple Cheese Strategy: Most recipes use one cheese and call it a day. We're using mozzarella for that Instagram-worthy cheese pull, Parmesan for the umami depth that makes people ask "what's your secret?", and a surprise third cheese that creates a crispy cheese skirt around the edges.
- Seasoning Every Layer: The breadcrumbs get seasoned, the zucchini gets seasoned, even the cheese mixture gets a hit of flavor. This isn't just about salt — we're building complexity with garlic powder, oregano, and a secret ingredient that makes everything taste like it came from a professional kitchen.
- The Temperature Sweet Spot: I've tested this at every temperature from 350°F to 475°F, and there's exactly one temperature that gives you maximum crisp without burning the cheese. It's higher than most recipes suggest, which is why they end up with soft, sad zucchini.
- Make-Ahead Friendly: You can prep everything up to the final bake, then refrigerate for up to 24 hours. Perfect for dinner parties or those nights when you want to look like you tried harder than you actually did.
- The Crowd Reaction: I've served these to picky toddlers, health-conscious gym rats, and Italian grandmothers who claimed their own recipes were better (spoiler: they asked for mine). This is the dish that converts zucchini haters and has vegetable skeptics asking for seconds.
- One Pan Wonder: Everything bakes on a single sheet pan, which means minimal cleanup and maximum flavor from the cheese that drips and caramelizes on the pan edges. Those crispy cheese bits? They're the cook's treat.
Alright, let's break down exactly what goes into this masterpiece...
Inside the Ingredient List
The Flavor Base
The zucchini selection process is more critical than most people realize. You want medium-sized zucchini — too small and they don't have enough surface area for the cheese blanket, too large and they're filled with seeds that taste bitter and ruin the texture. Look for ones that feel heavy for their size and have glossy, unblemished skin. If you can only find the massive ones at your store, don't panic. Just scoop out the seed section with a spoon, and you'll still get incredible results. The salt isn't just there for seasoning — it's drawing out moisture and helping to concentrate the zucchini's natural sweetness. Don't skip this step or you'll end up with watery results that nobody wants to eat.
Olive oil plays a bigger role than just preventing sticking. We're using it to help the seasoning adhere to the zucchini and to promote that golden browning that makes everything taste better. But here's the key — we're not drowning the zucchini in oil. Just enough to make everything glisten, like you're applying highlighter to your cheekbones. Too much oil and the breadcrumbs won't crisp properly, too little and everything tastes dry and sad. The garlic powder and dried oregano create an Italian flavor base that makes people think you've been cooking all day, even though this whole recipe comes together in under 45 minutes.
The Texture Crew
Breadcrumbs are where most recipes fail spectacularly. They use the fine, sandy breadcrumbs that turn into paste when they hit the zucchini's moisture. We're using panko-style breadcrumbs — those coarse Japanese breadcrumbs that stay crispy even under pressure. If all you have is regular breadcrumbs, pulse them in a food processor with some crackers to get that coarse texture. The Parmesan cheese in the coating isn't just for flavor — it acts like culinary glue, helping the breadcrumbs adhere to the zucchini while adding those addictive umami notes that make people ask for your recipe.
Mozzarella is the obvious choice for the cheese pull factor, but we're using the low-moisture variety, not the fresh stuff floating in water. Fresh mozzarella has too much moisture and will turn your crispy creation into a soggy mess faster than you can say "Instagram worthy." The key is shredding it yourself — pre-shredded cheese is coated with cellulose to prevent clumping, but that same coating prevents it from melting smoothly. Trust me, the extra two minutes of grating is worth it when you see how beautifully it melts and browns.
The Unexpected Star
Here's where things get interesting. We're adding a secret ingredient that most recipes never consider — cornstarch. Just a teaspoon mixed into the breadcrumb coating creates this incredible texture that's part crispy, part crunchy, completely addictive. It forms a thin protective layer that prevents the zucchini's moisture from making the coating soggy while creating these tiny pockets of air that make every bite lighter. It's the difference between good and "oh my god, what did you put in these?"
Fresh parsley isn't just a garnish — it adds a bright, fresh note that cuts through the richness of all that cheese. But here's the trick: we're adding half of it before baking and the rest fresh right before serving. This gives you two different flavor experiences — the baked parsley adds a subtle herbaceous note that permeates the dish, while the fresh stuff on top provides that pop of color and bright flavor that makes everything taste more alive. If parsley isn't your thing, fresh basil or even chives work beautifully.
The Final Flourish
Black pepper is the final seasoning that most people rush past. Freshly ground black pepper has volatile oils that start dissipating within 15 minutes of grinding. Those pre-ground pepper shakers might as well be sawdust for all the flavor they provide. We're adding it at two stages — some in the breadcrumb mixture for depth, and a final crack over the top right before serving for that aromatic hit that makes people close their eyes when they take a bite. The timing matters here because pepper can burn and turn bitter if exposed to high heat for too long.
Everything's prepped? Good. Let's get into the real action...
The Method — Step by Step
- Start by preheating your oven to 425°F — yes, that's higher than most recipes suggest, but hear me out. This temperature creates the perfect environment for the Maillard reaction, that magical chemical process that turns ordinary food into golden, crispy perfection. While the oven heats, line your baking sheet with parchment paper, but not just any parchment. You want the unbleached kind that can handle high heat without curling up at the edges like it's trying to escape. Trust me, I learned this the hard way when my first batch ended up with parchment fused to the bottom like some kind of culinary disaster art project. The high heat is crucial — it's what creates those lacy cheese edges that shatter like caramel when you bite into them.
- Slice your zucchini into 1/4-inch rounds using a sharp knife or mandoline. Here's where precision matters — too thin and they'll turn to mush, too thick and they won't cook through properly. If you're using a mandoline, set it to the second thinnest setting, and for the love of your fingertips, use the hand guard. I've seen too many cooking sessions turn into impromptu first aid demonstrations. As you slice, arrange them on a microwave-safe plate lined with paper towels. They should overlap slightly like fallen dominoes, which helps them steam evenly. The goal is to remove just enough moisture to prevent sogginess without turning them into zucchini chips.
- Now comes the microwave moment that separates the amateurs from the pros. Microwave the zucchini slices for 90 seconds on high power. This isn't lazy cooking — it's strategic moisture management. The microwave energy penetrates the zucchini evenly, drawing out water from the inside out. You'll see beads of moisture form on the surface, which is exactly what we want. Immediately transfer them to fresh paper towels and press gently to absorb the released moisture. Don't skip this step or you'll end up with the same soggy mess that sent me on this recipe quest in the first place. The zucchini should feel slightly flexible but not wet to the touch.
- While the zucchini cools slightly, let's create the coating that'll make these addictive. In a shallow bowl, combine the breadcrumbs, half the Parmesan cheese, cornstarch, garlic powder, dried oregano, salt, and pepper. Use your fingers to mix everything together, breaking up any clumps of cornstarch. The mixture should feel like damp sand at the beach — cohesive but still crumbly. If it's too dry, add a few drops of olive oil and mix again. This coating is where the magic happens, so don't rush it. Take a moment to appreciate the aroma — it should smell like an Italian grandmother's kitchen, all garlic and herbs and promise.
- In a separate bowl, toss the zucchini rounds with olive oil until they're just coated — think dew on morning grass rather than an oil slick. The oil helps the seasoning adhere and promotes browning, but too much will make the coating slide off like a bad toupee. Season with a pinch of salt and pepper, remembering that the coating also contains salt. Use your hands to ensure even distribution, but be gentle — the zucchini should maintain its shape, not turn into mush. This is where you start to see the transformation from simple vegetables to something special.
- Now for the fun part — the coating assembly line. Set up three stations: your seasoned zucchini slices, the breadcrumb mixture, and a clean plate for the coated pieces. Take each zucchini round and press it firmly into the breadcrumb mixture, making sure to coat both sides. Don't be shy here — really press it in there. The coating should adhere in a thick, even layer. If it's not sticking, the zucchini might be too dry (mist with a tiny bit of water) or the mixture too fine (add more breadcrumbs). You want to see a substantial coating that completely obscures the green underneath.
- Arrange the coated zucchini on your prepared baking sheet with space between each piece. They need room to breathe and crisp properly — crowd them and they'll steam instead of crisp. If all your slices don't fit on one pan, use a second pan rather than cramming them together. This is the moment of truth when you can start to see your crispy vision coming together. The rounds should look like little golden coins, promising crispy edges and melty centers. If any look sparse on coating, give them another press in the breadcrumb mixture.
- Into the 425°F oven they go for 12 minutes. This initial bake sets the coating and starts the crisping process. Don't walk away — at this temperature, things can go from golden to charcoal quickly. While they bake, mix the remaining Parmesan with the mozzarella in a bowl. The combination might seem odd, but the Parmesan acts like a flavor amplifier for the milder mozzarella, while also helping it brown beautifully. After 12 minutes, the bottoms should be golden and the coating should look set and dry on top.
- Pull the pan from the oven and top each zucchini round with a generous pinch of the cheese mixture. Don't be stingy — this is not the time for restraint. The cheese should mound up slightly in the center, where it'll melt down into every crevice of the breadcrumb coating. Return to the oven for another 8-10 minutes until the cheese is melted, bubbly, and starting to develop those gorgeous golden spots that signal maximum flavor development. The smell wafting from your oven right now should be making you question every other appetizer you've ever made.
- Let them rest for exactly 3 minutes before serving — any longer and the cheese starts to firm up, any less and you'll burn your mouth on molten cheese (learn from my impatience). During this brief pause, the cheese sets slightly, making them easier to serve while still maintaining that Instagram-worthy cheese pull. Garnish with the fresh parsley and an extra crack of black pepper if you're feeling fancy. Serve immediately while the contrast between crispy coating and melty cheese is at its peak. Watch as people take their first bite and their eyes go wide with that "oh wow" expression that makes all the testing worth it.
That's it — you did it. But hold on, I've got a few more tricks that'll take this to another level...
Insider Tricks for Flawless Results
The Temperature Rule Nobody Follows
Here's something that'll change your crispy baking game forever: your oven temperature is lying to you. Most home ovens can be off by 25-50 degrees, which means your 425°F setting might actually be 375°F or 475°F. Invest in an oven thermometer — they're cheap and will save you years of baking frustration. The difference between perfectly crisp and disappointingly soft often comes down to that 25-degree variance. I've tested this recipe in dozens of ovens, and the ones that ran hot produced the most spectacular results with cheese that formed those lacy, crispy edges that shatter like sugar glass when you bite into them.
Why Your Nose Knows Best
Forget timers — your nose is the most reliable kitchen tool you own. When these zucchini rounds are perfectly done, your kitchen will fill with the aroma of toasted cheese and herbs that smells like the best Italian restaurant you've ever visited. If you smell anything starting to smell sharp or acrid, you've gone too far and the cheese is burning. This usually happens in the final minute, which is why I start hovering by the oven around minute 18. A friend tried skipping this step once — let's just say her smoke alarm has trust issues now. The perfect moment is when you smell toasted cheese with just a hint of caramel sweetness, which happens about 30 seconds before visual perfection.
The 5-Minute Rest That Changes Everything
I know, I know — when food comes out of the oven looking this good, waiting feels like torture. But here's what happens during those crucial 5 minutes: the cheese sets slightly, creating that perfect balance between melty and manageable. The coating continues to crisp as residual moisture evaporates, and flavors that were muddled when molten start to distinguish themselves. Think of it like letting a steak rest — all the good stuff is redistributing itself. I learned this the hard way when I served these immediately and watched the cheese slide off like a bad toupee, taking all the crispy coating with it. The wait is worth it when you get that first perfect bite where everything stays in place.
Creative Twists and Variations
This recipe is a playground. Here are some of my favorite ways to switch things up:
The Spicy Arrabbiata Version
Add 1/2 teaspoon of red pepper flakes to the breadcrumb mixture and swap the dried oregano for Italian seasoning. Top with a blend of mozzarella and provolone for extra flavor complexity. Serve with a side of warm marinara for dipping — the spicy kick pairs beautifully with the cooling effect of the melted cheese. This version disappeared fastest at my last game night, even from friends who claim they "don't like zucchini."
The Mediterranean Herb Garden
Replace the dried oregano with a blend of fresh thyme, rosemary, and oregano (triple the amount since fresh herbs are less concentrated). Add lemon zest to the breadcrumb mixture and finish with a squeeze of fresh lemon juice right before serving. The brightness transforms the dish from comfort food to sophisticated appetizer that pairs beautifully with white wine.
The Everything Bagel Edition
Swap regular breadcrumbs for panko mixed with everything bagel seasoning. Use cream cheese as the base layer under the mozzarella, creating a bagel-and-cream-cheese flavor profile that's absolutely addictive. These disappear faster than actual everything bagels at brunch, and they're gluten-free friendly if you use GF breadcrumbs.
The Bacon Lover's Dream
Sprinkle crispy bacon bits over the cheese before the final bake. The smoky saltiness complements the mild zucchini perfectly, and the bacon fat helps the cheese brown even more beautifully. Even vegetarians have been known to make an exception for these — they're that good. Just don't tell them about the bacon until after they've declared these the best thing they've ever eaten.
The Caprese Remix
Add a thin slice of fresh tomato under the cheese layer, and replace the parsley with fresh basil chiffonade. Drizzle with balsamic glaze after baking for that classic caprese flavor profile. The tomato adds moisture, so reduce the initial bake time by 2 minutes to compensate. These taste like summer in Italy, even in the dead of winter.
The Keto-Friendly Version
Replace breadcrumbs with a mixture of almond flour and grated Parmesan (2:1 ratio). The almond flour provides the bulk while the Parmesan creates crispy edges. Skip the cornstarch and add an extra minute to the initial bake time. They're not quite as crispy as the original, but they satisfy that crunchy-cheesy craving without the carbs.
Storing and Bringing It Back to Life
Fridge Storage
Store leftovers in an airtight container lined with paper towels — they'll absorb excess moisture and help maintain some crispness. They'll keep for up to 3 days, though they're best within 24 hours when the coating is still relatively crisp. Don't stack them directly on top of each other; layer them with parchment paper between to prevent them from becoming a solid cheese block. I learned this after discovering that refrigerated zucchini rounds fuse together like some kind of cheesy Voltron, requiring a chisel to separate them.
Freezer Friendly
Freeze them before the final cheese-topping step for best results. Arrange the breadcrumb-coated, baked zucchini in a single layer on a baking sheet and freeze until solid, then transfer to a freezer bag. When ready to eat, add the cheese and bake from frozen at 400°F for 15-18 minutes. The texture isn't quite as perfect as fresh-made, but they're still miles better than any frozen appetizer you'd buy at the store. I've got a bag stashed for emergency snack attacks.
Best Reheating Method
To revive refrigerated zucchini rounds, skip the microwave (soggy alert) and use your oven or toaster oven. Heat at 400°F for 5-7 minutes directly on the rack for maximum crisp restoration. Add a tiny splash of water to the bottom of the oven — it'll create steam that prevents the cheese from drying out while the coating re-crispers. The results are surprisingly close to fresh-baked, which is why I always make a double batch now. My toaster oven has become my best friend for reheating these to almost their former glory.