Picture this: it’s a rainy Sunday afternoon, the kitchen lights flicker, and your friend bursts through the door demanding a “tropical dessert” that will lift everyone’s spirits. I, ever the culinary daredevil, grabbed a can of crushed pineapple, a handful of sugar, and a pinch of curiosity. The first batch I made was a disaster—dry, bland, and lacking that sunshine‑kissed punch that a pineapple cookie should deliver. I tasted it, sighed, and whispered, “I dare you to taste this and not go back for seconds.” That moment sparked a relentless quest for the perfect balance of sweetness, moisture, and tropical flair.
From the moment the butter met the sugar, a fragrant cloud of vanilla and caramel drifted through the kitchen, coaxing the senses into a sweet reverie. The sight of golden dough, the sound of a spoon gliding through the mixture, the feel of the dough’s silky texture under your fingers—all of it was a prelude to a cookie that would sing with a subtle, sun‑kissed melody. The aroma of toasted pineapple and toasted coconut mingled with the buttery scent, creating an olfactory promise of bliss. Each bite, when finally taken, would burst with moist pineapple, a hint of brown sugar caramel, and a gentle crunch from shredded coconut, leaving a lingering warmth that felt like a tropical vacation.
What makes this version stand out from the countless other pineapple cookies out there? It’s the meticulous harmony of ingredients and techniques that elevate it from ordinary to unforgettable. The dough is intentionally moist yet sturdy, thanks to a precise ratio of butter to sugar and a touch of crushed pineapple that adds natural sweetness and moisture without diluting the flavor. The use of both granulated and brown sugar creates a layered sweetness, giving the cookies a caramelized depth that lingers on the tongue. And the optional shredded coconut isn’t just a garnish—it’s an integral part of the texture, offering a subtle, nutty crunch that contrasts beautifully with the chewy interior.
But that’s not all—there’s a secret technique that most recipes overlook: chilling the dough for 30 minutes before baking. This simple step tames the spread, locks in moisture, and ensures each cookie holds its shape while still achieving that perfect golden edge. I’ll walk you through every single step, from mixing to baking, and by the end, you’ll wonder how you ever made it any other way.
What Makes This Version Stand Out
- Flavor Depth: Combining granulated and brown sugar creates a caramelized sweetness that pairs perfectly with the tartness of pineapple. The result is a cookie that feels layered and complex rather than flat.
- Moisture Balance: Crushed pineapple is drained thoroughly, yet its natural juices infuse the dough, giving the cookies a luscious, tropical bite without making them soggy.
- Texture Contrast: The optional shredded coconut adds a subtle crunch that breaks up the chewy center, making each bite a delightful sensory experience.
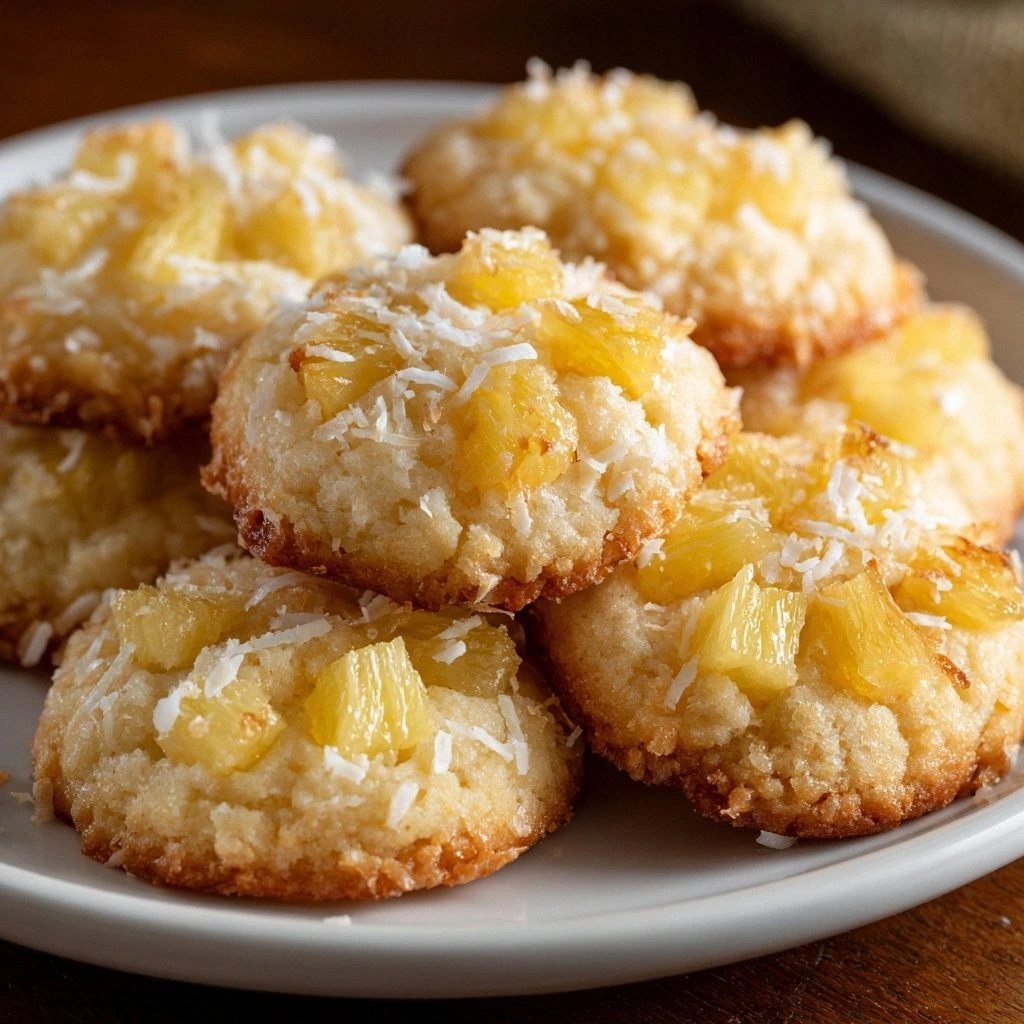
- Visual Appeal: The golden edges and speckled coconut give the cookies a professional, bakery‑like look that impresses guests at any gathering.
- Time Efficiency: With a simple 30‑minute chill, the dough is ready to bake in no time, making this recipe a go‑to for last‑minute dessert cravings.
- Make‑Ahead Friendly: The dough can be prepared a day ahead and stored in the fridge, allowing you to focus on other tasks while the cookies bake to perfection.
- Ingredient Quality: Using real vanilla extract and high‑quality butter elevates the flavor profile, turning a basic cookie into a gourmet treat.
- Scalability: The recipe scales cleanly, thanks to the precise ingredient ratios and a clear serving adjuster in the recipe card.
Inside the Ingredient List
The Flavor Base
Unsalted butter is the backbone of these cookies, providing richness and a silky mouthfeel. Softened to room temperature, it blends smoothly with the sugars, creating a homogeneous batter that locks in moisture. If you substitute salted butter, be sure to reduce the added salt by half to avoid an overly salty finish. Butter also carries the vanilla extract, amplifying its aromatic notes throughout each bite.
The Texture Crew
Granulated sugar and brown sugar work together to balance crispness and chew. Granulated sugar contributes to a crisp edge, while brown sugar adds a subtle molasses undertone that deepens the flavor. Should you prefer a lighter cookie, replace half the brown sugar with honey; it will add a floral sweetness and a slightly sticky texture. Remember, the ratio of sugars is key—altering it too drastically will change the cookie’s structure.
The Unexpected Star
Crushed pineapple is the star that sets this recipe apart. Its natural acidity cuts through the sweetness, preventing the cookie from feeling cloying. Drain the pineapple thoroughly; excess liquid will make the dough too wet, causing the cookies to spread excessively. If you’re craving a different tropical twist, try using frozen pineapple chunks that have been thawed and drained; they provide a slightly firmer bite.
The Final Flourish
All-purpose flour gives the cookies body, while baking powder and a pinch of salt lift the dough and balance flavors. The baking powder should be fresh; old leavening agents can leave a metallic taste. If you’re gluten‑free, replace the flour with a 1:1 gluten‑free blend that includes xanthan gum for structure. The shredded coconut, though optional, adds a nutty crunch and a hint of tropical aroma that elevates the cookie’s profile.
Everything’s prepped? Good. Let’s get into the real action.
The Method — Step by Step
- In a large bowl, cream 1 cup of unsalted butter with 1 cup of granulated sugar until the mixture is light and fluffy, about 3 to 4 minutes. The creaming process incorporates air, ensuring a tender crumb. As the butter softens, the sugar crystals begin to dissolve, creating a silky base that’s ready for the next step.
- Beat in 1 cup of brown sugar, 2 large eggs, and 1 teaspoon of pure vanilla extract. The eggs act as a binder, giving the cookies structure, while the vanilla adds a fragrant warmth. Stir until the mixture is uniform, and watch the batter slowly thicken—a sign that the sugars are fully integrated.
- Whisk together 2 cups of all‑purpose flour, 2 teaspoons of baking powder, and a 1/2 teaspoon of salt. The leavening agent ensures the cookies rise slightly, giving them a light, airy interior. Sifting the dry ingredients helps prevent clumps, ensuring a smooth batter.
- Gradually fold the dry mixture into the wet batter, using a spatula or wooden spoon. Mix just until the flour is incorporated—over‑mixing can develop gluten, leading to tough cookies. The batter should be thick yet pourable, with a consistency similar to a thick pancake batter.
- Fold in 1 cup of drained crushed pineapple and, if desired, 1 cup of shredded coconut. The pineapple adds moisture and a bright flavor, while the coconut introduces a delightful crunch. Ensure the pineapple is evenly distributed; this prevents pockets of excess moisture.
- Cover the dough with plastic wrap and chill in the refrigerator for 30 minutes. This step is critical: it firms the butter, allowing the cookies to hold their shape during baking. If you’re short on time, you can bake immediately, but expect slightly thinner cookies.
- Preheat the oven to 350°F (175°C). Line a baking sheet with parchment paper to prevent sticking. The even heat ensures a consistent bake across all cookies.
- Bake for 12 to 15 minutes, or until the edges are golden brown and the centers are set. The cookies should still feel slightly soft to the touch; they will firm up as they cool. Removing them at the right moment preserves the chewy interior.
- Let the cookies cool on the baking sheet for 5 minutes, then transfer them to a wire rack to cool completely. This step allows steam to escape, preventing sogginess. Once cooled, the cookies are ready to be devoured or stored.
That’s it—you did it. But hold on, I’ve got a few more tricks that will take this to another level. These insider tips will help you perfect the texture, flavor, and presentation of every batch.
Insider Tricks for Flawless Results
The Temperature Rule Nobody Follows
While most bakers rely on the oven’s dial, the real secret is using an oven thermometer. A 350°F reading on the dial can actually be 360°F in reality. By calibrating your oven, you’ll avoid overbaking and maintain that chewy center. I once baked at 350°F, only to find my cookies were dry; after calibrating, the next batch was silky.
Why Your Nose Knows Best
Trust your olfactory senses. As the cookies bake, a sweet, caramelized aroma will fill the kitchen. That scent signals the sugars are caramelizing just right. If the smell is too sharp, the cookies are overbaked; if it’s faint, they’re underbaked. I always pause a minute before the timer ends to inhale the aroma and decide.
The 5-Minute Rest That Changes Everything
After baking, let the cookies rest on the sheet for exactly five minutes. During this time, the heat distributes evenly, and the structure sets. Skipping this step can result in cookies that crumble when you pick them up. The five‑minute rest also allows the residual heat to finish the caramelization process, giving a richer flavor.
Chill for a Chewy Finish
If you prefer a chewier cookie, chill the dough for an extra 30 minutes before baking. The cold butter solidifies, preventing the dough from spreading too much. I’ve found that this trick turns a slightly dry cookie into a moist, chewy delight that’s hard to resist.
Serve with a Twist
Serve the cookies warm with a scoop of vanilla ice cream or a drizzle of caramel sauce. The contrast of warm, chewy cookie and cold, creamy dessert elevates the experience. It’s a simple way to transform an everyday treat into a showstopper for guests.
Creative Twists and Variations
This recipe is a playground. Here are some of my favorite ways to switch things up:
Chocolate‑Chunk Pineapple Cookie
Swapping 1 cup of shredded coconut for 1 cup of dark chocolate chunks gives a rich, bittersweet twist. The chocolate pairs beautifully with the pineapple’s acidity, creating a complex flavor profile that chocolate lovers adore.
Almond‑Infused Delight
Add 1/2 cup of sliced almonds to the dough for a nutty crunch. The almonds also absorb some of the pineapple juice, giving the cookies a subtle, toasted almond flavor that complements the tropical sweetness.
Gluten‑Free Paradise
Replace the all‑purpose flour with a gluten‑free blend that contains xanthan gum. Maintain the same ratios, and the cookies will rise properly and hold their shape, giving you a gluten‑free version that doesn’t compromise on taste.
Spiced Pineapple Cookie
Add 1 teaspoon of ground ginger and a pinch of cinnamon to the dry mix for a warm, spicy undertone. This variation brings an extra layer of depth, making the cookies perfect for a fall gathering.
Low‑Sugar Tropical Cookie
Reduce the granulated sugar by half and replace it with stevia or monk fruit sweetener. The resulting cookies are lighter on sugar but still maintain the tropical flavor, making them ideal for a health‑conscious crowd.
Miniature Pineapple Bites
Use a 1/4 teaspoon of baking powder and roll the dough into 1-inch balls for bite‑sized treats. These mini cookies are perfect for parties, allowing guests to sample a variety of flavors without getting overwhelmed.
Storing and Bringing It Back to Life
Fridge Storage
Store the cooled cookies in an airtight container at room temperature for up to a week. The airtight seal prevents moisture from seeping in, preserving the cookies’ chewy texture. If you notice them drying out, place a slice of bread in the container; the bread will release moisture and keep the cookies soft.
Freezer Friendly
For longer storage, freeze the cookies in a single layer on parchment paper for 2–3 months. Once frozen, transfer them to a freezer‑safe bag. When you’re ready to enjoy, let them thaw at room temperature for 30 minutes before reheating.
Best Reheating Method
Reheat frozen or refrigerated cookies in a 350°F oven for 5–7 minutes. Add a tiny splash of water to the bottom of the baking sheet to create steam; this trick keeps the cookies from drying out and restores their original softness. Let them cool on a wire rack before serving.