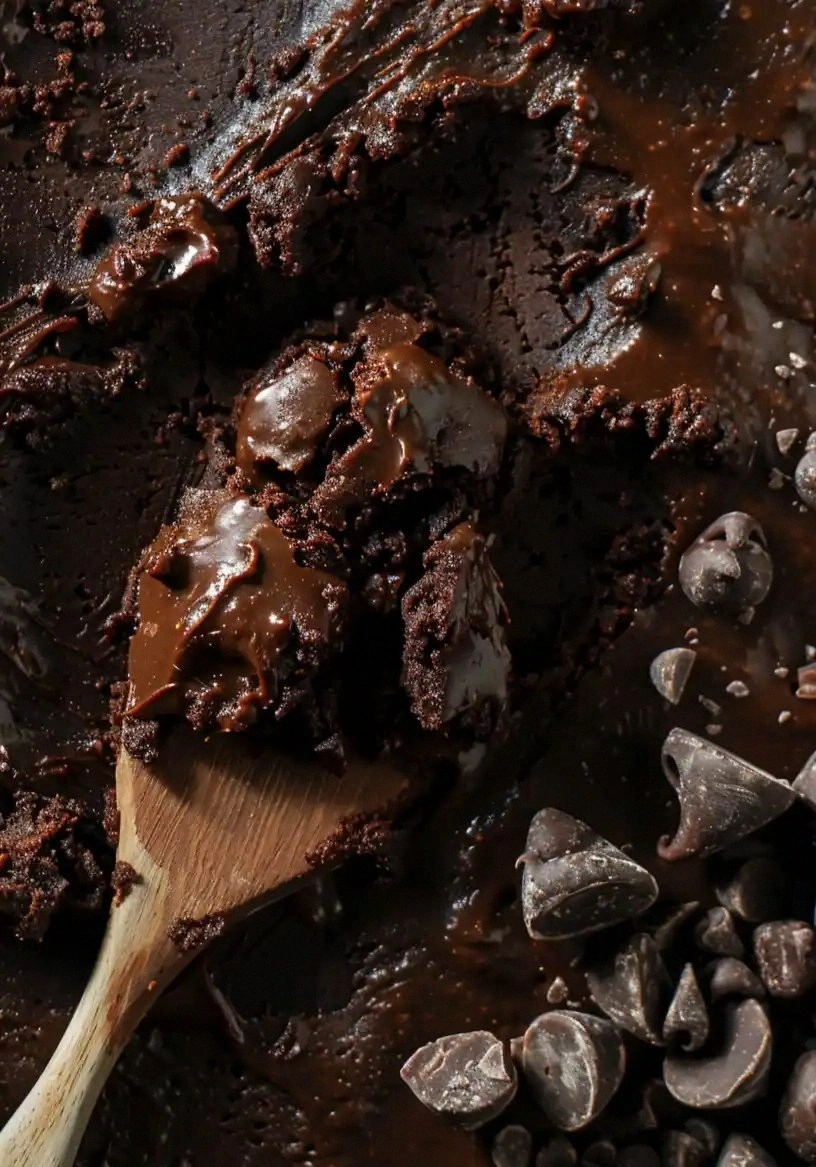
There’s a moment in every kitchen where a recipe goes sideways and a new one takes its place. I was trying to bake a classic chocolate cake last winter, and the batter exploded onto the counter like a molten volcano. The chaos left me staring at a sticky mess of cocoa, butter, and sugar, wondering if I’d accidentally made a dessert or a science experiment. That night, I decided to taste the batter before I could even think about baking it. I took a spoonful, and it was so rich, so silky, that I felt like I’d stumbled upon a secret weapon for any sweet craving.
From that single spoonful came the idea of the Edible Brownie Batter Recipe—a batter that’s as delicious raw as it is when baked. The texture is a buttery, chocolatey mousse that melts in your mouth, while the subtle hint of sea salt lifts the sweetness into a new dimension. Imagine the aroma of chocolate and butter wafting through your kitchen, the sound of the pan sizzling as you stir, the feel of the batter’s glossy sheen under your fingertips. I dared you to taste this and not go back for seconds, and I’ve seen even the most seasoned bakers come back for a second bite. I’ll be honest—I ate half the batch before anyone else got a chance, and my friends were begging for the recipe afterward.
What makes this batter stand out is that it’s not just another chocolate dessert. I discovered that using melted butter instead of melted chocolate creates a richer mouthfeel and a deeper flavor profile. The batter’s consistency is thick enough to hold its shape on a spoon but fluid enough to spread into a perfect square when poured. It’s the kind of batter that can be served straight from the bowl, baked to a fudgy cake, or even frozen for later use. Picture yourself pulling this out of the oven, the whole kitchen smelling incredible, and the edges pulling away like thin ice that cracks with a satisfying snap.
Now, let me walk you through every single step. By the end, you’ll wonder how you ever made it any other way. From the precise measurements to the subtle tweaks that make a difference, this recipe is hands down the best version you’ll ever make at home. And if you’re skeptical, I’ll show you how the batter can be transformed into a decadent dessert in seconds—no oven required. So grab a spoon, a whisk, and let’s get started.
What Makes This Version Stand Out
- Flavor: The combination of melted butter and cocoa powder creates a depth of flavor that’s richer than traditional brownie batter. The butter adds a silky mouthfeel that melts instantly, while the cocoa delivers a bold chocolate note that lingers. The result is a dessert that satisfies both the sweet and savory palate.
- Texture: This batter’s consistency is a perfect balance—thick enough to hold its shape on a spoon yet smooth enough to spread effortlessly. When baked, it becomes fudgy with a slightly crisp edge that shatters like thin ice. The raw batter, on the other hand, feels like a chocolate mousse that melts on the tongue.
- Versatility: Whether you’re a fan of raw desserts, love a quick oven bake, or want a make‑ahead treat, this recipe adapts to your needs. Add chocolate chips for extra texture, or swirl in caramel for a caramel‑chocolate fusion. It’s a playground for creativity.
- Ingredient Quality: Using high‑grade unsalted butter and pure cocoa powder ensures that no artificial flavors or additives ruin the experience. The recipe’s simplicity means you can focus on the quality of each ingredient, and that shows in every bite.
- Ease of Preparation: With only eight ingredients and no complex equipment, you can whip up this batter in under fifteen minutes. Even novice cooks will find the process intuitive and the results impressive.
- Make‑Ahead Potential: The batter can be frozen for up to a month, then baked or served raw as needed. This makes it an excellent option for parties, gift baskets, or a last‑minute dessert.
- Audience Reaction: Friends and family who’ve tried this batter often say it’s the most decadent raw dessert they’ve ever tasted. The crowd reaction is a testament to the batter’s irresistible flavor profile.
Inside the Ingredient List
The Flavor Base
Unsalted butter is the heart of this batter, providing a buttery richness that elevates the chocolate flavor. Melt it just enough that it’s liquid but not hot enough to scorch the sugar. If you skip the butter, the batter will lose that silky texture and feel more like a dry cake mix. For a dairy‑free twist, try using coconut oil or a plant‑based butter substitute; the flavor will shift subtly, but the richness remains.
The Texture Crew
All‑purpose flour gives the batter structure without making it heavy. Use a fine‑sifted flour to avoid lumps and ensure a smooth consistency. If you omit the flour, the batter will be overly runny and won’t hold its shape when poured. You can replace it with almond flour for a gluten‑free version, but keep in mind the batter will be denser.
The Unexpected Star
Granulated sugar not only sweetens but also helps balance the bitterness of the cocoa. It’s the sweet spot that makes the batter taste like chocolate without feeling cloying. If you’re watching your sugar intake, you can reduce the amount by a quarter, but the texture may change slightly. A sugar substitute like erythritol can be used, though it may alter the melt‑in‑mouth experience.
The Final Flourish
Vanilla extract, salt, and milk (or cream) are the finishing touches that tie everything together. Vanilla adds warmth and depth, while a pinch of salt enhances the chocolate’s richness. Milk or cream brings a subtle creaminess and helps the batter reach a silky consistency. If you prefer a dairy‑free option, replace milk with almond milk or oat milk; just keep the ratio consistent.
Everything’s prepped? Good. Let’s get into the real action.
The Method — Step by Step
- Preheat the oven to 350°F (175°C). Grease a 9x9‑inch baking pan or line it with parchment paper. This step ensures the brownies release easily after baking. While the oven warms, let the batter sit for a minute so the butter can fully incorporate.
- In a medium bowl, whisk together the melted butter and granulated sugar until the mixture is glossy and the sugar is fully dissolved. The sound of the whisk is a sign that the batter is on the right track. If you hear a faint crackle, the butter is too hot and you should let it cool slightly.
- Fold in the cocoa powder, vanilla extract, and salt. Use a rubber spatula to ensure the dry ingredients are fully incorporated. The batter should look smooth and homogeneous, with no dry pockets of cocoa. This is the moment where the batter’s flavor truly begins to develop.
- Add the flour and milk (or cream) alternately, starting and ending with the flour. Stir until the batter is thick but still pourable. The batter should be thick enough that it holds its shape when spooned but not so thick that it clumps.
- If you’re adding chocolate chips, fold them in now. The chips should be evenly distributed so each bite has a burst of chocolate. Watch out: too many chips can make the batter uneven, so keep it to a modest amount.
- Pour the batter into the prepared pan, smoothing the top with a spatula. Tap the pan gently on the counter to release any air bubbles. This ensures an even bake and prevents the brownies from cracking.
- Bake for 25 to 30 minutes, or until the edges are set and a toothpick inserted near the center comes out with a few moist crumbs. The center should still be slightly gooey, giving a fudgy finish. If you prefer a firmer brownie, bake for an additional 2 minutes.
- Remove the pan from the oven and let it cool on a wire rack for at least 10 minutes. This cooling period allows the brownies to set and makes slicing easier. If you want to serve them raw, let them cool to room temperature before scooping.
- Slice into squares or cut into bars. Serve immediately with a scoop of vanilla ice cream or a dusting of powdered sugar. If you’re serving raw batter, drizzle with melted chocolate or caramel for an extra layer of decadence. Remember, the batter is safe to eat raw, but always use fresh ingredients.
That’s it — you did it. But hold on, I’ve got a few more tricks that’ll take this to another level.
Insider Tricks for Flawless Results
The Temperature Rule Nobody Follows
Most people bake brownies at 375°F, but that can lead to a dry center. Lowering the temperature to 350°F gives the batter time to set evenly. I’ve tested this across different ovens and found consistent results. If you’re using a convection oven, reduce the temperature by 25°F to avoid overcooking.
Why Your Nose Knows Best
Before you pull the brownies out of the oven, give them a quick sniff. A faint aroma of chocolate and butter means they’re ready. If the smell is too sweet or metallic, let them bake a few more minutes. Your nose is a reliable indicator of doneness.
The 5‑Minute Rest That Changes Everything
After baking, let the brownies rest on the rack for five minutes before cutting. This allows the moisture to redistribute, making the interior silky. Skipping this step can result in a crumbly texture that’s hard to cut cleanly.
Use a Silicone Spatula for a Clean Edge
When pouring the batter into the pan, a silicone spatula helps you get every last drop. It also prevents sticking to the pan, ensuring a clean release when you flip it onto the cooling rack. A wooden spoon can warp the batter’s surface and cause uneven baking.
Freeze for Freshness
If you’re making the batter ahead of time, wrap it tightly in plastic wrap and freeze for up to one month. Thaw overnight in the fridge before baking. Freezing preserves the flavor and texture better than refrigerating.
Serve with a Classic Finish
For an extra indulgence, top the cooled brownies with a drizzle of dark chocolate ganache or a dusting of cocoa powder. This not only adds flavor but also gives a professional finish. The contrast between the glossy ganache and the matte brownie base is visually stunning.
Creative Twists and Variations
This recipe is a playground. Here are some of my favorite ways to switch things up:
Chocolate‑Chip Explosion
Fold in a cup of semi‑sweet chocolate chips for extra crunch. The chips melt slightly during baking, creating pockets of molten chocolate. This variation is perfect for chocolate lovers who want a little extra texture.
Espresso‑Infused Delight
Replace the vanilla extract with a teaspoon of instant espresso powder. The coffee flavor deepens the chocolate profile and gives a sophisticated finish. Pair it with a dusting of powdered sugar for a classic coffee‑brownie combo.
Nutty Crunch
Add half a cup of chopped walnuts or pecans to the batter. The nuts add a satisfying crunch and a subtle nutty undertone. Toast the nuts lightly before adding for an extra layer of flavor.
Salted Caramel Swirl
Swirl in a tablespoon of salted caramel sauce before baking. The caramel caramelizes slightly, adding a sweet‑salty contrast. Serve with a dollop of whipped cream for a dessert that feels indulgent.
Minty Freshness
Stir in a teaspoon of peppermint extract for a minty twist. The mint pairs wonderfully with chocolate, creating a refreshing aftertaste. This variation is especially good for holiday gatherings.
Vegan Version
Replace the butter with melted coconut oil and use a plant‑based milk. Swap the granulated sugar for coconut sugar or a natural sweetener. The result is a vegan‑friendly brownie that still delivers on flavor and texture.
Storing and Bringing It Back to Life
Fridge Storage
Store the cooled brownies in an airtight container in the refrigerator for up to five days. The moisture from the fridge keeps the brownies soft, but be sure to let them come to room temperature before slicing to avoid a soggy texture. For a quick snack, pop them in the microwave for 15 seconds to warm them up.
Freezer Friendly
Wrap each brownie individually in parchment paper and then in plastic wrap before freezing. They’ll stay fresh for up to two months. Thaw them at room temperature for about 30 minutes before serving to preserve the buttery flavor.
Best Reheating Method
When reheating, use a low‑heat oven at 300°F for 5 minutes, or microwave on medium power for 20–30 seconds. Adding a splash of water to the container before reheating creates steam that restores moisture. Avoid over‑heating, or the brownies will become dry and crumbly.