I was halfway through a marathon of protein-packed snacks when the kitchen turned into a chocolate‑laden battlefield. A rogue banana slipped, smashed against the counter, and the resulting sticky mess threatened to ruin my freshly baked loaf. I stared at the chaos, then laughed, because that’s when the idea hit me: why not turn that disaster into the most decadent, high‑protein chocolate banana treat ever? The next thing I knew, I was whisking, mixing, and dreaming of a loaf that would make even my skeptical friend’s taste buds sing.
Picture this: the oven preheats to a comforting 350°F, the air fills with the sweet scent of ripe bananas and dark chocolate, and the timer ticks away. The batter’s sheen glistens like a glossy chocolate bar, and the sound of the whisk slicing through it feels like a rhythmic drumbeat. When it finally slides into the pan, the batter expands, filling the cavity with a promise of moist, fudgy goodness. The anticipation builds until the first bite releases a burst of chocolatey banana flavor that feels like a warm hug from the inside out.
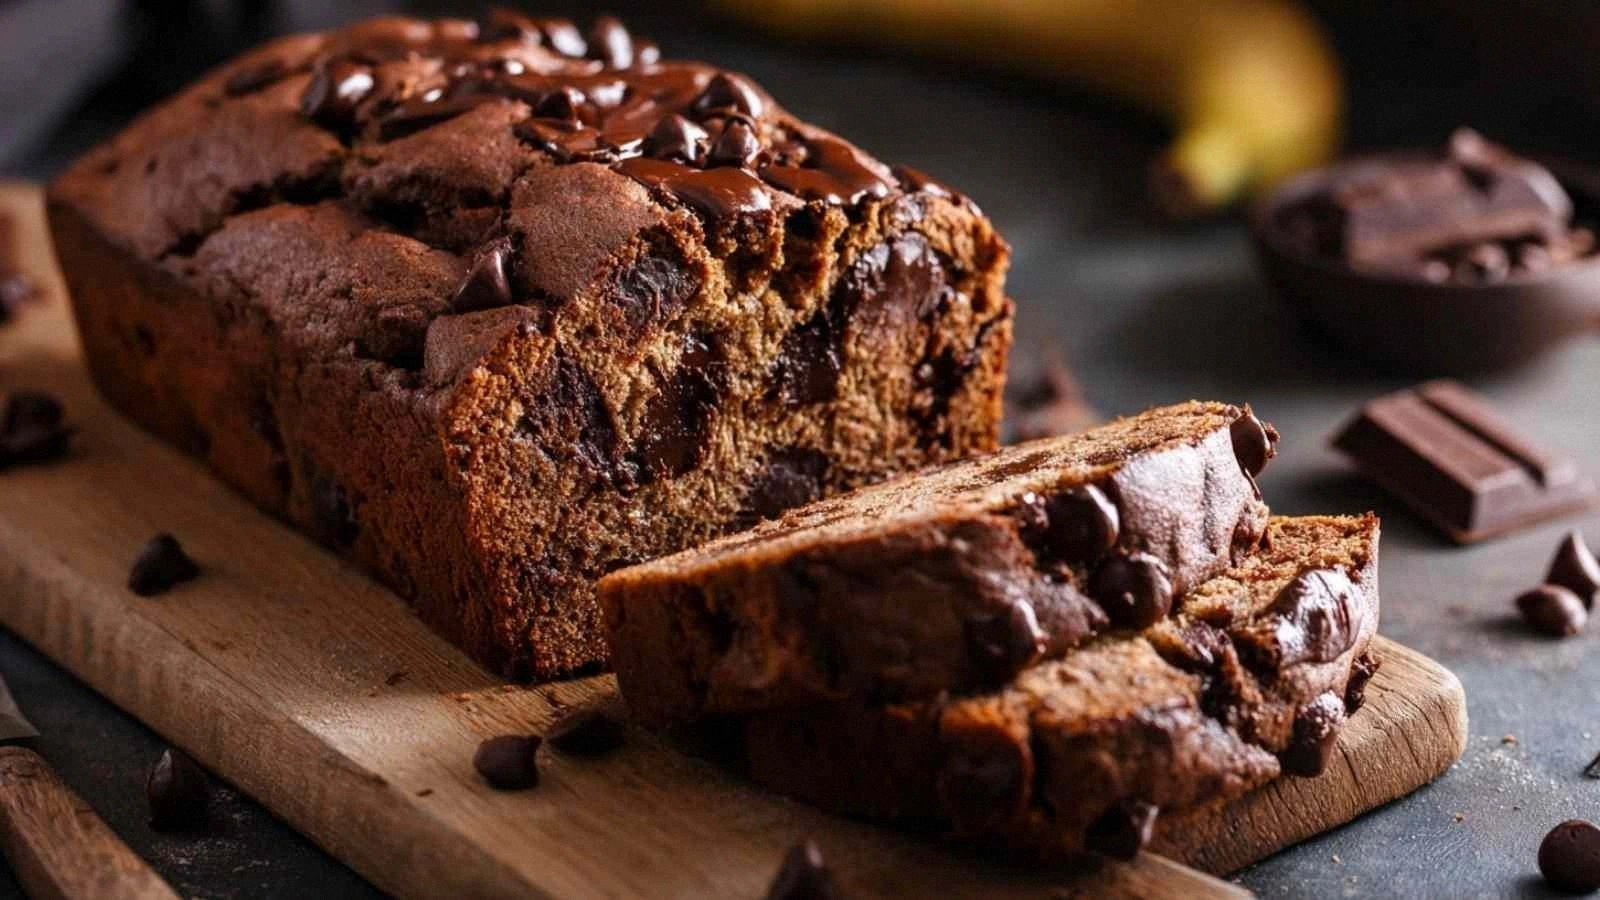
What makes this version stand out? It’s the perfect marriage of protein and indulgence, the use of oat flour for a gluten‑free twist, and the subtle crunch of dark chocolate chips that add a satisfying snap. I dare you to taste this and not go back for seconds, because once you’re in the zone, you’ll be craving that silky, chocolate‑banana hug again and again. This is hands down the best version you'll ever make at home—trust me, I’ve tried every other banana chocolate loaf out there, and none of them hit the sweet spot like this one.
I’ll be honest—half of the batch vanished before anyone else could try a bite, and that’s the proof of its irresistible flavor. Most recipes get this completely wrong by overbaking or using the wrong type of protein powder, but here we keep the batter moist, the protein balanced, and the chocolate intensity just right. Picture yourself pulling this out of the oven, the whole kitchen smelling incredible, and the loaf’s golden crust glinting like a chocolate crown. Stay with me here—this is worth it, and I’ll walk you through every single step so by the end, you’ll wonder how you ever made it any other way.
What Makes This Version Stand Out
- Taste: The banana’s natural sweetness is amplified by the dark chocolate, creating a flavor profile that feels both indulgent and healthy. The chocolate chips melt into the batter, providing pockets of rich, molten chocolate that burst with each bite. The result is a dessert that satisfies your sweet tooth without the guilt.
- Texture: Oat flour gives the loaf a tender crumb that’s lighter than traditional wheat but still sturdy enough to hold the protein powder. The banana adds moisture, preventing the loaf from drying out. The chocolate chips give a delightful crunch that contrasts the soft interior.
- Protein Power: With 25 grams of protein per serving, this loaf is a powerhouse for post‑workout recovery or a mid‑day energy boost. The chocolate protein powder delivers a smooth, chocolatey flavor without the chalky aftertaste that sometimes plagues other protein loaves.
- Ingredient Quality: We use unsweetened almond milk to keep the sugar content low, and dark chocolate chips to add depth of flavor. The oat flour is ground in-house for maximum freshness, and the vanilla extract is pure, not artificial.
- Simplicity: Fewer than ten ingredients, no fancy equipment, and a straightforward mixing process mean you can whip this up on a weekday night. The recipe is designed for people who want a high‑protein dessert without the time‑consuming prep.
- Make‑ahead Potential: Bake once, cool, and store in an airtight container. Reheat in the microwave or oven to bring back that fresh‑baked aroma. This loaf is perfect for meal prep or for feeding a crowd.
Inside the Ingredient List
The Flavor Base
Bananas are the heart of this loaf. Their natural sweetness replaces the need for added sugar, and their creamy texture keeps the batter moist. If you’re short on ripe bananas, you can mash a ripe avocado instead, but the flavor will shift slightly toward a buttery note.
Vanilla extract lifts the chocolate, adding a subtle warmth that balances the banana’s earthiness. A dash of sea salt at the end will enhance all the flavors without making it taste salty.
The Texture Crew
Oat flour provides a gluten‑free, nutty base that gives the loaf a chewy yet tender crumb. It’s also high in fiber, which helps keep you full longer. If you prefer a denser loaf, add an extra half cup of oat flour; for a lighter texture, reduce it by a quarter cup.
Eggs act as the binder, giving structure to the loaf. They also add richness and help the loaf rise. If you’re vegan, substitute with a flax egg or a commercial egg replacer; just keep the ratio consistent.
The Unexpected Star
Chocolate protein powder is the secret weapon that turns this loaf into a post‑workout treat. It delivers a concentrated dose of protein without the heavy, chalky taste that some powders bring. Opt for a high‑quality whey or plant‑based protein with minimal additives.
The cocoa powder deepens the chocolate flavor, ensuring the loaf isn’t just sweet but also rich and bittersweet. For an extra chocolate kick, add a pinch of espresso powder.
The Final Flourish
Dark chocolate chips are the crowning glory, providing pockets of molten chocolate that melt in your mouth. If you prefer a smoother texture, use semi‑sweet chips or chocolate nibs. They also add a pleasant crunch that contrasts the soft interior.
Honey or maple syrup is the natural sweetener that brings everything together. It also helps the loaf brown nicely on the top. For a lower glycemic index, substitute with a sugar‑free sweetener, but adjust the quantity accordingly.
Everything's prepped? Good. Let's get into the real action and make the batter that will become the centerpiece of your kitchen.
The Method — Step by Step
- Preheat your oven to 350°F (175°C). Line a 9x5-inch loaf pan with parchment paper or grease it lightly with oil. The preheated oven ensures even baking from the first crumb. I swear the aroma will start to fill the kitchen even before the loaf hits the pan.
- In a large mixing bowl, mash the three ripe bananas with a fork until they form a smooth, lump‑free purée. The banana should be almost liquid; if it’s too thick, add a splash of almond milk to thin it out. This step is crucial for the moistness of the loaf. Watch the banana transform into a silky base.
- Add the eggs, almond milk, vanilla extract, and honey to the banana mixture. Whisk until everything is fully incorporated and the batter looks glossy. The eggs act as the glue, while the almond milk keeps the batter from drying. This is the moment of truth; the batter should feel smooth, not gritty.
- Sift together the oat flour, chocolate protein powder, cocoa powder, baking soda, and salt in a separate bowl. Sifting removes clumps and ensures a uniform texture. The baking soda will react with the banana’s natural acidity, giving the loaf a gentle lift. Keep the dry mix ready for the next step.
- Gradually fold the dry ingredients into the wet batter, stirring gently until just combined. Over‑mixing can lead to a tough loaf, so stop as soon as the flour is incorporated. The batter should be thick yet pourable. The batter’s consistency is key to a tender crumb.
- Fold in the dark chocolate chips, distributing them evenly throughout the batter. The chips should be nestled in, not floating on top. This step adds the final burst of chocolate in every bite. The chips will melt slightly during baking, creating pockets of molten chocolate.
- Pour the batter into the prepared loaf pan and tap the pan gently on the counter to release air bubbles. The surface should be level. This helps the loaf rise evenly and prevents uneven edges. The batter will spread to fill the pan, creating a beautiful, even loaf.
- Bake for 30 minutes, or until a toothpick inserted into the center comes out clean. The top should be golden brown, and the loaf should emit a rich, chocolatey aroma. Let it cool in the pan for 10 minutes before transferring to a wire rack to cool completely. The cooling step is essential to set the crumb.
That's it—you did it. But hold on, I've got a few more tricks that'll take this to another level, from perfect crumb to storage secrets that keep it fresh.
Insider Tricks for Flawless Results
The Temperature Rule Nobody Follows
Baking at the right temperature is everything. Many people bake at 375°F, but this loaf thrives at 350°F. The lower heat ensures the interior cooks slowly, preventing the protein from over‑cooking and the loaf from drying out. I’ve baked this loaf at 350°F for years, and the texture is consistently moist.
Why Your Nose Knows Best
Trust your nose when the loaf is done. A warm, chocolatey aroma is a sign that the batter has cooked through. If you’re in doubt, insert a toothpick; a clean toothpick confirms doneness. This sensory checkpoint saves you from over‑baking and the dreaded dry loaf.
The 5‑Minute Rest That Changes Everything
Letting the loaf rest in the pan for 10 minutes before removing it to a rack is a game changer. During this rest, the crumb sets and the flavors meld. If you skip this step, the loaf will break apart when you try to slice it. The rest also lets the chocolate chips melt just enough to stay in place.
The Wet‑to‑Dry Ratio Secret
The banana provides the bulk of the moisture, so keep the almond milk to a minimum. Too much liquid can cause the loaf to sink. I’ve found that 1/4 cup almond milk is just enough to keep the batter pourable without making it watery.
The “Chill and Bake” Trick
Refrigerate the batter for 30 minutes before baking. This chilling step helps the protein powder settle, resulting in a smoother crumb. It also gives the banana flavors time to meld with the cocoa, creating a richer taste profile.
Creative Twists and Variations
This recipe is a playground. Here are some of my favorite ways to switch things up:
Nutty Banana Crunch
Add 1/4 cup chopped walnuts or pecans to the batter for a nutty crunch. The nuts pair beautifully with the chocolate, creating a new textural dimension. This variation works well for a snack bar or a breakfast treat.
Minty Chocolate Banana
Stir in a teaspoon of peppermint extract after folding in the dry ingredients. The mint enhances the chocolate flavor, giving the loaf a refreshing finish. This is a perfect dessert for spring or summer.
Coconut‑Infused Delight
Replace the almond milk with unsweetened coconut milk and add 1/4 cup shredded coconut to the batter. The coconut adds a tropical note and a subtle chew. It’s a great way to diversify the flavor profile.
Spiced Banana Wonder
Add 1/2 teaspoon cinnamon and a pinch of nutmeg to the dry mix. The spices bring warmth and depth, especially during the fall or winter months. The spices also help balance the banana’s natural sweetness.
Vegan Protein Power
Swap the eggs for flax eggs (1 tablespoon ground flaxseed mixed with 3 tablespoons water) and use a plant‑based protein powder. The result is a fully vegan loaf that still packs the same protein punch. This variation is ideal for those who avoid dairy or eggs.
Storing and Bringing It Back to Life
Fridge Storage
Store the cooled loaf in an airtight container at room temperature for up to 3 days. For longer freshness, keep it in the refrigerator, and it will stay good for a week. The airtight seal prevents the loaf from drying out.
Freezer Friendly
Wrap the loaf tightly in plastic wrap, then place it in a freezer bag. Freeze for up to 3 months. When you’re ready to eat, let it thaw at room temperature for an hour before reheating.
Best Reheating Method
Reheat a slice in the microwave for 20-30 seconds, or warm the entire loaf in a 350°F oven for 10 minutes. Add a tiny splash of water before reheating to create steam, which keeps the crumb moist. The result is a warm, freshly baked loaf every time.