Picture this: I’m standing in a cramped kitchen, the smell of burnt toast curling around me, and a friend challenges me to create something that will make everyone say “wow.” I’m skeptical, but I pull out a bag of frozen mixed vegetables, a handful of herbs, and a dash of daring. The result? A mixed vegetable cutlet that is so crisp on the outside and packed with umami on the inside that I can’t help but confess I ate half the batch before anyone else even had a chance. That moment sparked a fire in me – a fire that now fuels every line of this recipe, because I know exactly what it takes to turn ordinary veggies into a show‑stopper.
The first thing you’ll notice is the aroma. As the cutlets sizzle, a caramelized scent rises like a warm hug, mingling with the earthy fragrance of fresh parsley and the subtle sharpness of a whisper of cumin. Your senses are hit in waves: the crackle of the pan, the gentle hiss of oil, the faint pop of onions, the visual dance of golden edges. Every bite delivers a crunchy bite that shatters like thin ice, followed by a tender, savory core that melts in your mouth. It’s a sensory experience that turns a simple side dish into a memorable moment.
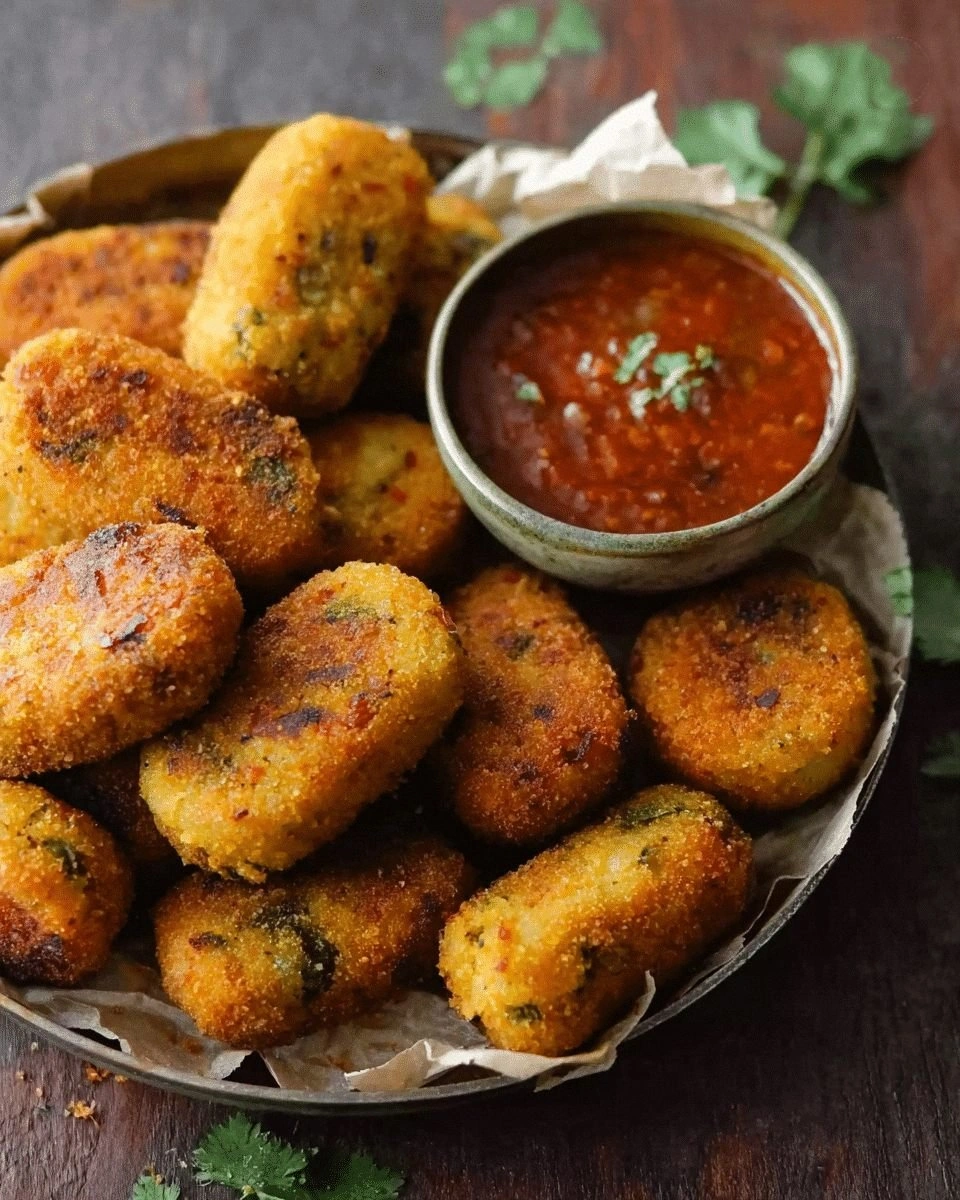
What sets this version apart from the countless “vegetable cutlet” recipes that flood the internet is the deliberate layering of flavors and textures. I’ve combined a blend of fresh and frozen vegetables, added a touch of cheese for creaminess, and finished with a crisp breadcrumb crust that’s seasoned to perfection. The result is a cutlet that’s not only delicious but also visually appealing, with a golden crust that gleams under the kitchen lights. It’s a dish that can be served as an appetizer, a snack, or a main course, and it will win over even the most skeptical palate.
And here’s the kicker: I’ll show you a technique you won’t expect – a secret ingredient that turns ordinary veggies into a flavor explosion. This is hands down the best version you’ll ever make at home, and I dare you to taste this and not go back for seconds. Let me walk you through every single step – by the end, you’ll wonder how you ever made it any other way.
What Makes This Version Stand Out
- Flavor: The combination of fresh herbs and a splash of lemon zest creates a bright, tangy profile that cuts through the richness of the cutlets.
- Texture: A double coating of flour and breadcrumbs gives the cutlets a satisfying crunch that contrasts with the soft, moist interior.
- Ingredient Quality: Using seasonal vegetables ensures maximum flavor and nutritional value, turning each bite into a celebration of nature’s bounty.
- Ease: The recipe requires minimal prep and no specialized equipment, making it a go-to option for busy evenings.
- Make‑Ahead: The cutlets can be assembled, frozen, and cooked later, saving you time without sacrificing taste.
- Versatility: It can be served with chutney, ketchup, or a yogurt dip, making it a crowd‑pleaser for parties or family dinners.
- Nutrition: Packed with fiber, vitamins, and a balanced protein-to-carb ratio, it’s a wholesome option that satisfies both taste buds and health goals.
Inside the Ingredient List
The Flavor Base
Onions, garlic, and ginger form the aromatic foundation of any savory dish. Sautéed until translucent, they release a sweet, nutty undertone that balances the earthy vegetables. Skipping them would leave the cutlets tasting flat, as if someone forgot to season a pot of soup.
Fresh parsley and cilantro add a burst of green freshness that lifts the heaviness of the dough. They also bring a subtle peppery note that complements the mild spices. If you’re allergic to cilantro, parsley alone will still keep the flavor vibrant.
The Texture Crew
Boiled potatoes and carrots provide bulk and a creamy interior. Their starch content ensures the cutlets hold together while keeping the inside tender. If you prefer a lighter bite, reduce the potato portion and increase the peas for a sweeter, firmer texture.
Cauliflower and broccoli add a subtle crunch and a nutritional boost. They absorb the spices well, becoming a flavorful component rather than a filler. For a vegan version, skip the cheese and use a plant‑based alternative.
The Unexpected Star
A spoonful of grated cheddar or paneer introduces a creamy, savory depth that elevates the whole dish. The cheese melts during cooking, creating a gooey center that contrasts beautifully with the crisp exterior. If you’re watching calories, a light sprinkle of mozzarella will still deliver a delightful melt.
Everything's prepped? Good. Let's get into the real action.
The Final Flourish
Breadcrumbs and a pinch of paprika finish the cutlets with a golden crust that’s both crunchy and flavorful. The breadcrumbs are seasoned with salt, pepper, and a dash of cumin to create a subtle spiced coating. If you prefer a gluten‑free option, use almond flour or crushed rice cakes instead of breadcrumbs.
A splash of milk or water is added to bind the mixture together. This liquid helps the flour and breadcrumbs adhere to the vegetables, ensuring each cutlet holds its shape during frying. For a thicker dough, use less liquid; for a more spreadable mixture, add a bit more.
The Method — Step by Step
- Begin by washing and chopping all the vegetables into uniform, bite‑sized pieces. The size matters: too large, and they won’t cook evenly; too small, and the cutlets will fall apart. Keep a bowl ready to mix the vegetables with the aromatics.
- Heat a large skillet over medium heat and add a generous splash of oil. Once the oil shimmers, toss in the minced onions, garlic, and ginger. Sauté for 3–4 minutes until they’re translucent and fragrant; this step builds the flavor base.
- Add the chopped vegetables to the skillet, stirring to coat them with the aromatic mixture. Cook for 6–8 minutes, or until the vegetables are just tender but still hold their shape. The goal is a soft interior with a slightly firm bite.
- Transfer the vegetable mixture to a large mixing bowl. Let it cool slightly so that you can handle it without burning your fingers. This cooling step is crucial; if you add the dry ingredients while the mixture is still steaming, it can become soggy.
- Stir in the grated cheese, chopped herbs, salt, pepper, cumin, and paprika. Mix thoroughly until the mixture is evenly seasoned. If the dough feels too dry, sprinkle in a tablespoon of milk or water to bind it together.
- Now, form the mixture into small, oval-shaped cutlets about 3 inches long. Press the edges firmly to ensure they don’t split during frying. If you’re making a large batch, keep the cutlets on a parchment‑lined tray to prevent sticking.
- In a separate shallow dish, whisk the flour with a pinch of salt. In another dish, beat the eggs. In the third dish, place the breadcrumbs mixed with a little paprika. These will form the classic three‑step coating process.
- Dip each cutlet first in flour, tapping off excess, then in beaten egg, and finally in the breadcrumb mixture. The double coating ensures a crunchy, golden crust that won’t crumble.
- Heat oil in a deep pan to 350°F (175°C). Carefully slide the coated cutlets into the hot oil, cooking 3–4 minutes per side until they’re a deep golden brown. Use a slotted spoon to turn them gently, avoiding any splatter.
- Remove the cutlets and place them on a paper towel-lined plate to drain excess oil. While they’re still warm, sprinkle a light dusting of fresh herbs for an extra burst of color and flavor. Serve immediately with your favorite chutney or dip.
That’s it — you did it. But hold on, I've got a few more tricks that'll take this to another level. You’ll wonder how you ever made cutlets without these secrets.
Insider Tricks for Flawless Results
The Temperature Rule Nobody Follows
Many cooks assume any oil temperature works, but the difference between 320°F and 350°F is the crunch factor. Use a thermometer to check the oil; a quick test is to drop a small breadcrumb into the oil – if it sizzles immediately and rises to the surface, you’re good.
Why Your Nose Knows Best
Before you start coating, give the cutlets a quick sniff. If the aroma is too bland, add a pinch of garam masala or a dash of lemon juice. Your nose is a reliable indicator of flavor balance.
The 5-Minute Rest That Changes Everything
After frying, let the cutlets rest on a wire rack for 5 minutes. This allows the steam to escape and keeps the crust crisp. A friend once tried to eat them immediately and got a soggy mess – lesson learned.
The Right Flour Choice
All‑purpose flour is fine, but if you want a gluten‑free version, try chickpea flour. It adds a nutty flavor and helps the coating stick better, giving you a crispier bite.
The Perfect Dip Combo
Pair your cutlets with a yogurt‑mint dip or a spicy tomato ketchup. The acidity cuts through the richness and adds a refreshing contrast.
Creative Twists and Variations
This recipe is a playground. Here are some of my favorite ways to switch things up:
Spicy Thai Twist
Swap the cumin for a tablespoon of curry powder and add red chili flakes. Serve with a coconut‑based dipping sauce for an exotic kick.
Mediterranean Medley
Incorporate sun‑dried tomatoes, olives, and feta cheese. Finish with a drizzle of olive oil and a sprinkle of oregano for a Mediterranean flair.
Vegan Delight
Omit the cheese and use a plant‑based cheese alternative. Replace the egg with a flaxseed mixture (1 tbsp flaxseed + 3 tbsp water). The result is a creamy, plant‑based cutlet that still satisfies.
Cheesy Jalapeño Explosion
Add diced jalapeños and a handful of shredded cheddar to the vegetable mix. The heat from the peppers pairs beautifully with the cheese melt.
Herbal Garden Edition
Use a variety of fresh herbs such as basil, dill, and mint. The herb blend adds layers of aroma and a burst of freshness.
Gluten‑Free Crunch
Use almond flour for coating and a gluten‑free breadcrumb mix. The texture remains crisp, and the flavor stays intact.
Storing and Bringing It Back to Life
Fridge Storage
Cool the cutlets completely before placing them in an airtight container. They’ll keep for up to 3 days in the refrigerator. When ready to eat, reheat in a toaster oven for a few minutes to restore crispness.
Freezer Friendly
Arrange the cutlets on a parchment‑lined tray and freeze until solid. Then transfer them to a freezer bag. They can be frozen for up to 3 months. Fry directly from the freezer; no thawing required.
Best Reheating Method
Reheat in a preheated oven at 375°F (190°C) for 10 minutes. Add a tiny splash of water to the pan before reheating to create steam, which keeps the interior moist while the exterior crisps up.