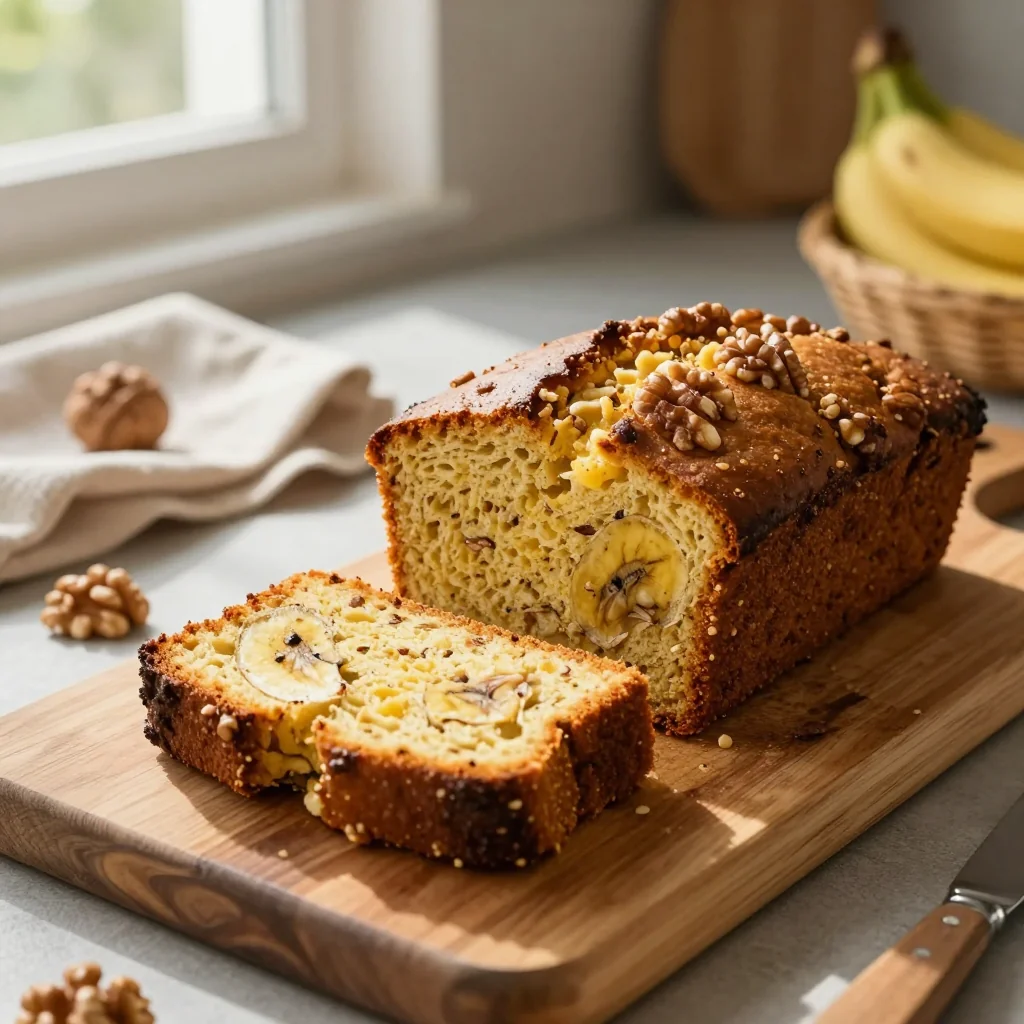
A moist, nutty loaf that brings comfort and joy to every bite.
I still remember the first time I smelled a fresh loaf of banana walnut bread cooling on my kitchen counter. It was a rainy Saturday afternoon, the kind where the world outside feels muted, and the only sound is the gentle patter of droplets against the window. My grandmother had just pulled the loaf from the oven, its golden crust crackling softly as she sliced a piece. The sweet aroma of ripe bananas mingled with the earthy scent of toasted walnuts, instantly transporting me back to my childhood kitchen, where love was measured in scoops of butter and generous handfuls of nuts.
Banana bread, in its many incarnations, is a timeless classic that spans cultures and generations. While its roots can be traced to the resourceful cooks of the Great Depression who turned overripe bananas into a comforting treat, today it has evolved into a versatile canvas for flavors, textures, and dietary twists. This particular recipe pays homage to that heritage while embracing modern techniques that guarantee a consistently moist crumb and a perfectly crisp top.
In this guide, I’ll walk you through every step—from selecting the ripest bananas to mastering the delicate balance of wet and dry ingredients. You’ll discover why a splash of melted butter, a pinch of sea salt, and the right proportion of baking soda make all the difference. By the end, you’ll have a foolproof method that yields a loaf so tender you’ll want to slice it while it’s still warm.
I’m thrilled to share this recipe with you, and I hope it becomes a beloved staple in your home as it has in mine. Let’s get baking!
🌟 Why This Recipe Will Capture Your Heart
There’s something magical about a loaf that stays soft for days, and this banana walnut bread delivers that magic every single time.
- ✨ Perfect Moisture Balance: The combination of mashed bananas and melted butter creates a tender crumb that never dries out, even after a few days in the pantry.
- ✨ Crunchy Walnut Contrast: Toasted walnuts add a satisfying crunch and a buttery richness that contrasts beautifully with the soft interior.
- ✨ Simple Ingredient List: You only need pantry staples—no exotic spices or hard‑to‑find items—making it accessible for any home cook.
- ✨ Versatile Serving Options: Enjoy it plain, toast it with a smear of cream cheese, or pair it with a scoop of vanilla ice cream for an indulgent dessert.
- ✨ Kid‑Friendly Flavor: The natural sweetness of bananas means you can skip refined sugar or drastically reduce it, keeping the loaf wholesome for little ones.
- ✨ Ideal for Meal Prep: Slice and freeze portions; they reheat beautifully, giving you a quick breakfast or snack on busy mornings.
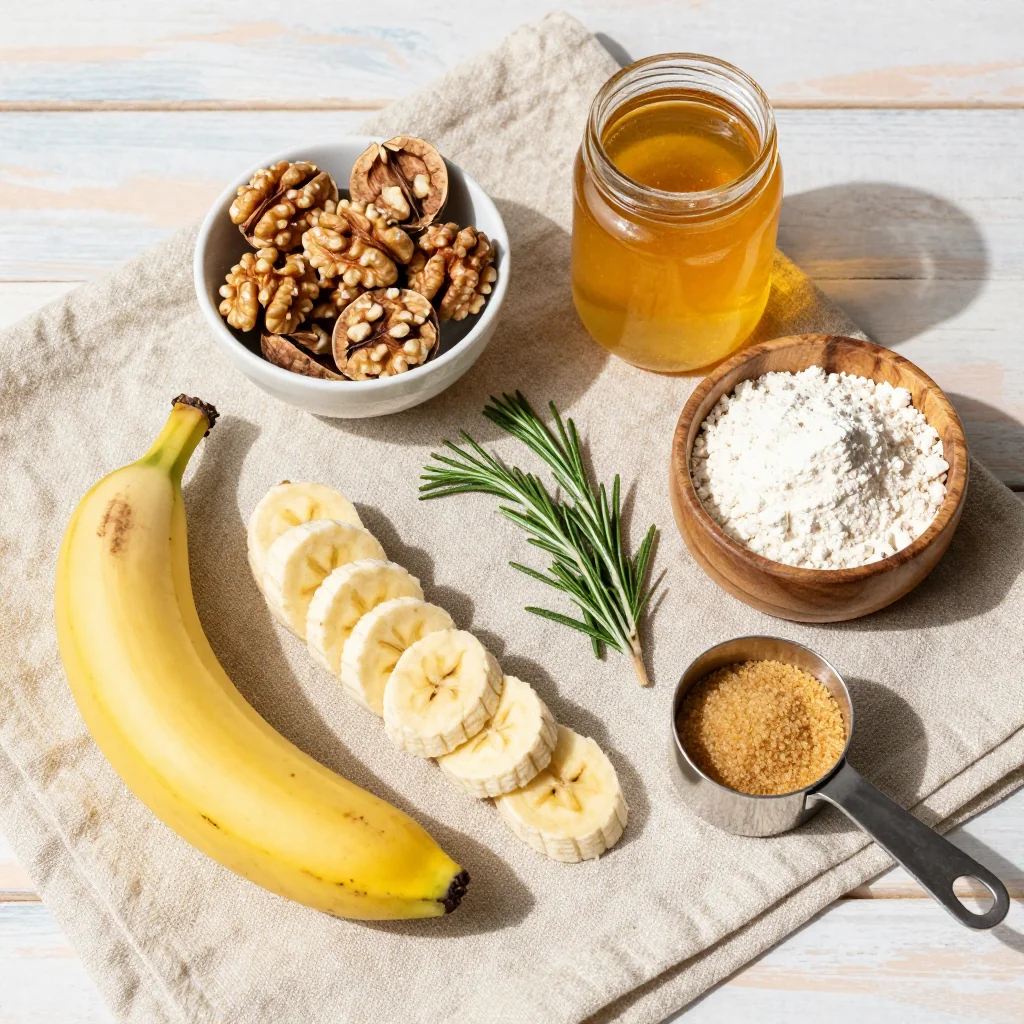
🥗 Ingredients
📝 Complete Ingredient List
For the Batter:
For the Dry Mix:
🔍 Focus on Key Ingredients
Ripe Bananas
Ripe bananas are the heart of this bread, providing natural sweetness, moisture, and a subtle caramel flavor. Look for bananas with dark brown spots; they’re at their peak of sugar content. If you can’t find perfectly ripe bananas, you can speed up the ripening process by placing them in a warm oven for 15 minutes.
Walnuts
Walnuts contribute a buttery crunch and a dose of healthy omega‑3 fatty acids. Toast them lightly in a dry skillet for 3‑4 minutes to amplify their nutty aroma before folding them into the batter. This extra step makes a noticeable difference in flavor depth.
Butter
Using melted butter instead of softened butter ensures an even distribution of fat, which keeps the crumb tender. If you prefer a lighter version, substitute half the butter with unsweetened applesauce; the texture will remain moist while reducing saturated fat.
🔄 Quick Substitutions
| If you don’t have... | Use instead... |
|---|---|
| Butter | Unsweetened applesauce (½ cup) |
| All‑purpose flour | Whole‑wheat flour (same amount) |
| Walnuts | Pecans or almonds, chopped |
👨🍳 Step‑by‑Step Instructions
Follow these detailed steps to create a loaf that’s both tender and flavorful. Each phase is designed to build layers of taste and texture.
📋 Phase 1: Preparation & Mise en Place
Gather, measure, and pre‑heat before you begin.
Preheat the Oven and Prepare the Pan
Set your oven to 175°C (350°F). While it heats, grease a 9×5‑inch loaf pan with a thin layer of butter or line it with parchment paper. This ensures the bread releases cleanly after baking, preserving its beautiful golden crust.
Mash the Bananas
Peel the three ripe bananas and place them in a large mixing bowl. Using a fork or potato masher, mash them until they’re almost pureed, leaving a few small lumps for texture. The mashed bananas should be smooth enough to blend with the butter but still retain a hint of chunkiness.
🔥 Phase 2: Mixing & Baking
Combine wet and dry components, then bake to perfection.
Incorporate Butter, Sugar, Egg, and Vanilla
To the mashed bananas, add the melted butter while stirring gently. Sprinkle in the granulated sugar, then whisk in the beaten egg and vanilla extract. The mixture should become glossy and slightly thick, indicating the sugar has begun to dissolve.
Combine Dry Ingredients Separately
In a separate bowl, whisk together the flour, baking soda, sea salt, and optional cinnamon. This ensures even distribution of leavening agents, which is crucial for a uniform rise.
Fold Dry Mix into Wet Mixture
Gradually add the dry ingredients to the wet banana mixture, using a rubber spatula. Fold gently until just combined—stop as soon as you no longer see flour streaks. Over‑mixing at this stage can cause a dense loaf.
Transfer to Pan and Bake
Pour the batter into the prepared loaf pan, smoothing the top with the back of a spoon. Sprinkle the reserved walnuts over the surface for a decorative finish. Place the pan in the pre‑heated oven and bake for 45‑55 minutes, or until a toothpick inserted into the center emerges clean.
✨ Phase 3: Finishing & Serving
Cool, slice, and enjoy.
Check for Doneness
After 45 minutes, insert a toothpick or thin skewer into the center. If it comes out with just a few moist crumbs, the bread is ready. If wet batter clings, continue baking in 5‑minute increments, checking each time.
Cool Before Slicing
Allow the loaf to cool in the pan for 10 minutes, then turn it out onto a wire rack. Cooling on a rack prevents steam from making the bottom soggy and helps the crust stay crisp.
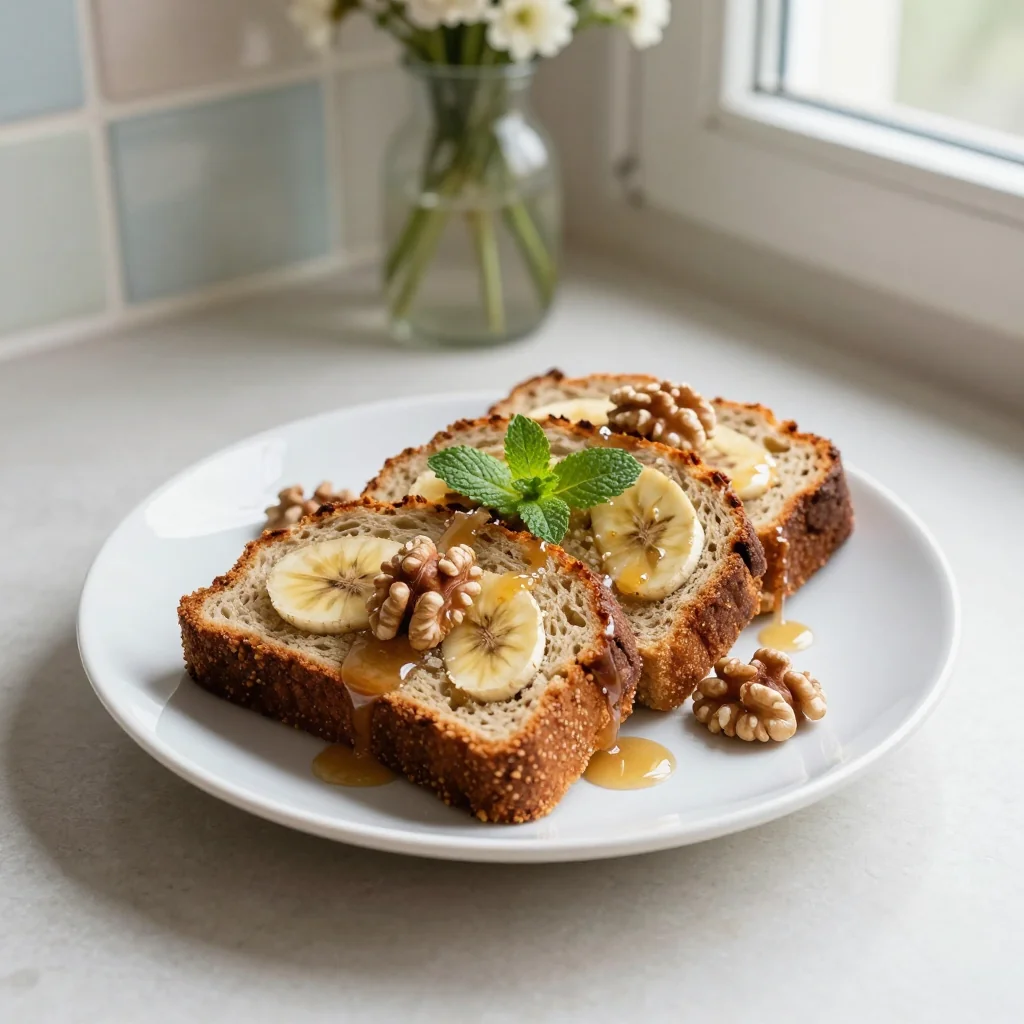
Serve Warm or Toasted
Slice the bread into 1‑inch thick pieces. Serve warm with a pat of butter, a drizzle of honey, or a dollop of cream cheese. For a dessert twist, toast a slice and top with a scoop of vanilla ice cream.
💡 Expert Tips & Tricks
🛒 Choosing the Right Ingredients
When selecting bananas, aim for those with a deep yellow skin and heavy brown speckles; they’re naturally sweeter and less starchy. For walnuts, buy them in bulk and store in an airtight container in the freezer to preserve freshness. Fresh butter should be slightly softened but not melted; this ensures it blends smoothly without separating. Finally, always use fresh baking soda—its potency fades over time, which can affect the loaf’s rise.
🔪 Preparation Techniques
Before mashing, slice bananas into uniform chunks; this speeds up the mashing process and yields a more even texture. When folding in the walnuts, use a gentle “cut‑and‑fold” motion to avoid crushing them, preserving their crunch. If you’re adding optional spices like cinnamon, toast them briefly in a dry pan to release essential oils before mixing.
🌡️ Mastering the Baking Process
Every oven behaves slightly differently. Use an oven thermometer to verify the temperature is accurate. Rotate the loaf pan halfway through baking to ensure even browning. If you notice the top browning too fast, tent it with foil; this protects the crust while allowing the interior to finish cooking.
🍽️ Presentation & Service
For a restaurant‑style presentation, dust the sliced loaf lightly with powdered sugar and serve on a wooden board. Pair each slice with a small dollop of mascarpone mixed with a drizzle of maple syrup for an elegant brunch. Adding a few fresh berries on the side adds color contrast and a fresh acidity that balances the sweetness.
🏆 Pro Tips
Elevate your banana walnut bread from home‑cooked comfort to bakery‑level excellence with these professional insights.
- 🎯 Control Moisture with Precise Ratios: The key to a consistently moist crumb is the ratio of bananas to fat. A 3:1 banana‑to‑butter ratio (by weight) ensures the bread stays tender without becoming gummy. Weigh your bananas and butter for best results.
- 🎯 Use a Light Hand with Leavening: Baking soda reacts quickly with the acidic bananas. Over‑mixing can cause premature gas release, leading to a collapsed loaf. Mix just until the soda is incorporated.
- 🎯 Enhance Walnut Flavor with a Quick Toast: Toast walnuts in a dry skillet over medium heat for 3‑4 minutes, stirring constantly. This step releases Maillard compounds, giving the nuts a deeper, almost caramelized flavor.
- 🎯 Create a Crusty Top with a Sugar Sprinkle: Before baking, lightly brush the top with melted butter and sprinkle a thin layer of coarse sugar. The sugar caramelizes, forming a glossy, crackly crust.
- 🎯 Cool Gradually to Prevent Crumb Collapse: After removing from the oven, let the loaf rest in the pan for 10 minutes, then transfer to a wire rack. This gradual cooling prevents steam from condensing and making the bottom soggy.
- 🎯 Store for Longevity: Wrap the cooled loaf tightly in parchment, then aluminum foil, and store at room temperature for up to 4 days. For longer storage, slice and freeze; each slice reheats perfectly in a toaster oven.
"The secret to a great loaf is respecting the balance between moisture and structure." — Thomas Keller
🔄 Variations & Adaptations
This banana walnut bread is a flexible canvas. Below are several ways to tailor it to specific diets, flavor cravings, and occasions.
🥬 Vegetarian/Vegan Version
Swap the egg for a “flax egg” (1 tbsp ground flaxseed mixed with 3 tbsp water) and replace butter with an equal amount of coconut oil or a neutral‑flavored plant oil. Use maple syrup or agave nectar instead of granulated sugar for a fully vegan sweetener.
- Flax egg: Provides binding and moisture without animal products.
- Coconut oil: Adds a subtle tropical note that complements bananas.
🌶️ Flavor Variations
Experiment with global spices and add‑ins to give the loaf a new personality.
Spicy Version:
Add ¼ tsp ground cayenne pepper and a pinch of smoked paprika to the dry mix. The heat pairs surprisingly well with the sweetness of the bananas.
Mediterranean Version:
Replace walnuts with toasted pine nuts and fold in ¼ cup crumbled feta cheese. Sprinkle a drizzle of olive oil on top before baking for a savory twist.
Asian Inspired Version:
Incorporate 1 tsp toasted sesame oil and 2 tbsp finely chopped toasted coconut. Finish with a light glaze of honey mixed with a splash of soy sauce after baking.
⚠️ Dietary Adaptations
Gluten‑Free:
Use a 1:1 gluten‑free flour blend (e.g., rice flour, tapioca starch, and potato starch). Add ½ tsp xanthan gum to mimic gluten’s elasticity.
Lactose‑Free:
Replace butter with a lactose‑free margarine or coconut oil. Ensure any sweetener used is also dairy‑free.
Low‑Calorie:
Reduce sugar to ½ cup and swap half the butter for unsweetened applesauce. This cuts calories while maintaining moisture.
👶 Family/Kids Version
Kids love extra sweetness and fun shapes. Add ¼ cup chocolate chips to the batter and bake the loaf in a muffin tin for individual “banana walnut cupcakes.” Serve with a drizzle of chocolate sauce for a playful snack.
📦 Storage & Reheating
🧊 Conservation
At the Refrigerator:
- Duration: Up to 5 days
- Recommended container: Airtight plastic or glass container
- Tip: Place a paper towel on top to absorb excess moisture.
In the Freezer:
- Duration: Up to 3 months
- Method: Slice the loaf, wrap each slice in parchment, then place in a zip‑lock bag.
- Defrosting: Thaw overnight in the refrigerator or warm directly in a toaster.
💡 For the best texture, reheat frozen slices directly in a toaster oven rather than a microwave.
♨️ Reheating
🔥 In the Oven (Recommended):
- Preheat to 180°C (350°F).
- Wrap the slice in foil to retain moisture.
- Heat for 8‑10 minutes.
- Remove foil and bake an additional 2 minutes for a crisp edge.
⚡ In the Microwave (Quick):
- Place slice on a microwave‑safe plate.
- Cover with a microwave‑safe lid or damp paper towel.
- Heat on medium power for 30‑45 seconds.
- Check and repeat in 10‑second bursts if needed.
🍳 On the Stovetop:
Heat a non‑stick skillet over low heat, add a thin slice, and cover with a lid. Warm for 2‑3 minutes per side, allowing the interior to steam gently while the exterior crisps.
🍷 Perfect Pairings
🥗 Side Dishes
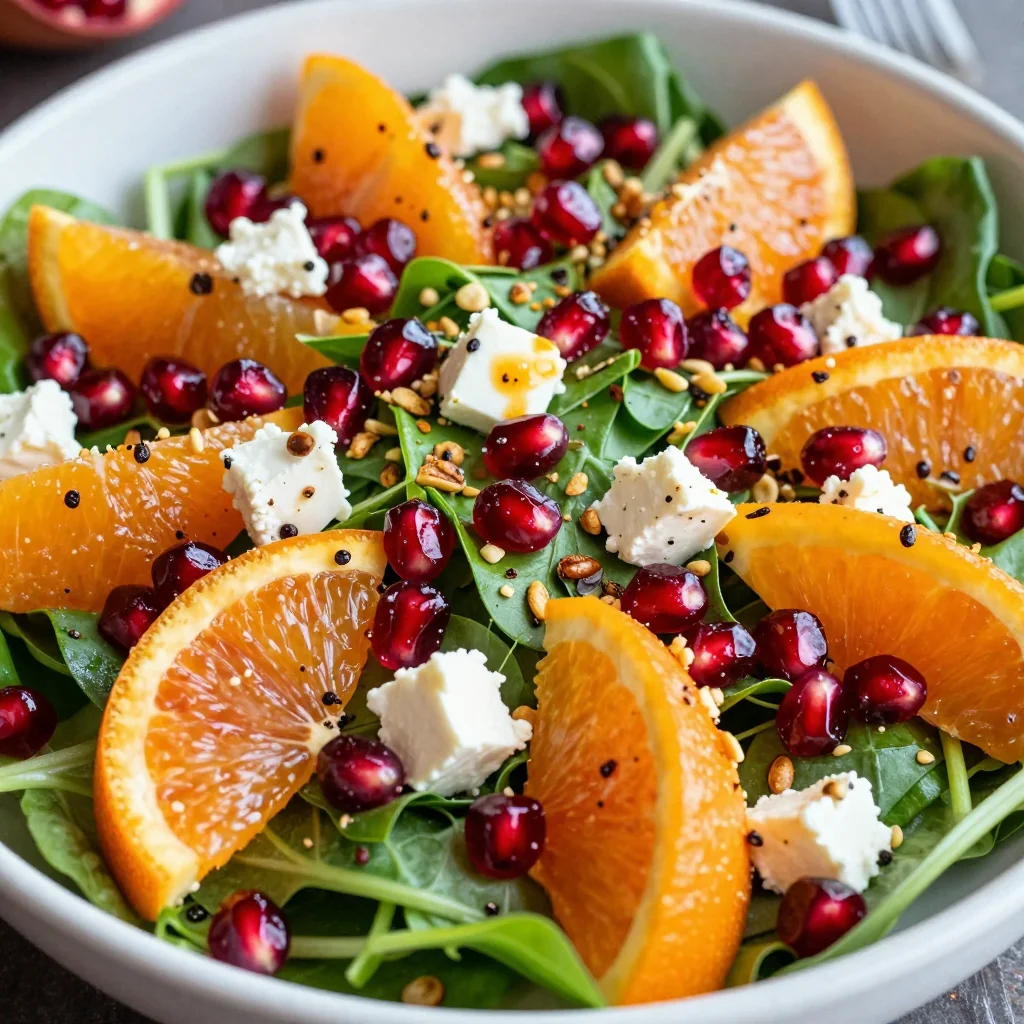
- Fresh Fruit Salad: A mix of berries and citrus balances the bread’s richness.
- Greek Yogurt with Honey: Adds tanginess and a creamy contrast.
- Light Arugula Salad: The peppery greens cut through the sweetness.
🍷 Wine & Beverage Pairings
- Late Harvest Riesling: Its honeyed notes echo the banana sweetness.
- Amber Ale: The maltiness complements the toasted walnuts.
- Non‑Alcoholic: A chilled glass of spiced chai or cold brew coffee.
🍰 Complementary Courses
Start with a light citrus soup or a crisp mixed greens salad, then serve the banana walnut bread as a main or side. Follow with a simple vanilla panna cotta or a drizzle of caramel sauce for a cohesive dessert experience.
❓ Frequently Asked Questions
Q: Can I use overripe bananas that are almost black?
Absolutely. The darker the banana, the sweeter and more flavorful it becomes. Just be sure they are not moldy. Overripe bananas also contain more natural sugars, allowing you to reduce added sugar if desired.
Q: How do I prevent the loaf from becoming too dense?
Density often results from over‑mixing or using too much flour. Measure flour with a kitchen scale, and fold the dry ingredients into the wet mixture just until combined. Also, ensure your baking soda is fresh; an old leavening agent won’t create enough rise.
Q: What if I don’t have a loaf pan?
You can bake the batter in a 9‑inch round cake pan or a muffin tin. Adjust the baking time: a cake pan may need 5‑10 minutes less, while muffins will bake in 20‑25 minutes. Check for doneness with a toothpick.
Q: Is it safe to freeze the whole loaf?
Yes, freezing the entire loaf works well. Wrap it tightly in plastic wrap, then foil, and store in a freezer‑grade bag. When ready to use, thaw at room temperature or reheat slices directly from frozen in a toaster oven.
Q: Can I add other nuts or dried fruit?
Definitely. Pecans, almonds, or even chopped dried apricots make excellent additions. Keep the total volume of add‑ins around ½ cup to maintain the batter’s balance.
Q: How far in advance can I prepare the batter?
The batter can sit at room temperature for up to 30 minutes before baking, allowing the flavors to meld. For longer storage, you can refrigerate the batter for up to 2 hours; just give it a gentle stir before transferring to the pan.
🎉 Let’s Get Baking!
This banana walnut bread combines the nostalgic comfort of home baking with a refined, moist texture that will impress friends and family alike. By following the precise ratios, respecting the gentle mixing technique, and using the pro tips provided, you’ll achieve a loaf that stays soft for days and offers a delightful crunch from toasted walnuts. Whether you enjoy it for breakfast, as an afternoon snack, or as a sweet finale to a dinner, this recipe adapts beautifully to any occasion.
Give it a try, experiment with the variations, and share your results in the comments below. Your feedback helps the community grow, and I love seeing how you make this recipe your own. Don’t forget to rate the recipe and tag your photos with #BananaWalnutBread on Instagram for a chance to be featured!
Have you tried this recipe?
Leave a comment and rating below! Share your photos on Instagram with #BananaWalnutBread to be featured.
Banana Walnut Bread Moist and Delicious
A moist, nutty loaf that brings comfort and joy to every bite.
📝 Ingredients
Batter
Dry Mix & Nuts
👨🍳 Instructions
- 1 Preheat oven to 175°C (350°F) and grease a 9×5‑inch loaf pan.
- 2 Mash bananas until mostly smooth, then stir in melted butter.
- 3 Add sugar, beaten egg, and vanilla; mix gently.
- 4 Whisk flour, baking soda, salt, and optional cinnamon together.
- 5 Fold dry mix into wet mixture until just combined; fold in walnuts.
- 6 Pour batter into pan, sprinkle remaining walnuts on top, and bake 45‑55 minutes.
- 7 Check doneness with a toothpick; it should come out clean.
- 8 Cool 10 minutes in pan, then turn onto a wire rack.
- 9 Slice and serve warm with butter, honey, or cream cheese.
- 10 Store leftovers as described in the storage section.
🥗 Nutrition (per serving)
*Nutritional values are estimates based on standard ingredients.
📚 You Might Also Like
Chocolate Banana Bread
Blueberry Muffins
Pumpkin Walnut Loaf


💬 Comments & Reviews
Leave a Comment
[Reader comments will appear here]