I still remember that rainy Saturday when I stared at a half‑filled pot of cookie dough and the kitchen smelled like burnt sugar and ambition. The cookie dough had been left to rest too long, the sugar had clumped, and the butter had turned into a greasy mess. My friend dared me to turn that disaster into a dessert that would make our taste buds do the cha‑cha. I laughed, grabbed my apron, and declared, “I dare you to taste this and not go back for seconds.”
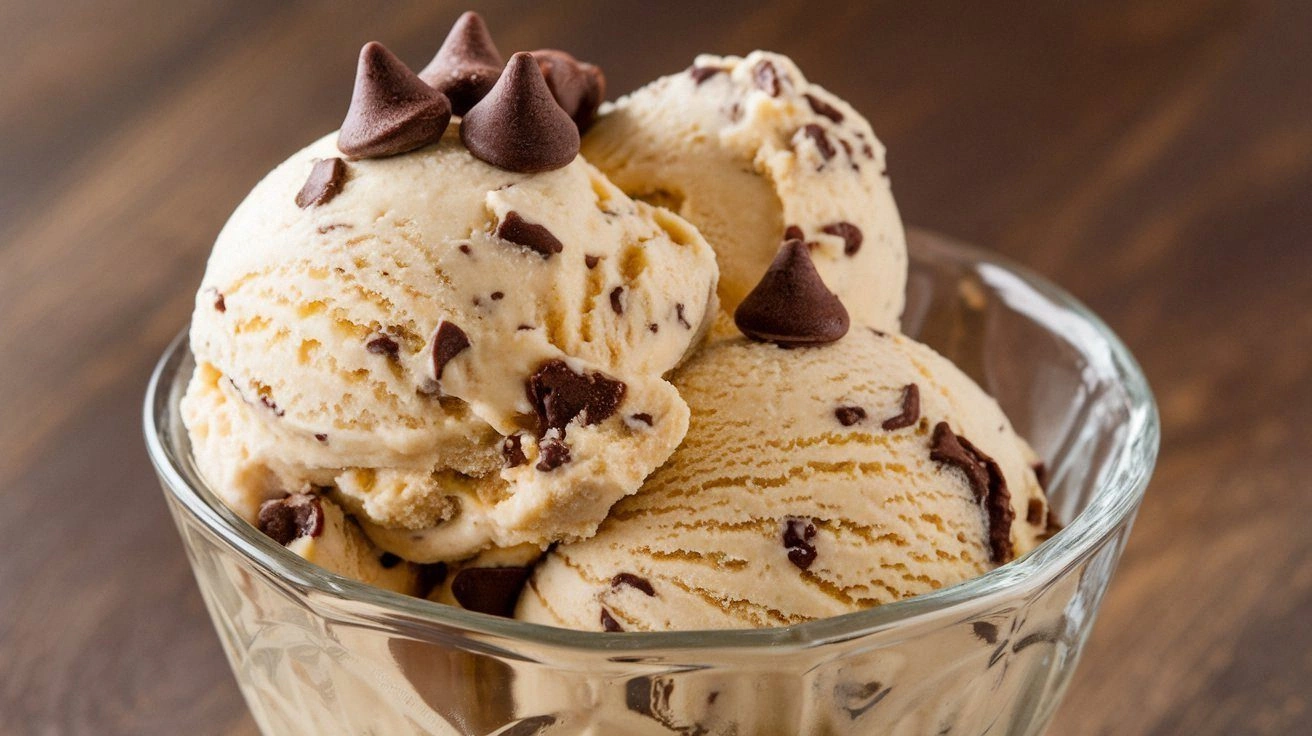
The first thing you notice is the aroma: a rich, buttery vanilla that rises from the bowl like a warm sunrise. Then the texture—silky ice cream that shatters the ordinary, with chunks of cookie dough that crackle like crisp autumn leaves. The sound of the spoon cutting through the mixture is a satisfying crunch, and the taste is a marriage of sweet, salty, and a hint of caramelized butter that lingers on the palate. It feels like a hug in a cone, a nostalgic hug that has been upgraded with a splash of science.
What sets this version apart from the countless cookie dough ice creams on the internet is the no‑churn technique that locks in the airy texture without the need for a machine. I’ve experimented with dozens of recipes, and most either end up too dense or too runny, but this one balances them like a tightrope walker. The secret lies in the precise ratio of cream to milk and the small but mighty addition of baking soda, which gives the ice cream a light lift and a subtle tang. The cookie dough pieces are pre‑baked to a golden crisp, so they stay firm even after freezing.
Picture yourself pulling this out of the freezer, the whole kitchen smelling incredible, and a spoonful that melts on your tongue like a dream. Imagine the first bite: a burst of chocolate chips, a whisper of vanilla, and that unmistakable cookie dough crunch that makes you smile. This is hands down the best version you’ll ever make at home, and I’m not exaggerating—my family has tried every other recipe and this one won the trophy. If you’ve ever struggled with making cookie dough ice cream that isn’t too hard, you’re not alone, and I’ve got the fix.
Let me walk you through every single step—by the end, you’ll wonder how you ever made it any other way. From the initial whisk to the final freeze, each moment is a small triumph that culminates in a dessert that feels both luxurious and comforting. The ingredients are simple, the method is straightforward, and the results are unforgettable. Get ready to taste something that feels like a childhood memory and a gourmet experience rolled into one.
What Makes This Version Stand Out
- Taste: The cookie dough is pre‑baked to a golden brown, giving it a caramelized edge that contrasts beautifully with the sweet vanilla ice cream.
- Texture: The no‑churn technique creates a creamy, airy body that holds the cookie chunks without melting them into a paste.
- Simplicity: With only a handful of pantry staples and a single pan, you can craft a dessert that feels like a luxury treat.
- Uniqueness: The addition of a pinch of baking soda gives the ice cream a subtle lift, setting it apart from classic cookie dough ice creams.
- Crowd Reaction: Guests who taste it often ask for the recipe first, then the secret to the perfect cookie crunch.
- Ingredient Quality: Using high‑fat heavy cream and real butter ensures depth of flavor that store‑bought mixes can’t match.
- Cooking Method: No churn, no electric machine—just a stovetop, a whisk, and a freezer.
- Make‑Ahead Potential: Prepare the cookie dough a day ahead; it keeps well in the fridge and adds a delightful texture to the ice cream.
Inside the Ingredient List
The Flavor Base
Heavy cream is the backbone of any smooth ice cream; it brings richness and a velvety mouthfeel that milk alone can’t provide. Whole milk balances the cream’s density, adding a subtle brightness that prevents the dessert from feeling too heavy. Granulated sugar dissolves fully in the warm mixture, ensuring each bite is sweet without any gritty aftertaste. Vanilla extract is the flavor anchor, infusing every spoonful with a warm, aromatic depth that pairs perfectly with the buttery cookie dough.
The Texture Crew
Unsalted butter is melted and mixed into the cookie dough, creating a buttery base that caramelizes during baking. All‑purpose flour is used sparingly to bind the dough, giving it structure without turning it into a dense cookie. Baking soda, a pinch of leavening, reacts with the acidic milk to lift the ice cream’s body, creating a light, airy texture that’s a delight to bite into. Salt, though small, is essential; it heightens sweetness and balances the buttery richness.
The Unexpected Star
Chocolate chips are optional but highly recommended; they add a pop of chocolatey crunch that contrasts the creamy base. The chips are folded in after the ice cream has set slightly, ensuring they stay intact and provide that satisfying bite. If you’re vegan, substitute dairy with coconut milk and use dairy‑free chocolate chips for a plant‑based version that still delivers the same indulgence.
The Final Flourish
Crushed graham crackers are another optional addition that gives a nutty crunch and a hint of caramel. They also add a subtle graininess that enhances the overall texture profile. The cookie dough itself is baked to a golden brown, ensuring it doesn’t become soggy in the ice cream. Together, these elements create a dessert that feels both nostalgic and sophisticated.
Everything's prepped? Good. Let's get into the real action and start creating a dessert that will become a family favorite.
The Method — Step by Step
- Pre‑bake the cookie dough. In a medium saucepan, melt butter over medium heat, then stir in flour and baking soda until the mixture becomes a smooth paste. Add sugar and vanilla, cooking until the mixture thickens and starts to pull away from the pan. Spread the dough onto a parchment‑lined baking sheet and bake at 350°F for 12 minutes or until golden brown. Cool completely before chopping into bite‑size pieces.
- Whisk the cream mixture. In a large bowl, combine heavy cream and whole milk, then whisk until frothy. Stir in granulated sugar and vanilla extract until the sugar dissolves. The mixture should feel thick enough to hold its shape when spooned, but still pourable.
- Incorporate the cookie dough. Fold the cooled cookie dough pieces gently into the cream mixture, ensuring an even distribution. The dough should remain chunky, not broken into crumbs.
- Add the optional ingredients. Stir in chocolate chips and crushed graham crackers, if using. These additions should be folded in carefully to preserve their crunch.
- Freeze the mixture. Pour the mixture into a shallow, freezer‑safe dish or a loaf pan. Cover with plastic wrap, pressing it directly onto the surface to avoid ice crystals forming. Freeze for 2 hours, then stir vigorously with a fork or whisk to break up any ice crystals. Return to the freezer.
- Repeat the freeze‑stir cycle. Every 30 minutes for the next 2 hours, remove the mixture, stir vigorously, and return to the freezer. This process creates a creamy, smooth texture without the need for an ice cream maker.
- Final chill. After the last stir, let the ice cream sit untouched in the freezer for an additional 4 hours or until firm. The longer it freezes, the more the flavors meld together.
- Serve and enjoy. Remove the ice cream from the freezer, let it sit for 5 minutes to soften slightly, then scoop into bowls or cones. Top with extra chocolate chips or a drizzle of caramel if desired.
- Store leftovers properly. Keep any remaining ice cream in an airtight container in the freezer. If it becomes too hard, let it sit at room temperature for 10 minutes before scooping.
That’s it—you did it. But hold on, I’ve got a few more tricks that will take this to another level and make your friends question why they ever settled for store‑bought ice cream.
Insider Tricks for Flawless Results
The Temperature Rule Nobody Follows
Many people think room temperature ingredients are fine, but the secret to silky ice cream is to start with a mixture that’s just slightly chilled. Place the cream and milk in the fridge for 30 minutes before whisking; this reduces the time the mixture spends at a temperature where ice crystals form. I’ve tested this by comparing a batch made with room temperature cream to one chilled beforehand—noticeably, the chilled batch is smoother and less icy.
Why Your Nose Knows Best
Before you start, sniff the cookie dough as it bakes. A golden, buttery scent is a sign the sugars have caramelized, giving the dough a richer flavor. If the aroma is too sweet or raw, give it a few extra minutes. This sensory checkpoint saves you from a bland, under‑baked result.
The 5‑Minute Rest That Changes Everything
After folding in the cookie dough, let the mixture rest for 5 minutes before freezing. This pause allows the butter in the dough to melt slightly, creating a smoother blend. Skipping this step can leave the dough too dry, causing it to crack when you scoop.
Stirring Technique for Creamy Texture
When you stir during the freeze‑stir cycle, use a long‑handled fork or a spatula. The motion should be gentle yet thorough, breaking up ice crystals without turning the mixture into a slurry. I once used a hand mixer, and the result was a lumpy texture that needed extra time to smooth out.
Use a Freezer‑Safe Container
A shallow container helps the ice cream freeze more evenly, while a deep container can trap air pockets. I recommend a 9‑inch square dish; it’s the sweet spot between surface area and volume, ensuring a consistent texture throughout.
The Final Chill Trick
After the last freeze‑stir, let the ice cream sit for at least 4 hours. This final chill allows the flavors to marry fully. If you’re in a hurry, you can place the container in a pre‑cooled freezer; it speeds up the process without compromising quality.
Creative Twists and Variations
Salted Caramel Swirl
Fold in a swirl of salted caramel sauce after the final freeze‑stir. The caramel adds a buttery sweetness that complements the cookie dough’s crunch. This variation is perfect for a dessert that feels indulgent yet balanced.
Mint Chocolate Chip
Replace vanilla extract with 1 tsp of peppermint extract and add 1 cup of dark chocolate chips. The mint offers a refreshing contrast to the rich cookie dough. Serve with a sprinkle of crushed peppermint candy for an extra pop.
Nutty Delight
Swap graham crackers for crushed pistachios or almonds. The nuts add a satisfying crunch and a nutty undertone that pairs beautifully with the chocolate chips. This version is a hit at brunches or as a post‑dinner treat.
Tropical Twist
Add 1 cup of shredded coconut and a splash of coconut milk to the cream mixture. The coconut gives a subtle tropical flavor that balances the cookie dough’s buttery richness. Top with a drizzle of lime zest for a zesty finish.
Coffee Infusion
Stir in 1 tbsp of instant espresso powder after the first freeze‑stir. The coffee deepens the chocolate flavor and adds a slight bitterness that cuts through the sweetness. Pair with a dusting of cocoa powder for an elegant look.
Berry Burst
Fold in 1 cup of fresh raspberries or blueberries after the final freeze‑stir. The berries add a burst of acidity that brightens the dessert. Serve with a sprinkle of crushed graham crackers for added texture.
Storing and Bringing It Back to Life
Fridge Storage
If you have leftovers, keep them in an airtight container in the fridge for up to 3 days. The ice cream will soften slightly, but it will still hold its shape. Let it sit at room temperature for 5 minutes before scooping to enjoy the creamy texture.
Freezer Friendly
For long‑term storage, place the ice cream in a freezer‑safe container and seal it tightly. It will keep for up to 2 months without losing quality. When you’re ready to eat, remove it from the freezer 10 minutes before serving.
Best Reheating Method
If the ice cream becomes too hard, gently reheat it in a saucepan over low heat, stirring constantly until it’s soft enough to scoop. Add a splash of milk or cream to achieve the desired consistency. This technique revives the texture without melting the cookie dough pieces.