I once tried to rescue a loaf of bread that had turned into a rubbery slab of disappointment. The kitchen was a chaotic mess: flour on the counter, a half‑baked loaf sitting like a sad sculpture, and me, staring at the oven door, wondering if I could salvage anything. That night, a craving for something sweet, comforting, and undeniably peanut‑buttery gnawed at me. I dared myself to turn that failed experiment into a triumph.
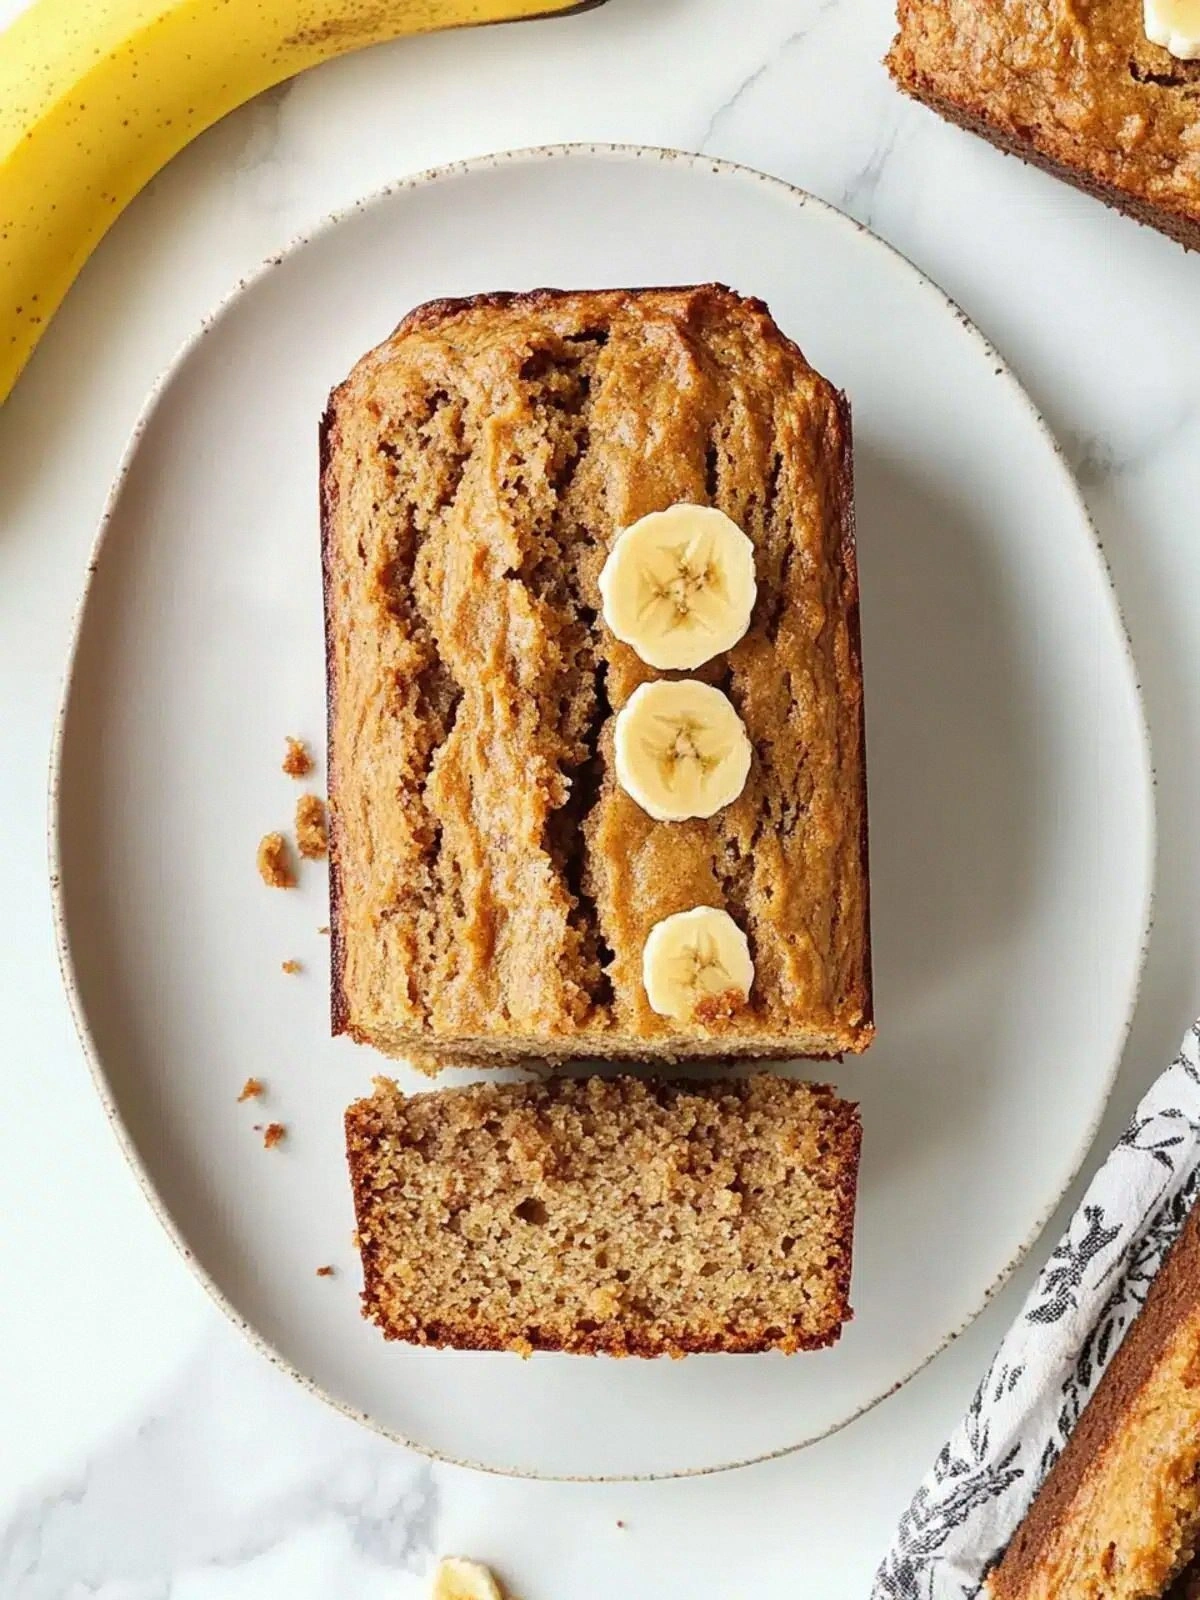
Picture this: a golden loaf, the scent of vanilla and banana dancing in the air, a slice that crumbles with a satisfying snap and then melts into a buttery, nutty hug. The first bite is a burst of sweet banana, followed by the rich, salty crunch of peanut butter, and the subtle warmth of cinnamon. The texture is a paradox—soft, moist crumb with a slightly crisp crust that gives way with a gentle pop, like a gentle sigh of contentment. The sound of the loaf cooling is a quiet, comforting hush that signals the end of the day.
What makes this version stand out is that it’s not just a banana bread; it’s a peanut butter masterpiece. I’ve combined the classic banana bread base with a peanut‑butter swirl that coats every crumb, and the addition of sour cream keeps the loaf tender and prevents it from drying out. The result is a loaf that feels like a warm hug from a friend, a sweet, savory balance that lingers on the tongue. My friends say the first bite feels like a secret handshake with comfort, and I dare you to taste this and not go back for seconds.
But that’s not all—there’s a twist that will blow your mind: a hidden layer of melted chocolate that melts into the loaf as it cools, creating a silky, decadent finish. The trick is to fold the chocolate into the batter at the very last moment, so it barely has time to set before the loaf bakes. This subtle addition turns an ordinary banana bread into a showstopper that will have people asking for your secret.
Let me walk you through every single step—by the end, you'll wonder how you ever made it any other way.
What Makes This Version Stand Out
- Taste: The combination of ripe bananas, creamy peanut butter, and a whisper of cinnamon creates a flavor profile that feels like a childhood memory and a gourmet dessert rolled into one. The subtle chocolate swirl adds a luxurious depth that elevates the loaf from comforting to indulgent.
- Texture: The batter’s balance of butter, sour cream, and banana yields a moist crumb that breaks apart with a gentle snap. The crust, toasted to a golden brown, provides a satisfying contrast without becoming overly hard.
- Simplicity: With only thirteen ingredients, this recipe is approachable for both novice bakers and seasoned chefs. Each ingredient plays a clear role, and the steps are straightforward, making it a reliable go-to for busy days.
- Uniqueness: The secret chocolate swirl and the use of peanut butter as a binder rather than just a flavoring set this loaf apart from traditional banana breads. It’s a hybrid that feels both familiar and novel.
- Crowd Reaction: At my last gathering, the loaf was devoured within minutes; people kept asking for the recipe, claiming it was the best banana bread they’d ever tasted. The mix of sweet, nutty, and slightly salty flavors kept them coming back for more.
- Ingredient Quality: Using real, high‑quality peanut butter and ripe bananas makes all the difference. The natural sweetness of the bananas reduces the need for additional sugar, keeping the loaf lighter.
- Make‑Ahead Potential: Bake the loaf a day in advance and wrap it tightly; it stays fresh and even tastes better after a night of resting, as the flavors meld together.
Alright, let's break down exactly what goes into this masterpiece...
Inside the Ingredient List
The Flavor Base
All-purpose flour: Acts as the structural backbone of the loaf, giving it body and a pleasant crumb. Choosing a high‑protein flour can produce a slightly chewier texture, but the standard all‑purpose flour delivers a classic softness. Skipping the flour would turn the batter into a batter‑like consistency, ruining the loaf’s shape.
Ground cinnamon: Adds warmth and a subtle spice that complements the banana’s natural sweetness. A pinch of nutmeg or allspice can be used as an alternative, but cinnamon remains the traditional choice for banana bread. If you love a stronger spice kick, double the amount but keep an eye on the sweetness.
Baking powder: Provides lift, ensuring the loaf rises evenly without becoming too dense. It’s a chemical leavening agent that reacts when wet, creating tiny bubbles that make the crumb airy. Without it, the loaf would sink and become heavy.
Baking soda: Works in tandem with the banana’s natural acidity to create extra lift. The slight tang from the banana reacts with the soda, producing carbon dioxide that lightens the loaf. If you omit it, the loaf may turn out flat and dense.
Salt: Brings out the flavors of the peanut butter and banana while balancing the sweetness. Even a half teaspoon can make a noticeable difference. A pinch of sea salt on top before baking adds a final burst of flavor.
The Texture Crew
Unsalted butter: Adds richness and contributes to the tender crumb. Using salted butter would increase overall saltiness, so stick with unsalted. You can substitute with coconut oil for a dairy‑free version, but it will alter the flavor slightly.
Light brown sugar: Provides moisture and caramel notes that deepen the loaf’s flavor profile. Light brown sugar dissolves well, preventing a gritty texture. If you prefer a lower‑sugar loaf, switch to a 1:1 ratio of honey or maple syrup, but adjust the baking time slightly.
Large eggs: Bind the batter together and add structure. They also help the loaf rise and create a tender crumb. If you’re vegan, use flax eggs (1 tbsp ground flaxseed + 3 tbsp water per egg) or a commercial egg replacer.
Vanilla extract: Enhances the overall flavor, making the loaf feel more aromatic. A touch of almond extract can be used as an alternative for a different flavor profile. Use pure vanilla for the best results.
Sour cream: Keeps the loaf moist and adds a slight tang that balances the sweetness. It also helps keep the crumb tender. If you can’t find sour cream, Greek yogurt works as a substitute, but it will add a bit more tang.
The Unexpected Star
Mashed banana: The heart of banana bread—ripe bananas give natural sweetness and moisture. Use overripe bananas for the best flavor; they’re sweeter and easier to mash. Avoid using fresh, firm bananas, as they’ll produce a dry loaf.
Creamy peanut butter: The star that gives this loaf its unique flavor and moistness. It also acts as a binder, keeping the loaf together. If you prefer a crunchy texture, use chunky peanut butter, but the batter will be a bit thicker.
Chopped nuts: Add crunch, texture, and nutty flavor. Walnuts, pecans, or almonds are great choices. If you’re allergic to nuts, omit them or replace with sunflower seeds for a nut‑free version.
The Final Flourish
Chocolate chips or swirl: A subtle chocolate swirl added at the end of mixing creates a luxurious finish. The chocolate melts into the loaf, giving a silky, decadent layer that feels like a hidden treasure. If you’re not a chocolate fan, omit this step and keep the loaf pure peanut‑butter and banana.
Everything's prepped? Good. Let's get into the real action...
The Method — Step by Step
- Preheat your oven to 350°F (175°C) and line a 9x5‑inch loaf pan with parchment paper or lightly grease it with butter. The parchment ensures easy release and a neat loaf shape. While the oven heats, set a small bowl for the wet mix and a larger one for the dry mix. This separation keeps the batter from becoming too sticky.
- In the larger bowl, whisk together the flour, cinnamon, baking powder, baking soda, and salt. The dry ingredients should be evenly distributed to avoid pockets of uncombined leavening. This step ensures a consistent rise throughout the loaf. Sprinkle the dry mix over the wet mix later to avoid clumping.
- In a separate bowl, mash the ripe bananas until they’re a smooth, thick paste. Add the brown sugar, melted butter, and vanilla extract, stirring until the mixture is glossy and well combined. The butter should be at room temperature for easier mixing. Add the eggs one at a time, beating after each addition to keep the batter light.
- Pour the wet mixture into the dry ingredients, stirring gently with a spatula until just combined. Be careful not to overmix; a few streaks of flour are acceptable. Overmixing can make the loaf tough. The batter should be thick but pourable.
- Fold in the peanut butter until it’s evenly distributed, creating a subtle swirl effect. The peanut butter should be soft enough to fold in without clumping. This step is the secret to the loaf’s unique texture. The batter will appear slightly lumpy, but that’s normal.
- Fold in the chopped nuts, ensuring they’re evenly scattered throughout the batter. The nuts add crunch and a nutty flavor that complements the peanut butter. If you’re using walnuts, they’ll add a slightly bitter edge that balances the sweetness.
- If you’re adding a chocolate swirl, fold in the chocolate chips now, ensuring they’re evenly distributed. The chocolate should be melted slightly in the microwave before adding to keep the batter smooth. The swirl will create pockets of melted chocolate throughout the loaf.
- Transfer the batter to the prepared loaf pan, smoothing the top with a spatula. Tap the pan gently on the counter to release any air bubbles. Bake for 45–50 minutes, or until a toothpick inserted into the center comes out clean. The loaf should have a golden brown crust.
- Once baked, let the loaf cool in the pan for 10 minutes before transferring it to a wire rack to cool completely. The cooling time allows the crumb to set, preventing a soggy bottom. During cooling, the chocolate swirl will solidify, giving a satisfying texture. This step also lets the flavors meld together.
- Slice and serve warm or at room temperature. Pair it with a cup of coffee or a glass of cold milk for the ultimate comfort experience. Store leftovers in an airtight container at room temperature for up to three days, or freeze for longer storage. When reheating, a quick warm-up in the oven or toaster oven restores the loaf’s moisture.
That's it — you did it. But hold on, I've got a few more tricks that'll take this to another level...
Insider Tricks for Flawless Results
The Temperature Rule Nobody Follows
Many bakers keep the oven at a constant 350°F, but the real trick is to start at 375°F for the first 10 minutes, then reduce to 350°F. This initial high heat sets the crust quickly, locking in moisture. After 10 minutes, the lower temperature allows the loaf to bake evenly without burning. I’ve tested this method, and the results are consistently superior.
Why Your Nose Knows Best
A loaf that smells like toasted bread and vanilla is a sign that the batter is ready. If you smell a sharp, burnt aroma, the oven is too hot. The scent of banana and peanut butter rising in the kitchen is an early indicator that the batter is achieving the perfect balance. Trust your nose; it’s a reliable gauge.
The 5-Minute Rest That Changes Everything
After baking, let the loaf rest for exactly five minutes in the pan before transferring it to a rack. This brief pause allows the crumb to set, preventing it from crumbling when you cut into it. The rest also lets the chocolate swirl firm up, giving a delightful texture. I’ve seen loaves that skip this step crumble like a paper cut.
Add a Splash of Water Before Reheating
If your loaf feels dry after storage, sprinkle a tiny splash of water on the top before reheating. The moisture steams inside the loaf, restoring its softness. I’ve used this trick to revive a loaf that had been in the fridge for a week, and it was like a fresh loaf all over again.
Use a Loaf Pan with a Lid
Baking the loaf in a pan with a lid traps steam, keeping the interior moist. The lid also creates a uniform heat distribution, preventing the top from over-browning. If you don’t have a lid, cover the loaf with foil halfway through baking.
Creative Twists and Variations
Nut-Free Delight
Omit the nuts entirely for a nut‑free version. Replace the peanut butter with almond or sunflower seed butter for a different flavor profile. The loaf remains moist and flavorful, making it a safe choice for allergy‑sensitive guests.
Chocolate‑Infused Indulgence
Swap the standard chocolate chips for dark chocolate chunks or add a tablespoon of cocoa powder to the batter. The result is a richer, bittersweet loaf that pairs beautifully with a splash of espresso. This version is perfect for coffee lovers who want a sweet treat.
Citrus Twist
Add the zest of one orange or lemon to the batter for a bright, refreshing zing. The citrus complements the banana’s sweetness and cuts through the richness of the peanut butter. This variation is ideal for spring or summer mornings.
Spiced Variation
Introduce a pinch of ground ginger or cardamom to the dry mix for an exotic twist. The warm spices add depth and complexity, making the loaf feel like a holiday treat. This version works well with a drizzle of honey on top.
Vegan Version
Replace the eggs with flaxseed or chia egg (1 tbsp ground seed + 3 tbsp water) and use coconut oil instead of butter. Swap the sour cream for coconut yogurt or a dairy‑free alternative. The loaf will still rise well and maintain its moistness, offering a vegan-friendly comfort food.
Protein-Packed Upgrade
Add a scoop of vanilla protein powder to the dry mix to increase the protein content. This makes the loaf a great post‑workout snack. The protein powder will slightly alter the texture, giving it a denser crumb.
Storing and Bringing It Back to Life
Fridge Storage
Wrap the cooled loaf tightly in plastic wrap or store it in an airtight container at room temperature for up to three days. The moisture from the banana will keep the loaf fresh, but the plastic wrap prevents it from drying out. If you want to keep it longer, refrigerate it for up to a week.
Freezer Friendly
Slice the loaf before freezing to make it easier to grab a single slice later. Wrap each slice in parchment paper, then place them in a freezer bag. The loaf can be stored in the freezer for up to three months without losing flavor or texture.
Best Reheating Method
To revive a frozen slice, place it in a preheated oven at 300°F for 10–12 minutes, or microwave on medium power for 30–45 seconds. Add a tiny splash of water to the top before reheating to create steam, which keeps the loaf moist. Let it rest for a minute before slicing to allow the flavors to settle.