The night I tried to make a “quick” snack for a house‑party, I accidentally set the kitchen on fire—well, not literally, but the pot of boiling eggs erupted into a chaotic splash of yolk and shell. My friends were laughing, my oven was humming, and my stomach was growling like a beast that hadn’t been fed in days. I stared at the over‑cooked eggs, feeling the heat of the moment and the taste of disappointment, and thought, “I can do better.” That single, sizzling moment sparked a revelation: deviled eggs could be elevated from a bland appetizer to a flavor bomb that sings.
Picture this: the kitchen filled with the sharp, almost metallic scent of garlic as it sizzles in a hot pan, the rhythmic clink of a wooden spoon against the pot, and the bright, citrusy pop of lemon juice cutting through the richness of the yolks. The air tastes of pepper, the texture of creamy filling glistening against the hard shell, and the sound of a spoon scraping the bowl echoing in the background. Every sense is engaged, turning a simple snack into an orchestra of flavors that dance on your tongue. You can almost hear the eggs crack like a drum, the sizzling garlic crackle, and the gentle hiss of the chili flakes releasing their heat.
Why does this version stand out? Because it blends the humble deviled egg with a punch of chili and a whisper of Dijon, creating a harmony that most recipes miss. The mayo is light enough to keep the filling silky, yet thick enough to hold the spices together like a secret sauce that clings to every bite. The fresh garlic gives a pungent kick that wakes up the palate, while the lemon juice adds a zesty brightness that balances the heat. It’s a dish that feels both daring and comforting, a paradox that keeps guests coming back for seconds—yes, I dare you to taste this and not go back for more.
I’ve spent countless hours tweaking ratios, testing textures, and balancing heat until I hit the sweet spot where the yolk’s creaminess meets the fiery bite of chili. I’ve discovered that the best deviled eggs are those that look like a polished gem but burst with flavor when you bite into them. This isn’t just another recipe; it’s a culinary experiment that turned a kitchen mishap into a masterpiece. Let me walk you through every single step—by the end, you’ll wonder how you ever made it any other way.
What Makes This Version Stand Out
- Bold Flavor: The combination of fresh garlic and chili flakes creates a depth of taste that is both spicy and aromatic, elevating the classic deviled egg into something unforgettable.
- Velvety Texture: A generous amount of mayonnaise gives the filling a silky mouthfeel that coats the shell like a smooth velvet, making each bite luscious.
- Bright Citrus: Lemon juice cuts through the richness, providing a fresh, bright lift that balances the heat and keeps the filling from feeling heavy.
- Simple Yet Sophisticated: The recipe uses only eight core ingredients, yet each one plays a pivotal role, proving that complexity can come from precision.
- Make‑Ahead Friendly: You can prep the filling up to 24 hours in advance, allowing the flavors to meld and making it ideal for parties or last‑minute gatherings.
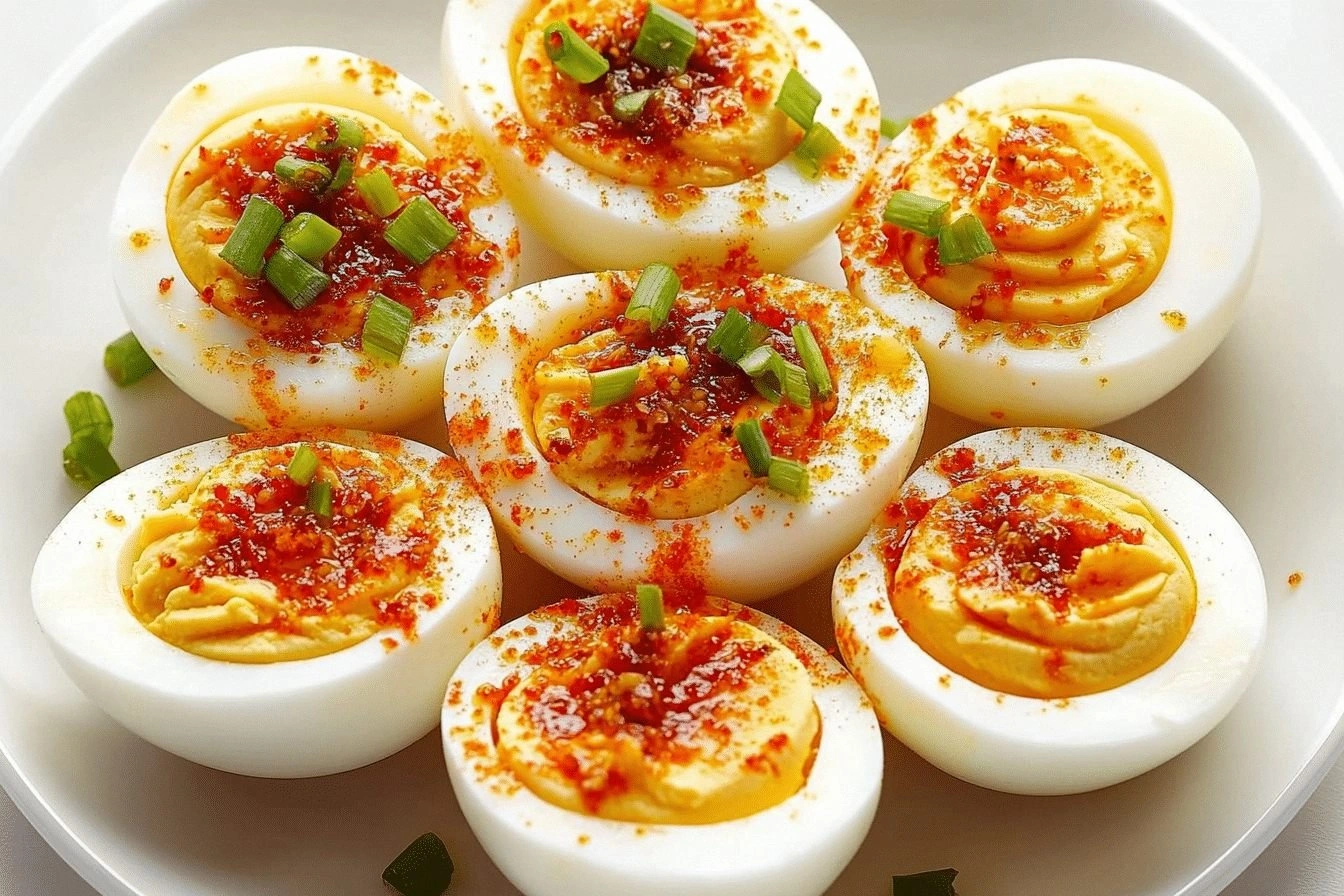
- Visual Appeal: The vibrant red of the chili and the green garnish create a dish that looks as good as it tastes, making it a showstopper on any plate.
- Heat Control: By using chili flakes or paste, you can dial up or down the spiciness to suit any palate, giving you full control over the dish’s heat level.
- Versatility: Whether you’re serving it at a potluck, a formal dinner, or a casual family brunch, this deviled egg adapts seamlessly to any occasion.
Alright, let's break down exactly what goes into this masterpiece…
Inside the Ingredient List
The Flavor Base
Large eggs are the backbone of this dish; they provide the creamy yolk that carries all the other flavors. Choosing eggs that are slightly older than the freshest stock ensures they hold together better during boiling, reducing the chance of a runny yolk. If you’re in a pinch, a quick test is to roll the egg on a countertop; a smooth roll indicates a fresher egg that may split more easily.
The Texture Crew
Mayonnaise is the secret weapon that gives the filling its silkiness. Opt for a full‑fat, store‑bought mayo for the richest mouthfeel, or whip up a homemade version using egg yolks and oil for a lighter alternative. The amount of mayo determines whether the filling feels airy or dense; a 1:1 ratio of yolk to mayo is a safe starting point. If you prefer a tangier bite, add a splash of Greek yogurt or a dollop of sour cream.
The Unexpected Star
Chili flakes or paste bring the heat that turns this deviled egg into a fiery sensation. Freshly crushed red pepper flakes give a bright, peppery heat, while a small amount of chili paste offers a deeper, smoky undertone. Adjust the quantity to match your spice tolerance; a pinch of cayenne can turn a mild dish into an adrenaline rush. If you’re cooking for a crowd, consider making a separate spicy and mild batch.
The Final Flourish
Fresh lemon juice brightens the filling with a citrusy zing that cuts through the richness of mayo and yolk. Dijon mustard adds a subtle tang and a touch of complexity, balancing the heat and providing a silky texture. Green onions or chives add a pop of color and a mild onion flavor that lingers on the palate, creating a harmonious contrast.
Everything's prepped? Good. Let's get into the real action…
The Method — Step by Step
- Start by placing the eggs in a single layer in a saucepan and cover them with cold water, ensuring the water level is an inch above the eggs. Bring the water to a gentle boil over medium heat; the key is a steady, not rolling, boil to prevent shell cracks. Once the water reaches a rolling boil, let the eggs cook for exactly 9 minutes to achieve a firm yet creamy yolk. Turn off the heat, drain the hot water, and immediately immerse the eggs in a bowl of ice water for 5 minutes to halt the cooking process. This quick chill locks the yolk’s texture, preventing overcooking.
- After the eggs have cooled, peel them carefully by tapping each shell on a countertop and rolling gently to loosen the membrane. Trim the ends of the shells with a sharp knife if needed, then slice the eggs in half lengthwise. Use a spoon to scoop out the yolks into a medium bowl, discarding or saving the whites for a different recipe. The yolks should feel firm and slightly springy when pressed. This step is crucial for a clean presentation and a smooth filling.
- Mash the yolks with a fork until they’re almost smooth, leaving a few small lumps for texture. Add the mayonnaise and mix until the mixture is creamy and cohesive, ensuring no streaks of yolk remain. Stir in the Dijon mustard, a splash of lemon juice, and a pinch of salt. The mixture should have a silky consistency that coats the spoon. This is the moment where flavors begin to mingle, creating the base that will carry the heat.
- Introduce the chili flakes or paste to the yolk mixture, starting with a small pinch and tasting as you go. The goal is a balanced heat that complements the garlic without overpowering the mayo. Fold in the minced garlic, ensuring it’s evenly distributed. If you’re using a chili paste, it will melt into the mixture, giving a smoky undertone. The filling should be glossy and slightly translucent, indicating a well‑blended sauce.
- Fill the egg whites with the spicy mixture using a small spoon or a piping bag for a more polished look. The filling should sit snugly in the shell, leaving a small gap at the top for garnish. Sprinkle the green onions or chives over the top, letting them add a fresh burst of color. Let the eggs rest in the refrigerator for at least 30 minutes to allow the flavors to meld. This step ensures the deviled eggs are chilled and ready to serve.
- Before serving, give the eggs a final gentle shake to redistribute any settled filling. Check the seasoning one last time; add a dash of pepper if you desire a sharper bite. The finished dish should have a glossy sheen, a bright green garnish, and a hint of heat that lingers on the tongue. The aroma will be a blend of garlic, citrus, and chili, inviting everyone to dive in.
- If you’re planning a large gathering, consider setting a serving station with a small bowl of extra chili paste on the side, allowing guests to adjust the heat to their preference. This interactive touch adds a fun element to your spread and ensures everyone gets the flavor profile they love. The extra sauce also doubles as a dipping option for crackers or bread slices.
- Keep the deviled eggs chilled until serving; the cooler they stay, the firmer the filling will remain. If you’re transporting them, use a cooler bag or insulated container to maintain the temperature. This ensures the texture stays pristine, avoiding any sogginess that can arise from room temperature exposure.
- Serve immediately after the final garnish, and watch as the crowd’s eyes widen at the vibrant colors and aromatic steam. Offer a small plate of extra lemon wedges for guests who prefer a citrus kick, and a pinch of black pepper for those who like a subtle peppery finish. The dish is a conversation starter, with each bite delivering a punch of heat that’s balanced by creamy richness.
Insider Tricks for Flawless Results
The Temperature Rule Nobody Follows
While many recipes call for a quick boil, the real trick is to let the water reach a rolling boil before timing the 9‑minute cook. This ensures the eggs cook evenly and the yolks remain firm yet creamy. If you’re in a hurry, a 7‑minute boil can produce a slightly softer yolk, but the texture will be less desirable. The key is consistency; always use the same heat setting to replicate the results every time.
Why Your Nose Knows Best
Before you taste the filling, sniff it. The aroma of fresh garlic and lemon should dominate, with a faint hint of chili. If the smell leans too much toward raw garlic, give the mixture a quick stir to blend the flavors better. Your nose is a reliable guide for flavor balance—if it smells off, your taste buds will follow.
The 5-Minute Rest That Changes Everything
After you fill the egg whites, let the deviled eggs rest in the fridge for at least 5 minutes. This short chill allows the flavors to meld, resulting in a richer taste. If you’re in a rush, skip this step, but be prepared for a slightly less integrated flavor profile. For a crowd‑pleasing result, always give them that extra 5 minutes.
The Secret to a Clean Peel
Add a teaspoon of baking soda to the boiling water; this raises the pH and makes the eggshells easier to slip off. The eggs will also be less likely to crack during boiling, preserving the yolk’s integrity. When you peel, start at the larger end where the air pocket is located; it’s the easiest point to detach the shell. This simple tweak saves time and frustration.
The Final Touch of Color
A sprinkle of paprika or a dusting of finely chopped cilantro adds a pop of color and a subtle herbal note. This garnish not only looks appealing but also introduces a new layer of flavor that can complement the chili’s heat. Experiment with different herbs to find your favorite combination. The visual impact is as important as the taste.
Creative Twists and Variations
Smoky Chipotle Kick
Swap the chili flakes for a spoonful of chipotle in adobo. The smoky undertone transforms the dish into a Mexican‑inspired appetizer that pairs perfectly with corn tortilla chips. The heat is more complex, with a hint of sweetness from the adobo sauce. This variation is ideal for a summer barbecue or a casual gathering.
Citrus‑Infused Thai Twist
Replace the lemon juice with lime and add a teaspoon of fish sauce for an umami punch. The bright citrus and savory fish sauce create a Thai flavor profile that’s both bold and refreshing. Pair it with a side of fresh cucumber slices for a cooling contrast. This version is great for a light, tropical brunch.
Herb‑Rich Mediterranean Flair
Incorporate a handful of chopped parsley, dill, and oregano into the filling. The fresh herbs bring a fragrant, earthy quality that balances the chili’s heat. Top with a drizzle of olive oil and a sprinkle of feta for a Mediterranean touch. This variation is perfect for a Mediterranean‑themed dinner party.
Creamy Avocado Fusion
Add diced avocado to the yolk mixture for a creamy, buttery texture that complements the chili. The avocado adds a subtle richness that softens the heat while providing a silky mouthfeel. Finish with a squeeze of lime for brightness. This twist turns the deviled eggs into a fusion dish that feels both indulgent and fresh.
Spiced Sweet Potato Garnish
Roast diced sweet potatoes with a pinch of cumin and paprika, then scatter them over the deviled eggs. The sweet, earthy flavor of the potatoes contrasts wonderfully with the spicy filling, creating a multi‑layered taste experience. The color contrast also adds visual appeal. This variation is ideal for a Thanksgiving or holiday spread.
Storing and Bringing It Back to Life
Fridge Storage
Keep the deviled eggs in the refrigerator for up to 3 days. Store them in a shallow container with a tight‑fitting lid to prevent moisture from seeping in. The filling will stay firm and the flavors will deepen slightly, giving you a deliciously mature taste. When you’re ready to serve, give them a quick shake to redistribute any settled filling.
Freezer Friendly
For longer storage, freeze the filled eggs for up to 2 weeks. Wrap each egg individually in plastic wrap before placing them in a freezer bag. When you’re ready to enjoy them, thaw overnight in the refrigerator. The texture may be slightly softer, but the flavor remains intact.
Best Reheating Method
Reheat the deviled eggs in a steamer basket over simmering water for 5 minutes, or gently warm them in the microwave on low for 30 seconds. Add a splash of water before reheating to create steam that keeps the filling moist. Avoid over‑cooking, as the eggs can become rubbery. Once reheated, let them rest for a minute before serving to allow the flavors to settle.