I was halfway through a weeknight scramble, juggling a burnt lasagna, a forgotten pot of soup, and a phone that kept pinging me with a friend's dare: “Try a new teriyaki chicken rice tonight, or I’m calling your mom.” The kitchen was a chaos of sizzling pans and the faint aroma of burnt sugar. My stomach growled louder than the clatter, and I knew I needed a dish that could turn a disaster into a triumph. I grabbed the recipe I’d found on a food forum, promising myself that if I could make it taste better than my last attempt, I’d finally master the art of teriyaki. The moment I opened the page, a wave of anticipation hit me like a hot skillet on a cold stove.
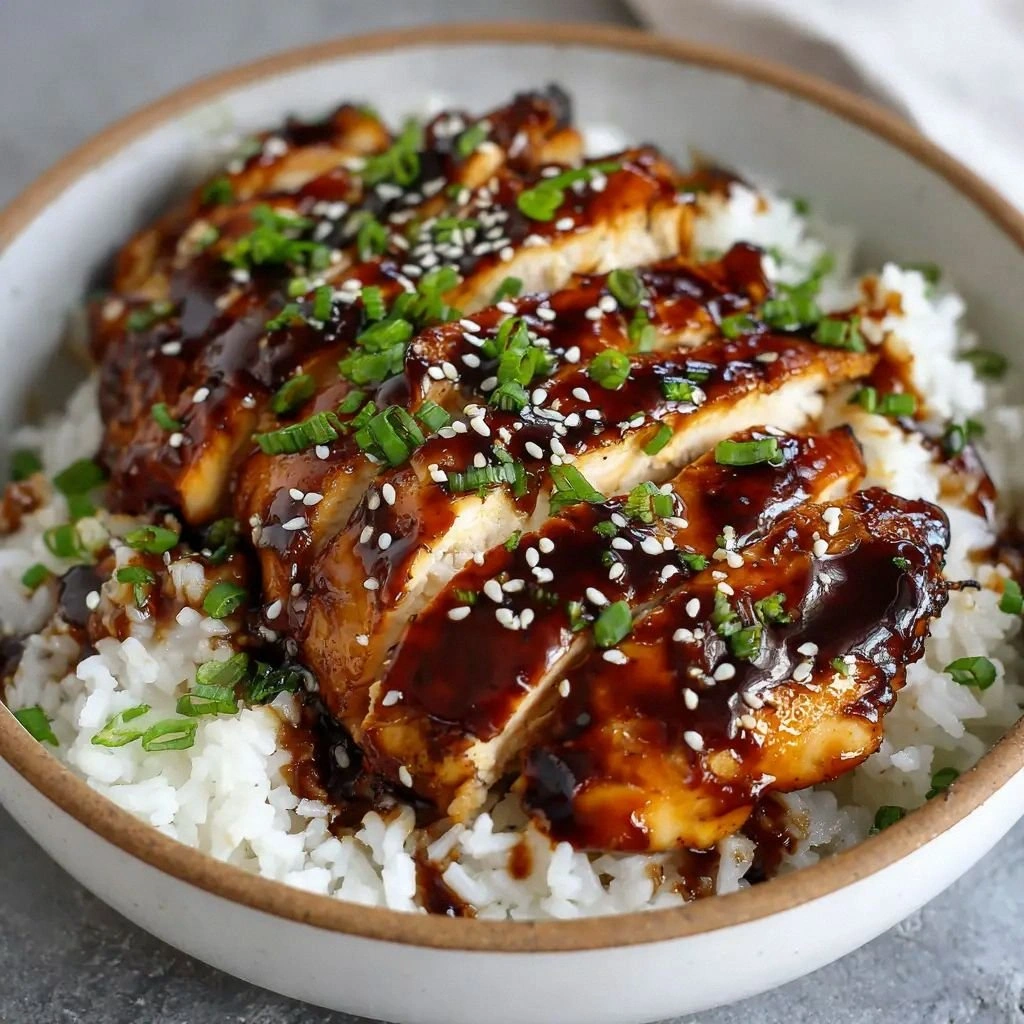
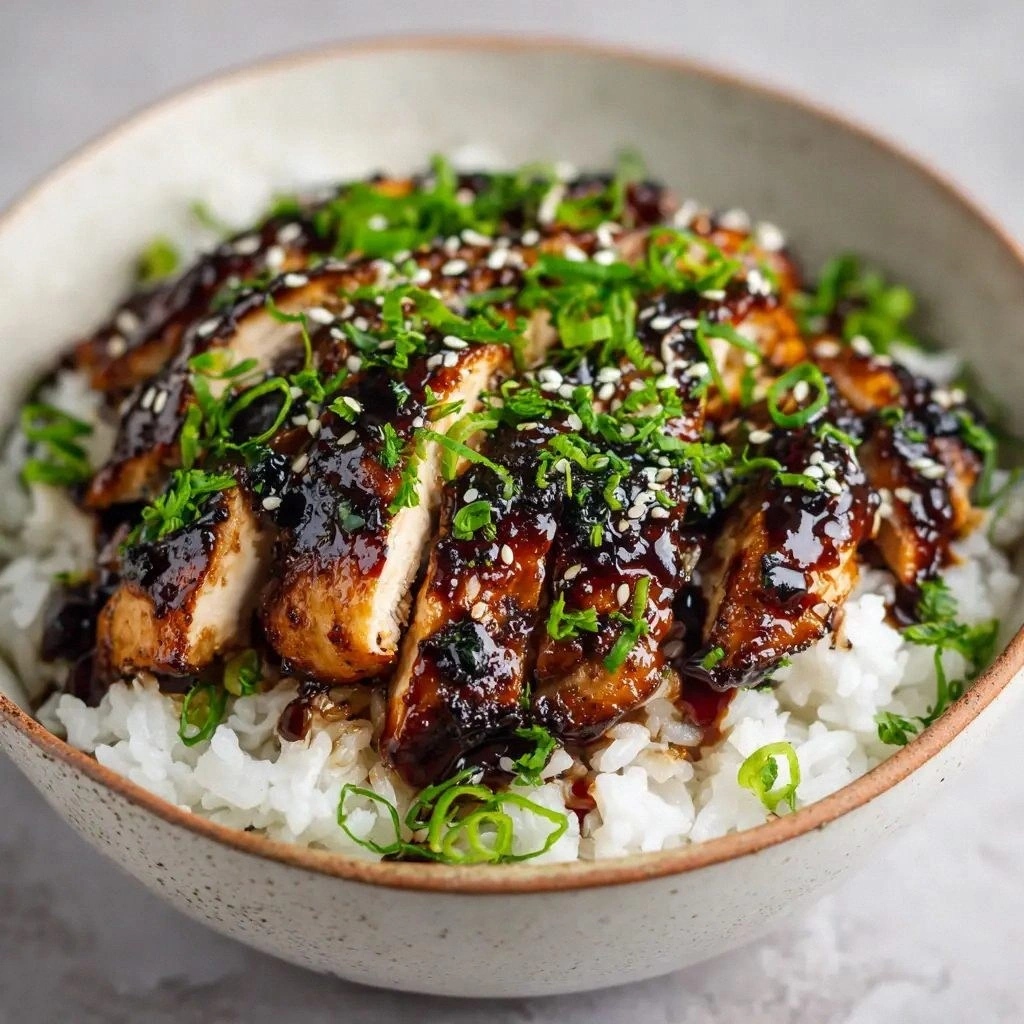
Picture this: the first bite is a burst of umami that coats the tongue like velvet, the chicken’s juices mingling with a glossy, sweet‑savory glaze that glistens on the rice. The rice itself is fluffy, each grain a tiny cloud that holds the sauce like a sponge, while a scattering of sesame seeds adds a subtle crunch. The green onions provide a bright, almost citrusy note that cuts through the richness, and the faint scent of ginger lingers in the air, promising warmth. The sound of the sauce thickening is a satisfying hiss, a reminder that everything is coming together in perfect harmony. By the time the dish is plated, the kitchen smells like a Japanese street market, and the anticipation of that first spoonful feels almost tangible.
What sets this version apart is that it doesn’t rely on the usual shortcuts or pre‑made sauces. Every element is fresh, from the hand‑minced garlic to the freshly grated ginger, and the sauce is thickened with cornstarch for that silky finish that clings to the rice. The chicken is sliced thin, allowing it to cook quickly and absorb the glaze fully, while the rice is cooked in water and a splash of soy sauce to infuse it with depth from the very first grain. I’ve tweaked the ratio of sweet to salty so that the sauce is never cloying, and I’ve added a touch of mirin for that subtle sweetness that balances everything. The result is a dish that feels both comforting and sophisticated, a simple plate that elevates a weekday dinner into an experience worth savoring.
I dare you to taste this and not go back for seconds. If you’ve ever struggled with teriyaki that tastes too flat or too sweet, you’re not alone, and I’ve got the fix. The next part of this post will walk you through each step, revealing the secrets that make this dish stand out from every other recipe out there. I’ll share a technique you won’t expect—using a splash of water in the sauce to keep it silky without making it runny. By the end, you’ll wonder how you ever made it any other way.
I’ll be honest—after the first batch, I ate half the bowl before anyone else got a taste. The sauce clung to the rice like a second skin, and the chicken was so tender it practically melted in my mouth. I’ve watched my friends’ faces light up, and I realized this was more than a recipe; it was an invitation to a new culinary adventure. The next sections will break down exactly what goes into this masterpiece, from the flavor base to the final flourish. Let’s dive in and discover the magic that turns ordinary ingredients into extraordinary flavor.
What Makes This Version Stand Out
- Flavor Depth: The sauce balances soy, mirin, and brown sugar in a way that feels both authentic and elevated, avoiding the flatness of many store‑bought versions.
- Texture Harmony: The cornstarch‑based glaze coats the rice without making it soggy, while the chicken remains juicy and slightly caramelized.
- Ingredient Quality: Using fresh ginger and garlic instead of powders gives the dish an aromatic punch that pre‑made sauces can’t match.
- Time Efficiency: The entire meal takes less than an hour, making it a perfect weekday winner without sacrificing flavor.
- Versatility: Swap the protein for tofu or shrimp, and the dish stays delicious, showcasing its adaptability for different dietary preferences.
- Make‑Ahead Potential: The sauce can be prepared a day in advance and reheated without losing its glossy sheen.
- Crowd Reaction: Friends who’ve tried it describe it as “the best teriyaki rice bowl I’ve ever had,” and they’re not shy about asking for the recipe.
Inside the Ingredient List
The Flavor Base
The heart of the dish lies in the sauce, a marriage of soy sauce, mirin, and brown sugar that creates a sweet‑savory profile. The soy sauce provides umami and saltiness, while mirin adds a subtle sweetness and a hint of acidity that brightens the glaze. Brown sugar balances the salt with its deep molasses undertone, preventing the sauce from becoming too sharp. If you skip the mirin, the glaze loses its silky finish, and the overall flavor becomes one-dimensional.
The Texture Crew
Cornstarch is the secret weapon that thickens the glaze without making it heavy. When mixed with a splash of water, it creates a smooth, glossy coating that clings to the rice and chicken. The neutral cooking oil used to sear the chicken ensures the meat stays moist and develops a slight caramelized crust. The rice itself is short‑grain white rice, chosen for its sticky texture that holds the sauce like a sponge, creating a cohesive bite.
The Unexpected Star
Fresh ginger and minced garlic are more than aromatics; they add a bright, peppery kick that cuts through the richness of the glaze. Ginger’s subtle heat elevates the dish, while garlic offers a deep, savory depth. If you’re watching sodium, you can reduce the soy sauce slightly, but keep the ginger and garlic to preserve the flavor profile. A pinch of white sesame seeds at the end adds a nutty aroma that ties all the components together.
The Final Flourish
Green onions, sliced thin, provide a fresh, slightly sweet crunch that contrasts with the silky glaze. They also add a pop of color, making the bowl visually appealing. If you prefer a milder taste, you can use scallions instead of green onions, but the texture will be softer. Finally, a light dusting of sesame seeds gives the dish a subtle nutty finish that lingers on the palate.
Everything's prepped? Good. Let's get into the real action and see how these components dance together in the pan.
The Method — Step by Step
- Step 1: Prepare the Rice. Rinse 1 cup of short‑grain white rice under cold water until the water runs clear. Combine the rice with 1.25 cups of water in a saucepan, bring to a boil, then reduce the heat to low, cover, and simmer for 18 minutes. After the rice is fluffy, fluff it with a fork and set aside. The rice should be moist but not sticky; if it’s too dry, a splash of water will help.
- Step 2: Slice the Chicken. Trim any fat from the 1 lb boneless, skinless chicken breasts and cut them into thin, bite‑size strips. The thinness ensures quick cooking and maximum absorption of the glaze. A sharp knife is essential to keep the edges clean and prevent tearing. If you prefer a more uniform shape, you can cut the strips into cubes.
- Step 3: Marinate the Chicken. In a bowl, combine the chicken strips with 1 tbsp of neutral cooking oil, 1 tsp of grated ginger, and 1 minced clove of garlic. Toss until the chicken is evenly coated. Let it sit for 10 minutes; this step is crucial for flavor infiltration. Kitchen Hack: Add a pinch of pepper to the marination mixture for a subtle heat that complements the sweet glaze.
- Step 4: Make the Teriyaki Sauce. In a small saucepan, whisk together 0.5 cup soy sauce, 0.25 cup water, 3 tbsp brown sugar, and 1 tbsp mirin. Heat over medium heat until the sugar dissolves, stirring constantly. Once the mixture starts to bubble, reduce the heat to low and let it simmer for 3 minutes to blend the flavors.
- Step 5: Thicken the Sauce. Whisk 1 tbsp cornstarch with 1 tbsp cold water to create a slurry. Slowly pour the slurry into the simmering sauce, stirring continuously until the sauce thickens to a glossy, coat‑the‑hand consistency. This step is critical; if the sauce is too thin, it won’t cling to the rice and chicken.
- Step 6: Cook the Chicken. Heat a large skillet over medium‑high heat and add the marinated chicken strips. Cook for 3–4 minutes, stirring occasionally, until the chicken is lightly browned and nearly cooked through. The goal is to develop a caramelized crust without drying out the meat.
- Step 7: Combine Chicken and Sauce. Pour the thickened teriyaki sauce over the chicken in the skillet. Stir gently to coat the chicken evenly, then reduce the heat to medium-low. Let the mixture simmer for 2 minutes, allowing the chicken to finish cooking and the sauce to glaze. Kitchen Hack: Add a splash of water if the sauce thickens too much; this keeps it silky without losing its coat.
- Step 8: Finish with Sesame and Green Onions. Remove the skillet from heat and sprinkle 1 tsp white sesame seeds and 2 sliced stalks of green onions over the chicken. Toss gently to distribute the garnish. The sesame seeds add a nutty aroma, while the green onions provide a fresh, citrusy bite. Watch Out: Don’t let the sesame seeds burn; add them at the very end to preserve their crunch.
- Step 9: Assemble the Bowl. Divide the cooked rice into four bowls, ensuring each gets an equal portion. Spoon the glazed chicken over the rice, letting the sauce pool around the edges. The visual contrast of the glossy glaze against the fluffy rice is almost a feast for the eyes.
- Step 10: Serve Immediately. Serve the bowls hot, optionally with a side of pickled ginger or a sprinkle of extra sesame seeds for those who like a little extra crunch. The dish is best enjoyed fresh, when the flavors are at their peak and the rice is still warm. If you’re in a hurry, you can reheat the bowl in the microwave for 30 seconds, but it’s best served straight from the skillet.
That's it — you did it. But hold on, I've got a few more tricks that'll take this to another level, ensuring each bite is a masterpiece.
Insider Tricks for Flawless Results
The Temperature Rule Nobody Follows
Cooking the chicken at the right temperature is essential; too high and it dries out, too low and it won’t caramelize. I recommend heating the skillet to medium‑high until a drop of water sizzles on contact. This ensures a quick sear that locks in juices. A friend once tried a low heat and ended up with limp chicken that didn’t hold the glaze. The lesson? Heat is your secret weapon for texture.
Why Your Nose Knows Best
The aroma of the sauce as it simmers is a reliable indicator of readiness. When the smell becomes fragrant and slightly caramelized, the sauce has reached its peak. If you wait too long, it can start to reduce excessively and become syrupy. A quick sniff can save you from a sticky disaster. Trust your nose; it’s the best sous‑chef you can have.
The 5‑Minute Rest That Changes Everything
After you remove the skillet from heat, let the chicken rest for 5 minutes before plating. This rest period allows the juices to redistribute, ensuring each bite is moist. Skipping this step often results in uneven moisture distribution, with some strips drying out. The rest period also lets the glaze thicken slightly, giving the dish a richer mouthfeel.
The Perfect Rice Ratio
Using the right water-to-rice ratio is critical. Too little water and the rice will be undercooked; too much and it becomes mushy. The 1.25:1 ratio for short‑grain rice works best for this dish, producing a sticky yet fluffy texture. If you’re using a rice cooker, set it to the “sticky” setting for consistent results.
The Quick Garnish Trick
A quick sprinkle of toasted sesame seeds before serving adds an extra layer of flavor and visual appeal. Toast them in a dry pan over medium heat until golden and fragrant. The toasting process brings out their nutty notes, enhancing the overall taste. Save a few for later to sprinkle on top for that final pop.
The One‑Pan Wonder
If you’re short on time, you can cook the rice in the same pan after the chicken is done. Simply add the rinsed rice and water, bring to a boil, reduce to low, cover, and simmer until done. This method saves dishes and ensures the rice absorbs the residual flavors left in the pan.
Creative Twists and Variations
This recipe is a playground. Here are some of my favorite ways to switch things up:
Spicy Sriracha Teriyaki
Add 1 tablespoon of sriracha to the sauce for a fiery kick that balances the sweetness. The heat pairs beautifully with the umami notes, creating a layered flavor profile that excites the palate. This version is perfect for those who love a little bite.
Miso‑Infused Glaze
Replace half of the soy sauce with white miso paste to deepen the umami and add a subtle earthiness. Miso also gives the sauce a richer color and a slightly thicker consistency. This twist works well with pork or beef, but also shines with chicken.
Coconut Rice Variation
Cook the rice in coconut milk instead of water for a creamy, tropical twist. The coconut milk adds a subtle sweetness that complements the teriyaki glaze. Pair this with grilled shrimp for a beach‑inspired dinner.
Vegetarian Tofu Bowl
Replace the chicken with firm tofu cubes, pan‑fried until golden before adding the sauce. The tofu soaks up the glaze, delivering a satisfying bite. Sprinkle with toasted pumpkin seeds for crunch.
Asian Noodle Swap
Swap the rice for soba or udon noodles for a noodle bowl variation. The chewy noodles hold the sauce beautifully, and the dish becomes a hearty, comforting meal. Add a handful of spinach for color and nutrition.
Lemon‑Ginger Glaze
Add the zest of one lemon to the sauce for a bright, citrusy note that cuts through the richness. The lemon pairs well with grilled salmon or tofu, creating a refreshing alternative. The result is a bright, zesty bowl that feels lighter.
Storing and Bringing It Back to Life
Fridge Storage
Store the cooked rice and chicken separately in airtight containers for up to 3 days. Keep the sauce in a small jar, and when you’re ready to eat, combine all components and reheat gently. The rice will remain fluffy if you add a splash of water before reheating.
Freezer Friendly
The dish freezes well for up to 2 months. Freeze the rice, chicken, and sauce separately, then reheat in the microwave or on the stove. Add a tablespoon of water to the rice before reheating to prevent dryness.
Best Reheating Method
Reheat the bowl in a skillet over medium heat, adding a splash of water to loosen the glaze. Stir until the sauce is heated through and coats the rice again. This method preserves the texture better than microwaving alone.