Love this? Pin it for later! 📌
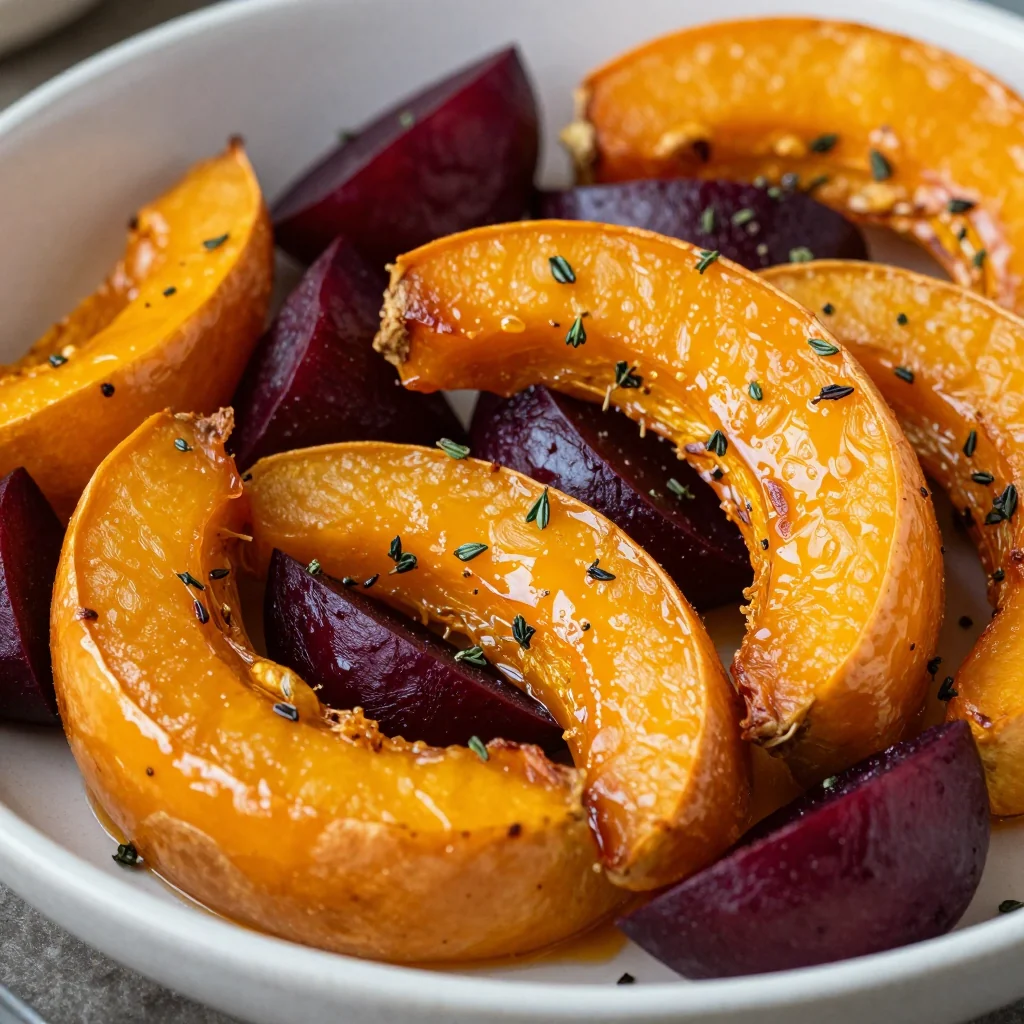
There's something magical about the way winter vegetables transform in the oven—their edges caramelize, their natural sweetness intensifies, and your kitchen fills with the most incredible aroma. This garlic roasted winter squash and beets recipe has been my go-to for busy weeknights when I want something nutritious, colorful, and absolutely delicious on the table.
I first created this dish during one of those hectic weeks when my kids had activities every evening, work was overwhelming, and I needed something that could feed us all without spending hours in the kitchen. The beauty of this recipe lies in its simplicity: just chop, toss with the most incredible garlic-herb mixture, and let the oven work its magic while you help with homework or catch up on emails.
What makes this recipe truly special is how it bridges the gap between healthy eating and comfort food. The natural sweetness of butternut squash pairs beautifully with the earthy beets, while the garlic and fresh herbs create layers of flavor that make even my pickiest eater ask for seconds. Plus, it's packed with vitamins A and C, fiber, and antioxidants—everything a growing family needs during the cold winter months.
Why This Recipe Works
- One-Pan Wonder: Everything roasts on a single sheet pan, making cleanup a breeze
- Meal Prep Friendly: Chop vegetables up to 3 days ahead for even faster weeknight dinners
- Nutrient Powerhouse: Loaded with vitamins, minerals, and antioxidants for immune support
- Customizable: Swap in your favorite winter vegetables or add proteins for variety
- Family-Approved: Naturally sweet vegetables that kids actually enjoy eating
- Budget-Conscious: Uses affordable, seasonal produce that's readily available
- Leftover Magic: Transform leftovers into salads, grain bowls, or breakfast hashes
- Dietary Inclusive: Naturally gluten-free, vegan, and nut-free to accommodate various needs
Ingredients You'll Need
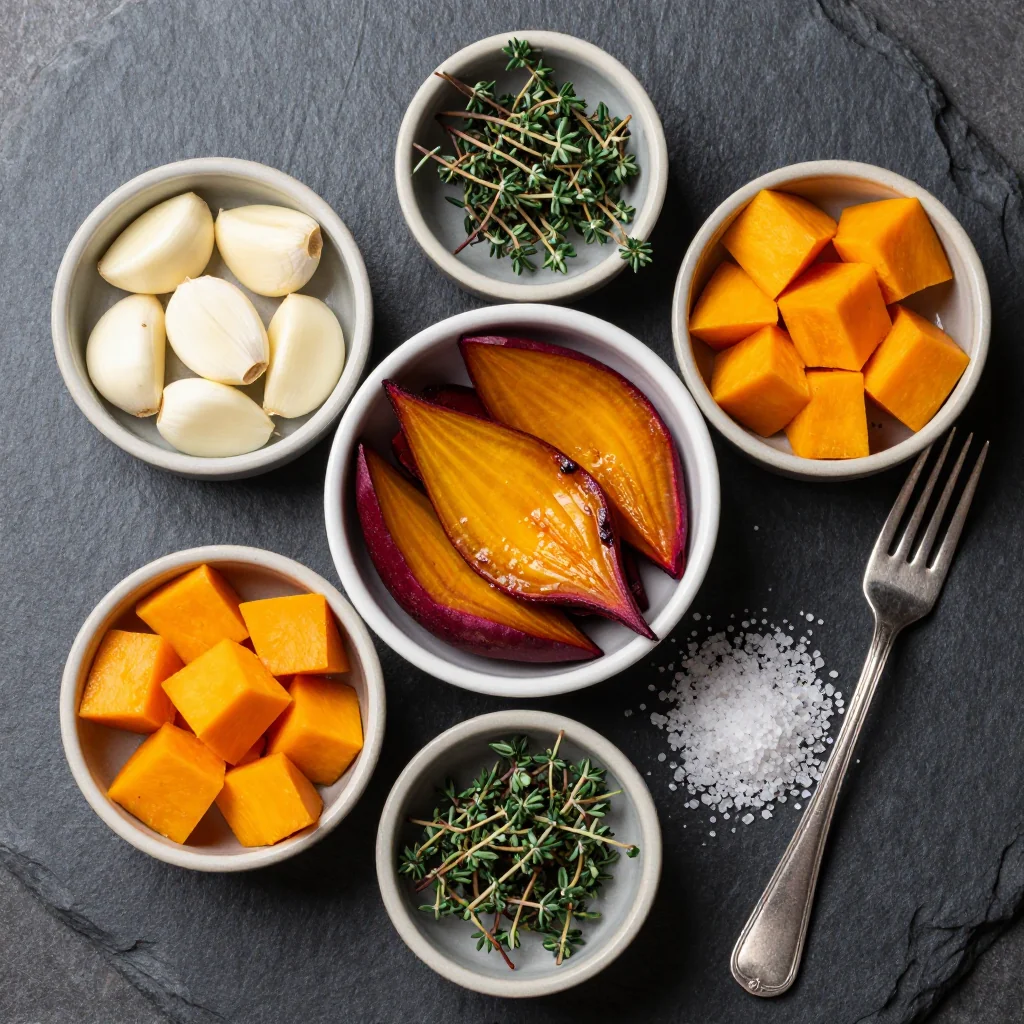
Each ingredient in this recipe plays a crucial role in creating the perfect balance of flavors and textures. Let me walk you through what makes each component special and how to select the best produce at the store.
Butternut Squash (2 pounds): The star of our show! Look for squash that feels heavy for its size with a matte, tan skin free from cuts or soft spots. The neck should be long and thick, which gives you more edible flesh. If you're short on time, many stores sell pre-peeled and cubed butternut squash, though it's often more expensive and not as fresh.
Beets (1.5 pounds): Choose beets that are firm with smooth, unblemished skin. The greens should be fresh-looking if still attached—this indicates freshness. I love using a mix of golden and red beets for visual appeal, but any variety works beautifully. Don't toss those beet greens! Save them for sautéing later.
Garlic (6 cloves): Fresh garlic makes all the difference here. Look for plump, firm heads with tight skin. Avoid any that have started to sprout green shoots. If you're a garlic lover like me, feel free to add an extra clove or two!
Fresh Thyme (2 tablespoons): This herb adds an earthy, slightly floral note that complements the vegetables perfectly. If fresh isn't available, use 2 teaspoons of dried thyme, but fresh really does make a difference in this recipe.
Extra Virgin Olive Oil (1/4 cup): Use a good quality oil here since it contributes significantly to the flavor. I prefer a robust, peppery olive oil that can stand up to the roasting process without losing its character.
Maple Syrup (2 tablespoons): Just a touch helps caramelize the vegetables and enhances their natural sweetness. Grade A amber is my go-to, but honey works well too if you prefer.
Smoked Paprika (1 teaspoon): This adds a subtle smoky depth that makes the vegetables taste like they've been slow-roasted over a wood fire. Regular paprika works in a pinch, but the smoked variety really elevates the dish.
How to Make Garlic Roasted Winter Squash and Beets for Healthy Family Dinners
Preheat and Prepare Your Pan
Position your oven rack in the center and preheat to 425°F (220°C). This high temperature is crucial for achieving those gorgeous caramelized edges. Line a large rimmed baking sheet with parchment paper for easy cleanup, or use a silicone baking mat if you have one. The rim is important to prevent any juices from spilling over during roasting.
Prepare the Butternut Squash
Using a sharp chef's knife, carefully cut off both ends of the squash. Stand it upright on the flat bottom and slice it in half vertically. Scoop out the seeds with a spoon and save them for roasting later! Peel the skin using a vegetable peeler or knife, then cut the flesh into 1-inch cubes. Try to keep the pieces uniform in size so they cook evenly. If you're new to cutting squash, you can microwave the whole squash for 2-3 minutes to soften it slightly and make cutting easier.
Prep the Beets
Beets can stain, so wear gloves if you're concerned about your hands. Cut off the greens (save them for another dish), then scrub the beets well under running water. You don't need to peel them—the skin becomes tender and delicious when roasted. Cut into 1-inch pieces, similar in size to your squash cubes. If using different colored beets, keep them separate until roasting to prevent the colors from bleeding.
Create the Flavor Base
In a small bowl, whisk together the olive oil, maple syrup, minced garlic, fresh thyme leaves, smoked paprika, salt, and pepper. The mixture should be well-combined and slightly viscous. This creates the most incredible coating that will transform your vegetables into something extraordinary. Don't be tempted to skip the maple syrup—it helps achieve that gorgeous caramelization.
Coat the Vegetables
Place your cubed squash and beets in a large mixing bowl. Pour the garlic-herb mixture over the vegetables and toss well to ensure every piece is evenly coated. I like to use my hands for this step—it's messy but effective. Make sure there are no dry spots, as the oil mixture is what creates those delicious caramelized edges during roasting.
Arrange on the Baking Sheet
Spread the vegetables in a single layer on your prepared baking sheet. It's crucial not to overcrowd the pan—if the vegetables are too crowded, they'll steam instead of roast, and you'll miss out on those crispy, caramelized edges. If necessary, use two baking sheets. Give each piece some breathing room, ensuring it's touching the pan surface.
Roast to Perfection
Slide the baking sheet into your preheated oven and roast for 25-30 minutes. Halfway through, use a spatula to gently flip the vegetables for even browning. The vegetables are done when they're tender enough to pierce with a fork and sport gorgeous golden-brown edges. The garlic will be fragrant and slightly caramelized, creating an irresistible aroma throughout your kitchen.
Rest and Serve
Remove from the oven and let rest for 5 minutes before serving. This brief rest period allows the flavors to meld and prevents any burnt tongues from eager family members! Taste and adjust seasoning if needed, then transfer to a serving platter. These vegetables are delicious hot, warm, or even at room temperature, making them perfect for potlucks or meal prep containers.
Expert Tips
Temperature Matters
Don't be tempted to lower the oven temperature. That 425°F heat is essential for caramelization. Lower temperatures will cook the vegetables but won't give you those crispy, golden edges that make this dish special.
Prep Ahead Strategy
If you're making this on a weeknight, prep everything the night before. Cut vegetables and store them separately in the refrigerator. Mix the oil mixture and have it ready to go.
Don't Skip the Oil
While it might be tempting to reduce the oil for health reasons, you need it for proper roasting. The oil helps conduct heat evenly and prevents sticking while creating those gorgeous caramelized surfaces.
Space is Key
Overcrowding is the enemy of roasting. If you're doubling the recipe, use two baking sheets and rotate them halfway through cooking for the best results.
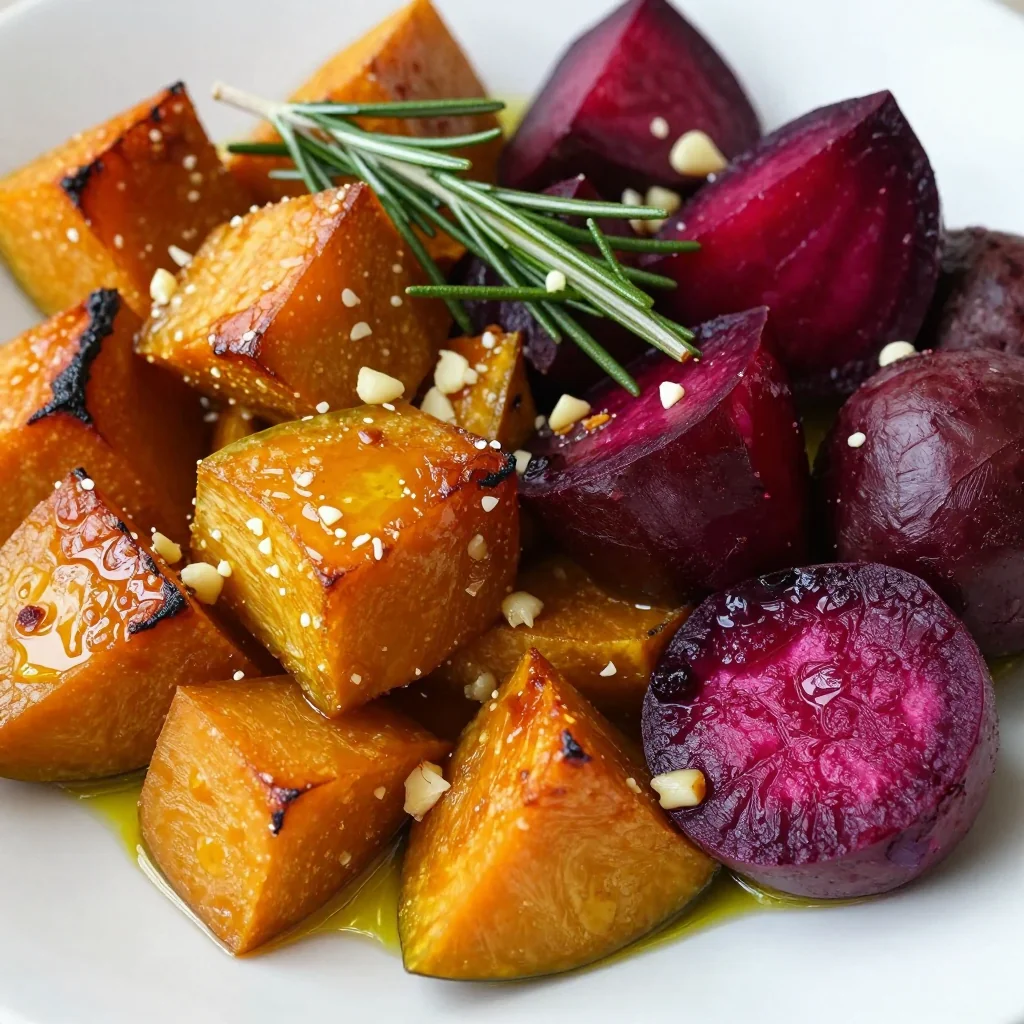
Color Contrast
Using both golden and red beets creates a stunning visual presentation. The colors stay vibrant after roasting, making this dish as beautiful as it is delicious.
Fresh Herbs First
Fresh thyme really makes a difference here. Dried herbs work in a pinch, but the bright, earthy flavor of fresh thyme elevates this from good to unforgettable.
Variations to Try
Add Protein Power
Toss in some cubed tofu, tempeh, or even chickpeas during the last 15 minutes of roasting for a complete one-pan meal. The protein absorbs all those delicious flavors while the vegetables finish cooking.
Fruit Fusion
Add some apple chunks or fresh cranberries during the last 10 minutes of roasting. The fruit adds a delightful sweetness and makes this dish perfect for Thanksgiving or holiday meals.
Spice It Up
Add a pinch of cayenne pepper or some red pepper flakes to the oil mixture for a subtle heat that complements the sweetness of the vegetables beautifully.
Crunch Factor
Sprinkle some toasted pecans or walnuts over the vegetables right before serving. The crunch adds textural contrast and makes this feel like a restaurant-quality dish.
Herb Swap
Try fresh rosemary or sage instead of thyme. Rosemary adds a piney note, while sage brings an earthy warmth that pairs beautifully with winter vegetables.
Winter Medley
Include other winter favorites like parsnips, turnips, or sweet potatoes. Just be mindful of cooking times—firmer vegetables like turnips should be cut smaller than softer ones.
Storage Tips
Refrigeration: Store cooled vegetables in an airtight container in the refrigerator for up to 5 days. The flavors actually deepen overnight, making leftovers even more delicious. To reheat, spread on a baking sheet and warm in a 350°F oven for 10-15 minutes, or microwave for 2-3 minutes until heated through.
Freezing: These vegetables freeze beautifully for up to 3 months. Let them cool completely, then spread in a single layer on a baking sheet to freeze individually before transferring to freezer bags. This prevents them from freezing into one large clump. Thaw overnight in the refrigerator before reheating.
Make-Ahead Magic: Prep everything up to 3 days ahead. Store cut vegetables in separate containers, and mix the oil mixture in a jar. When ready to cook, simply toss everything together and roast as directed. This is a lifesaver for busy weeks!
Leftover Ideas: Transform leftovers into a warm grain bowl with quinoa or farro, crumble over salads for lunch, mash into breakfast hash with eggs, or blend into a creamy soup with vegetable broth. The possibilities are endless!
Frequently Asked Questions
Ingredients
Instructions
- Preheat oven to 425°F (220°C). Line a large rimmed baking sheet with parchment paper.
- Prepare vegetables: Cut squash and beets into 1-inch cubes, keeping beet colors separate if using multiple varieties.
- Make the coating: In a small bowl, whisk together olive oil, maple syrup, garlic, thyme, paprika, salt, and pepper.
- Toss vegetables: In a large bowl, combine squash and beets with the oil mixture, ensuring even coating.
- Arrange on pan: Spread vegetables in a single layer on prepared baking sheet, ensuring space between pieces.
- Roast: Bake for 25-30 minutes, flipping halfway through, until vegetables are tender and edges are caramelized.
- Rest and serve: Let rest 5 minutes before serving. Garnish with toasted pecans if desired.
Recipe Notes
For meal prep, these vegetables keep well in the refrigerator for up to 5 days. Reheat in a 350°F oven for best results, or enjoy cold in salads. The vegetables are naturally gluten-free, vegan, and nut-free (without pecan garnish).