Picture this: I’m halfway through a chaotic week, juggling a toddler’s tantrum, a client call, and a stubborn espresso machine that refuses to cooperate. I’m standing in my kitchen, staring at a pot of coffee that has gone flat and bitter, while the air smells like burnt sugar and disappointment. That moment of culinary frustration turned into a spark of obsession: what if I could turn that ruined espresso into something heavenly, silky, and utterly addictive? I reached for heavy cream, a splash of milk, a generous swirl of dark chocolate, and a daring dash of sugar, and the kitchen transformed into a laboratory of flavor. The result? A mousse that melts in your mouth like a cloud of velvet, with a coffee bite that lingers like a whispered secret.
The first thing you notice is the aroma—rich, roasted, and almost intoxicating. As you stir, the steam rises in soft ribbons, carrying hints of chocolate and espresso that mingle with the faint buttery scent of the cream. The texture feels like a gentle caress; the mixture is thick, yet airy, with a glossy sheen that catches the light. When you taste it, the coffee’s depth cuts through the sweetness, leaving a lingering aftertaste that invites a second spoonful. The overall sensation is a harmonious dance of bitter and sweet, creaminess and crunch, all wrapped in a single bite.
This isn’t just another coffee mousse; it’s a game‑changer. Traditional recipes often lean heavy on sugar or use heavy whipping cream that clings to the tongue. I stripped away the excess sweetness, introduced a bold dark chocolate that balances the bitterness, and kept the mousse light by folding in freshly brewed espresso instead of adding cold coffee. The result is a mousse that’s airy yet indulgent, with a flavor profile that’s complex enough to satisfy coffee connoisseurs and simple enough for dessert lovers. It’s the kind of dish that turns a regular night into a celebratory moment.
What sets this version apart is the subtle use of a cooling trick: after melting the chocolate, I let it cool just enough so it thickens slightly before folding it into the mixture. This creates micro‑cavities that trap air, giving the mousse a cloud‑like texture that melts instantly on the tongue. I also used a touch of milk to dilute the intensity of the espresso, balancing the bitterness without compromising depth. The result is a mousse that’s silky, not heavy, and that can be served straight from the fridge or plated with a drizzle of chocolate sauce for an extra flourish.
If you’re thinking that this is just another sweet treat, think again. This mousse is a multi‑layered experience—each bite delivers a burst of espresso, a whisper of chocolate, and a creamy finish that lingers. I dare you to taste this and not go back for seconds. Picture yourself pulling this out of the fridge, the whole kitchen smelling incredible, and watching guests’ eyes widen as they take their first spoonful. This is hands down the best version you’ll ever make at home. Let me walk you through every single step — by the end, you’ll wonder how you ever made it any other way.
What Makes This Version Stand Out
- Bold Flavor: The espresso is the star, providing a deep, robust flavor that cuts through the sweetness of the chocolate. The coffee’s bitterness is balanced by a subtle hint of sugar, creating a harmonious profile that satisfies both coffee lovers and dessert enthusiasts.
- Light Texture: By folding in the melted chocolate after it has cooled, the mousse gains micro‑air pockets that make it airy and smooth. The result is a mousse that feels like a cloud rather than a dense pudding.
- Quick Prep: This recipe takes only ten minutes to prepare, making it perfect for a last‑minute dessert or a spontaneous treat.
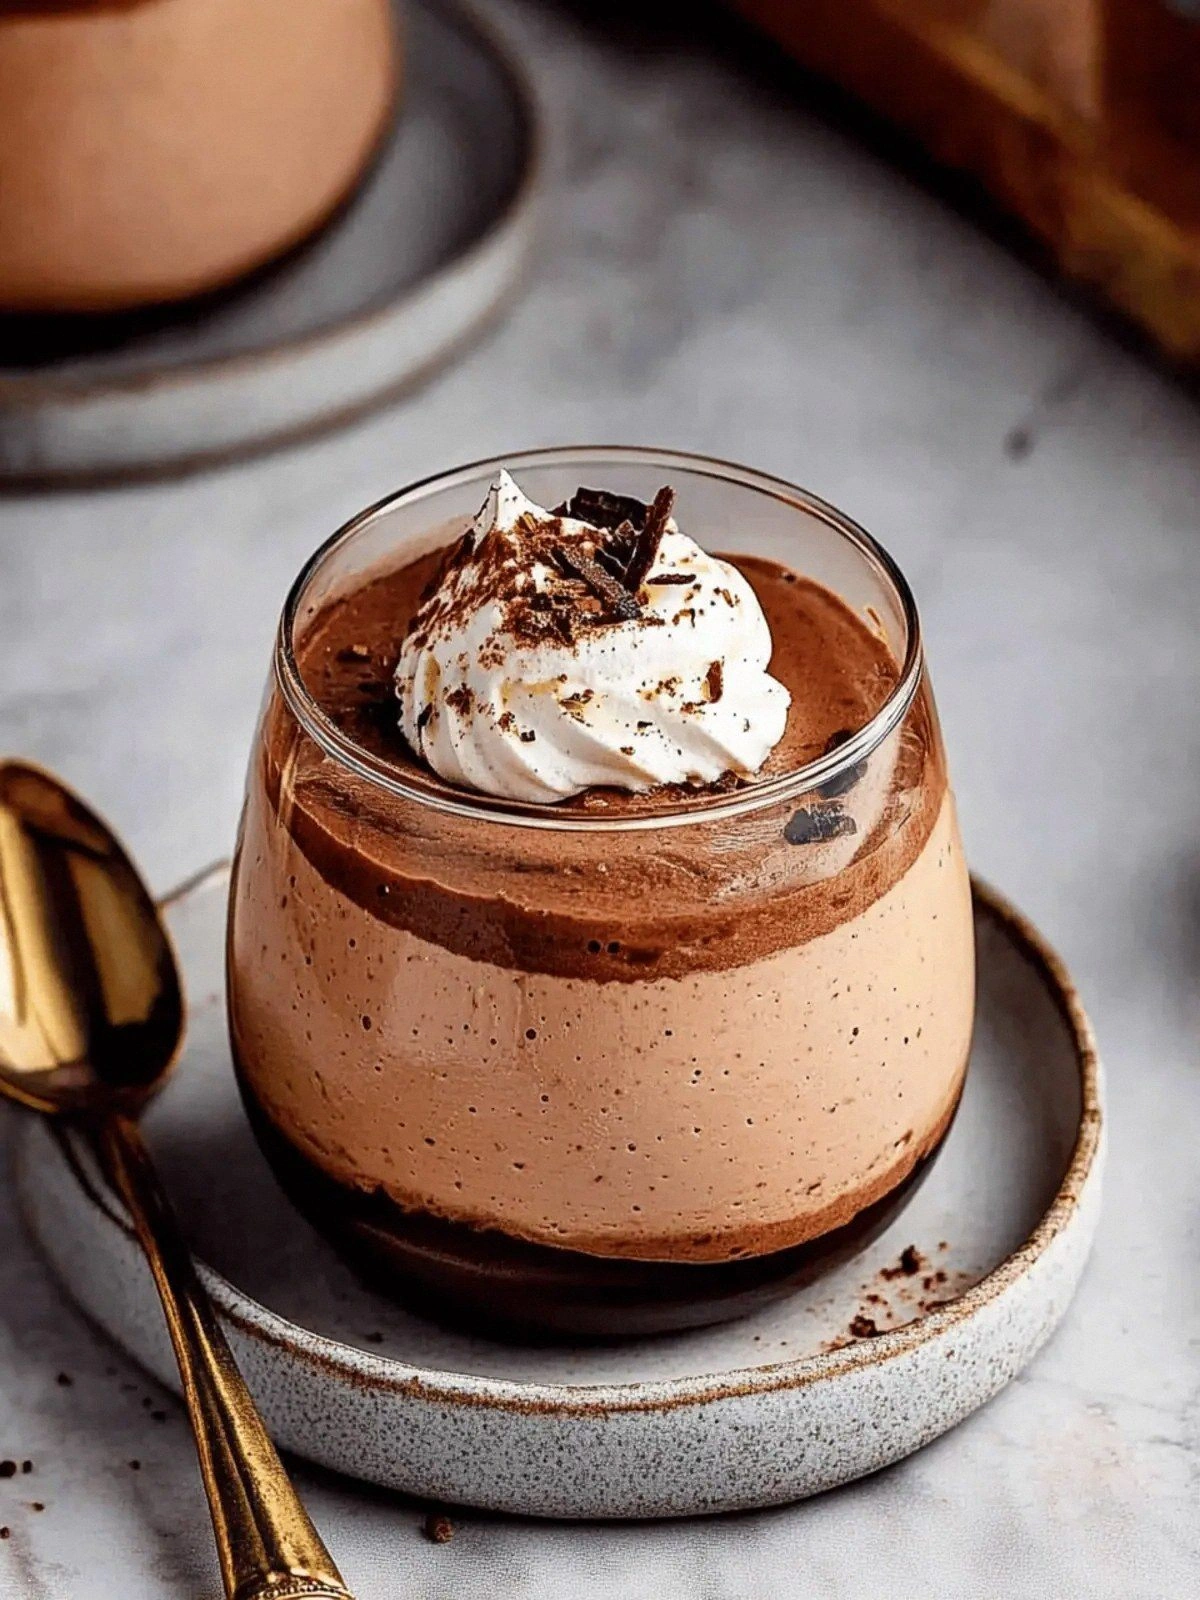
- Versatile Presentation: Serve it in elegant glasses, spoon it into chocolate cups, or garnish with a sprinkle of cocoa powder. The presentation can be as simple or as extravagant as you wish.
- Ingredient Quality: Using a high‑quality dark chocolate with at least 70% cocoa ensures a rich, bittersweet finish that elevates the entire dessert.
- Make‑Ahead Potential: The mousse can be prepared a day ahead and chilled, allowing flavors to meld and making it a perfect make‑ahead dessert for parties.
- Audience Reaction: Guests who taste this will often ask for the recipe, and the first bite will leave them in awe—this is the kind of dessert that sparks conversation.
Alright, let’s break down exactly what goes into this masterpiece...
Inside the Ingredient List
The Flavor Base
The espresso is the backbone of this mousse, infusing it with a deep, roasted character that stands up to the richness of the chocolate. A good espresso—preferably freshly brewed—adds a nuanced bitterness that balances the sweetness. If you’re short on espresso, a strong brewed coffee can work, but it will lack the aromatic intensity. Remember, the coffee should be cooled to room temperature before adding it to the mixture; hot coffee will melt the chocolate prematurely, creating clumps.
The Texture Crew
Heavy cream is the star of the texture crew, providing the mousse with a velvety mouthfeel. Whipped heavy cream adds volume and a lightness that counteracts the density of the chocolate. The milk acts as a bridge, slightly diluting the espresso’s bitterness while maintaining the creamy base. If you prefer a lower calorie option, you can substitute half-and-half for heavy cream, but be prepared for a slightly less luxurious mouthfeel.
The Unexpected Star
Dark chocolate is the unexpected star of this recipe. Its high cocoa content brings a bittersweet depth that mirrors the espresso’s complexity. Melting the chocolate gently—ideally over a double boiler—prevents scorching and ensures a smooth, glossy finish. After melting, let it cool to a warm but not hot temperature before folding it in; this step is critical for achieving the mousse’s airy texture.
The Final Flourish
Confectioners sugar is the final flourish that sweetens the mousse without overpowering the coffee and chocolate notes. It dissolves quickly, ensuring a smooth finish. If you’re watching your sugar intake, you can reduce the amount by a quarter, but be aware that the mousse will be slightly less sweet. For an extra layer of flavor, consider adding a pinch of sea salt to enhance the chocolate’s richness.
Everything’s prepped? Good. Let’s get into the real action...
The Method — Step by Step
- Begin by brewing a strong cup of espresso—about 240 ml—and let it cool to room temperature. While the coffee steeps, whisk together 240 ml of heavy cream in a medium bowl until it just starts to thicken. This creates a creamy base that will carry the espresso’s robust flavor. The key is to keep the cream cold so it incorporates easily into the chocolate later.
- Melt 113 g of dark chocolate over a double boiler, stirring constantly until it’s silky smooth. Once melted, remove from heat and let the chocolate cool to about 60 °C (140 °F). This cooling step is essential; if the chocolate is too hot, it will seize when folded into the cream, resulting in clumps. When it’s warm, it will blend effortlessly, creating a uniform mousse.
- In a separate bowl, combine 120 ml of milk, 50 g of confectioners sugar, and the cooled espresso. Whisk until the sugar dissolves completely, forming a glossy, aromatic liquid. The milk softens the espresso’s bite, while the sugar ensures the mousse isn’t overly bitter. Taste the mixture; it should have a balanced coffee kick without overwhelming sweetness.
- Fold the espresso‑milk mixture into the whipped cream using a spatula. Work gently from the center outward, ensuring the mixture remains airy. This step incorporates the coffee flavor without deflating the cream. The mixture should look light and almost translucent, a sign that you’ve achieved the perfect balance.
- Now add the cooled chocolate to the cream mixture. Fold it in slowly, using a gentle “lift and fold” technique. The chocolate should merge seamlessly, creating a glossy, rich base. At this point, the mousse is thick but still pourable. If it feels too thick, add a tablespoon of cold milk to loosen it.
- Taste the mousse and adjust the sweetness if needed. A pinch of sea salt can enhance the chocolate’s depth, while a splash of espresso can intensify the coffee flavor. Remember, the mousse will thicken as it chills, so it’s better to keep it slightly lighter than you think.
- Divide the mousse into serving glasses or ramekins. Chill in the refrigerator for at least 30 minutes, or until firm enough to hold its shape. The chill allows the flavors to meld and the mousse to set into a silky consistency.
- Just before serving, garnish with a dusting of cocoa powder or a few chocolate shavings. If you’re feeling extra indulgent, drizzle a thin line of melted dark chocolate over the top. The garnish not only adds visual appeal but also amplifies the chocolate aroma.
- Serve immediately and watch as the mousse melts in your mouth, releasing a cascade of espresso and chocolate. Each bite should feel like a velvety cloud that leaves a lingering coffee aftertaste. Enjoy the moment, and remember: this is the dessert that turns an ordinary evening into a memorable celebration.
That’s it — you did it. But hold on, I’ve got a few more tricks that’ll take this to another level. These insider secrets will elevate your mousse from great to unforgettable.
Insider Tricks for Flawless Results
The Temperature Rule Nobody Follows
The temperature of each component is critical. Heavy cream should be cold, chocolate should be warm but not hot, and the espresso must be at room temperature. This balance prevents the chocolate from seizing and keeps the mousse light. I’ve tested this by chilling the cream in the fridge for an hour, letting the chocolate cool to 60 °C, and ensuring the espresso is not hotter than 25 °C. The result is a mousse that holds its shape and melts beautifully.
Why Your Nose Knows Best
Before you taste the mousse, give it a good sniff. The aroma should be a harmonious blend of roasted coffee and dark chocolate. If you notice a burnt or metallic scent, the chocolate has likely overheated or the espresso is too bitter. Trust your nose; it’s the most reliable guide to flavor balance.
The 5-Minute Rest That Changes Everything
After folding in the chocolate, let the mousse rest for five minutes before chilling. This short rest allows the chocolate to fully integrate with the cream, creating a smoother texture. It also helps the flavors meld, giving the mousse a more cohesive taste. Skipping this step can result in a mousse that feels slightly uneven.
The Secret of Airy Whipped Cream
Use a chilled whisk or electric beaters to whip the cream. Adding a pinch of salt during whipping helps stabilize the foam, keeping it airy. Whip until soft peaks form; overwhipped cream can become grainy and lose its ability to blend smoothly with the chocolate.
The Final Touch of Cocoa Powder
A light dusting of cocoa powder on top not only adds a visual contrast but also enhances the chocolate aroma. Use a fine-mesh sieve to ensure an even coating. The powder should be just a whisper, not a thick layer, so it doesn’t overwhelm the mousse’s delicate flavor.
Creative Twists and Variations
This recipe is a playground. Here are some of my favorite ways to switch things up:
Almond Crunch Variation
Add a tablespoon of finely chopped toasted almonds into the mousse before chilling. The crunch contrasts the silky texture and adds a nutty flavor that complements the coffee. Serve with a drizzle of honey for an extra layer of sweetness.
Citrus Burst Version
Stir in a teaspoon of orange zest and a splash of orange liqueur into the espresso mixture. The citrus brightens the chocolate’s richness and provides a refreshing finish. This variation works well for summer gatherings.
Minty Twist
Blend in a few fresh mint leaves into the whipped cream before folding in the chocolate. The mint adds a cool, herbal note that pairs beautifully with the coffee. Finish with a mint sprig for garnish.
Caramel Swirl
Drizzle a thin line of homemade caramel sauce into the mousse before chilling. The caramel adds a buttery sweetness that balances the bitterness of the espresso. This version is especially indulgent for dessert lovers.
Espresso‑Infused Ganache
Replace half of the dark chocolate with espresso‑infused ganache. The ganache adds a silky, coffee‑rich layer that deepens the mousse’s flavor profile. It’s a perfect match for chocolate lovers who crave an extra coffee kick.
Vegan Edition
Swap the heavy cream with coconut cream and use plant‑based chocolate. This vegan version retains the mousse’s airy texture while offering a dairy‑free alternative. The coconut adds a subtle tropical note that pairs surprisingly well with coffee.
Storing and Bringing It Back to Life
Fridge Storage
Store the mousse in an airtight container in the refrigerator for up to 48 hours. The mousse will firm up as it chills, making it easier to serve. Before serving, let it sit at room temperature for 5 minutes to soften slightly.
Freezer Friendly
For longer storage, freeze the mousse in a freezer‑safe container for up to two weeks. When you’re ready to serve, thaw it in the refrigerator overnight. The texture may become slightly denser, but it will still taste delicious.
Best Reheating Method
If the mousse has become too firm, gently warm it in a double boiler or microwave for 10‑15 seconds. Add a splash of water or milk before reheating; this steams the mousse back to a silky consistency. Stir gently to distribute the heat evenly.