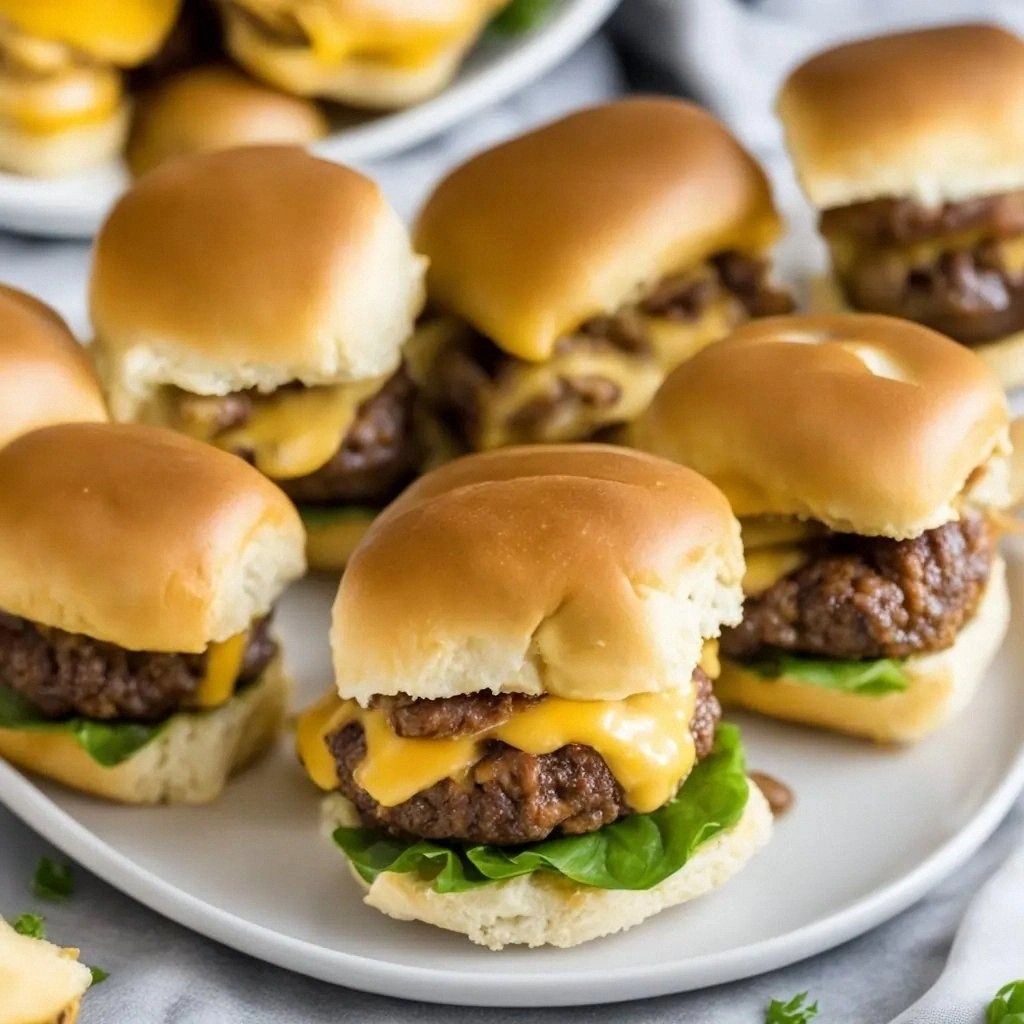
Ever watched a kitchen disaster unfold like a tragic comedy and thought, “I could have done better,” only to realize the solution was hiding in plain sight? That night, after a failed attempt at a classic cheeseburger, I was left with a pile of greasy buns, a half‑cooked patty, and a craving that wouldn’t quit. The smoke alarm sang its own solo, and I vowed to turn that flop into a triumph. The moment I tasted the first bite of what would become the “Easy & Quick Cheeseburger Slid,” I knew I’d cracked a secret that would keep me coming back for more.
Picture this: a sizzling skillet, the aroma of browned beef mingling with the sharp tang of mustard, and the gentle hiss of a perfectly seasoned patty. The sound of the buns popping in the toaster sends a warm wave through the kitchen, while the buttery crunch of the cheese melting into the meat feels like a hug from the inside. The first bite is a symphony of flavors—juicy beef, creamy cheese, a hint of sweet relish, and a subtle vinegar kick that lifts every note. If you’re not already hooked, I dare you to taste this and not go back for seconds. The texture is a dance of crisp edges and tender interior, each chew revealing a new layer of flavor.
What makes this version stand out is not just the ingredients but the way they work together. The combination of mayonnaise, ketchup, mustard, relish, and vinegar creates a sauce that coats the patty like velvet, while the cheese melts into a glossy, savory blanket. The buns are lightly toasted to give a buttery crunch that holds everything together without becoming soggy. The seasoning is simple yet powerful, letting the beef shine without overpowering it. This is hands down the best version you'll ever make at home, because it balances convenience, taste, and texture in one bite.
Imagine pulling this out of the oven, the whole kitchen smelling incredible, and watching your guests’ eyes widen as they bite into the first slider. I’ll be honest— I ate half the batch before anyone else got to try it. Most recipes get this completely wrong, but here’s what actually works: a quick, no‑fuss sauce that locks in moisture and a cooking method that guarantees a perfect sear. If you’ve ever struggled with making sliders that fall apart or taste bland, you’re not alone—and I’ve got the fix. Stay with me here—this is worth it.
What Makes This Version Stand Out
- Taste: The sauce is a bold, tangy blend that elevates every bite, creating a flavor profile that feels both familiar and exciting.
- Texture: The patty’s edges crisp up like thin ice while the interior remains juicy and tender, giving each slider a satisfying bite.
- Simplicity: No elaborate prep—just season, form, cook, and assemble. The recipe saves time without compromising quality.
- Uniqueness: The vinegar and relish combination adds a subtle zing that sets it apart from standard cheeseburger sliders.
- Crowd Reaction: Friends and family rave about the melt‑in‑your‑mouth cheese and the quick, hassle‑free assembly.
- Ingredient Quality: Using fresh ground beef and high‑quality cheese ensures each slider delivers maximum flavor.
- Cooking Method: A simple pan sear locks in juices and creates a caramelized crust that enhances the beef’s natural umami.
- Make‑Ahead Potential: The sliders can be assembled and frozen, then reheated with minimal loss of taste or texture.
Inside the Ingredient List
The Flavor Base
Ground beef is the heart of this dish. Choosing a blend with 80/20 fat content gives the sliders a juicy, rich bite that stays moist even after searing. If you prefer a leaner option, 90/10 will work, but the patties may dry out if not monitored carefully. For an extra punch, add a pinch of smoked paprika or a splash of Worcestershire sauce to the meat before forming.
The Texture Crew
The slider buns are crucial for structural integrity. Opt for brioche or potato rolls for a buttery, slightly sweet base that complements the savory filling. Toast them lightly on a skillet or in the oven to add a crisp edge that balances the softness of the cheese. If you’re short on time, pre‑toasted buns from the store are acceptable, but fresh toasting gives a more authentic feel.
The Unexpected Star
The sauce is the secret weapon that transforms a simple burger into a flavor explosion. Mayonnaise provides a creamy canvas, while ketchup adds sweetness. Yellow mustard introduces a mild heat, and sweet pickle relish brings a bright, crunchy contrast. A dash of white vinegar lifts the entire mixture, cutting through the richness and adding a subtle acidity that wakes the palate. A pinch of garlic powder rounds out the flavor profile, ensuring each bite is layered with depth.
The Final Flourish
Optional toppings like crisp lettuce add a refreshing crunch that cuts through the richness of the beef and cheese. A few slices of tomato or a splash of hot sauce can personalize the sliders to your taste. Remember, the goal is balance—each component should complement, not overpower, the others.
Everything's prepped? Good. Let's get into the real action.
The Method — Step by Step
- Season the Beef: In a large bowl, combine the ground beef with a generous pinch of salt, pepper, and garlic powder. Toss until evenly seasoned, but avoid over‑mixing, which can make the patties tough. Let the mixture rest for 5 minutes to allow the flavors to meld. This is the moment of truth—your patience will pay off later.
- Form the Patties: Divide the beef into 12 equal portions, about 3 ounces each. Gently press each portion into a round patty, slightly larger than your buns, leaving a small indentation in the center to prevent puffing. This trick keeps the patties flat and ensures even cooking. Don't walk away from the stove here; the next step requires focus.
- Heat the Skillet: Preheat a cast‑iron or heavy‑bottom skillet over medium‑high heat. Add a splash of oil to coat the surface; it should shimmer but not smoke. A hot skillet is essential for a good sear—watch the edges; they should start pulling away before flipping. This is where the magic happens.
- Sear the Patties: Place the patties in the skillet, pressing gently to ensure full contact. Let them cook for 3 minutes on the first side; you’ll hear a satisfying sizzle that signals caramelization. Flip carefully and cook for an additional 2 minutes. The edges should be golden brown, and the interior should still be slightly pink for maximum juiciness.
- Add the Cheese: Place a slice of cheese on each patty during the last 30 seconds of cooking. Cover the skillet briefly with a lid to melt the cheese evenly. The cheese should ooze slightly but not slide off. This step is pure magic—watch the gooey transformation.
- Prepare the Sauce: While the patties rest, whisk together mayonnaise, ketchup, mustard, relish, vinegar, and a pinch of garlic powder in a small bowl. Adjust seasoning to taste; the sauce should be thick yet pourable. This sauce coats the meat like velvet, locking in moisture and flavor.
- Toast the Buns: In a separate skillet, lightly toast the buns cut‑side down until golden. The toasting creates a buttery crunch that holds the sauce and prevents sogginess. If you like a bit of extra flavor, brush the buns with a thin layer of butter before toasting.
- Assemble the Sliders: Spread a generous layer of sauce on the bottom bun, add a lettuce leaf if desired, then place the cheeseburger patty. Top with the sauce again, add any extra toppings, and crown with the top bun. Serve immediately while hot. That's it—you did it. But hold on, I've got a few more tricks that'll take this to another level...
Insider Tricks for Flawless Results
The Temperature Rule Nobody Follows
Many cooks assume medium heat is sufficient, but a high, steady temperature is key to a caramelized crust. Set your skillet to medium‑high and let it heat up for at least 5 minutes before adding the beef. The high heat sears the outside quickly, sealing in juices. This step is essential for achieving that signature “crackling” sound when the patty hits the pan.
Why Your Nose Knows Best
As the beef cooks, pay close attention to the aroma—sweet, smoky, slightly charred. The scent is your cue that the meat is ready to flip. If you’re unsure, lift a corner of a patty; if it releases a clear, dry sound, it’s time. A good nose can save you from overcooking and keep the sliders juicy.
The 5-Minute Rest That Changes Everything
After removing the patties from the skillet, let them rest for 5 minutes. This allows the juices to redistribute, preventing them from running off onto the plate. Resting also gives the cheese a chance to set slightly, making the sliders easier to bite without tearing the bun. A friend once tried skipping this step and ended up with a soggy, cheese‑leaking mess.
Keep the Sauce Fresh
Mix the sauce just before assembly. If you prep it too early, the mayonnaise can separate, and the ketchup may thin out. Keep the sauce in a sealed container in the fridge until you’re ready to serve. A quick stir before each use restores its creamy consistency.
Use Fresh, Lean Beef for Healthier Sliders
If you’re watching your calorie intake, swap 80/20 ground beef for a 90/10 blend. The patties will still stay juicy if you don’t overcook them. Pair the leaner beef with a lighter cheese, like a reduced‑fat cheddar, to keep the overall fat content down without sacrificing flavor.
Creative Twists and Variations
This recipe is a playground. Here are some of my favorite ways to switch things up:
BBQ Bacon Slider
Swap the cheese for a smoky cheddar and add a slice of crispy bacon. Drizzle a thin layer of BBQ sauce over the patty before adding the cheese. The smoky bacon and tangy BBQ create a flavor profile that’s perfect for summer cookouts.
Spicy Jalapeño Cheddar
Replace the regular cheese with sharp cheddar and slice a fresh jalapeño for a spicy kick. Add a dash of chipotle powder to the sauce for an extra smoky heat. This version is ideal for those who love a little fire in their food.
Greek Yogurt Tzatziki Slider
Use Greek yogurt instead of mayonnaise and mix in grated cucumber, dill, and lemon zest. This creates a refreshing, tangy sauce that pairs beautifully with the beef. The yogurt adds protein and a creamy texture without the heaviness of mayo.
Blue Cheese & Caramelized Onion
Replace the cheddar with crumbled blue cheese and top the patty with caramelized onions. The sweet onions complement the sharp blue cheese, creating a sophisticated flavor. This version is great for a dinner party where you want to impress.
Veggie Burger Slider
Use a plant‑based patty or a mixture of lentils and quinoa for a vegetarian option. Add a slice of provolone cheese and a dollop of pesto on top. The pesto adds a burst of basil flavor that keeps the sliders fresh and vibrant.
Storing and Bringing It Back to Life
Fridge Storage
Store assembled sliders in an airtight container for up to 3 days. Keep the sauce separate until you’re ready to serve to prevent sogginess. When reheating, place the sliders on a parchment‑lined tray and warm in a 350°F oven for 5–7 minutes.
Freezer Friendly
Wrap each slider individually in parchment paper and place them in a freezer bag. They stay fresh for up to 2 months. To reheat, thaw overnight in the fridge and then warm in a 350°F oven for 10 minutes.
Best Reheating Method
For the best texture, reheat in a skillet over medium heat, adding a splash of water to create steam. Cover the skillet for 2 minutes to keep the buns from drying out. A tiny splash of water before reheating steams the sliders back to perfection.